REPAIR INSTRUCTIONS, PART 1
Page 173
Do not replace an entire rocker shaft assembly
(which includes the rocker arms, mounting
brackets, etc.) if only replacement of the shaft is
required. Reuse components which are not
damaged.
Nozzle Holder Removal
[222 KG]
SPECIAL TOOL REQUIRED
앫 Injection Nozzle Puller J 37093
After removing the nozzles, it is a good practice
to label or tag them for reinstallation into the
same cylinders. After removal, place nozzles on a
clean surface.
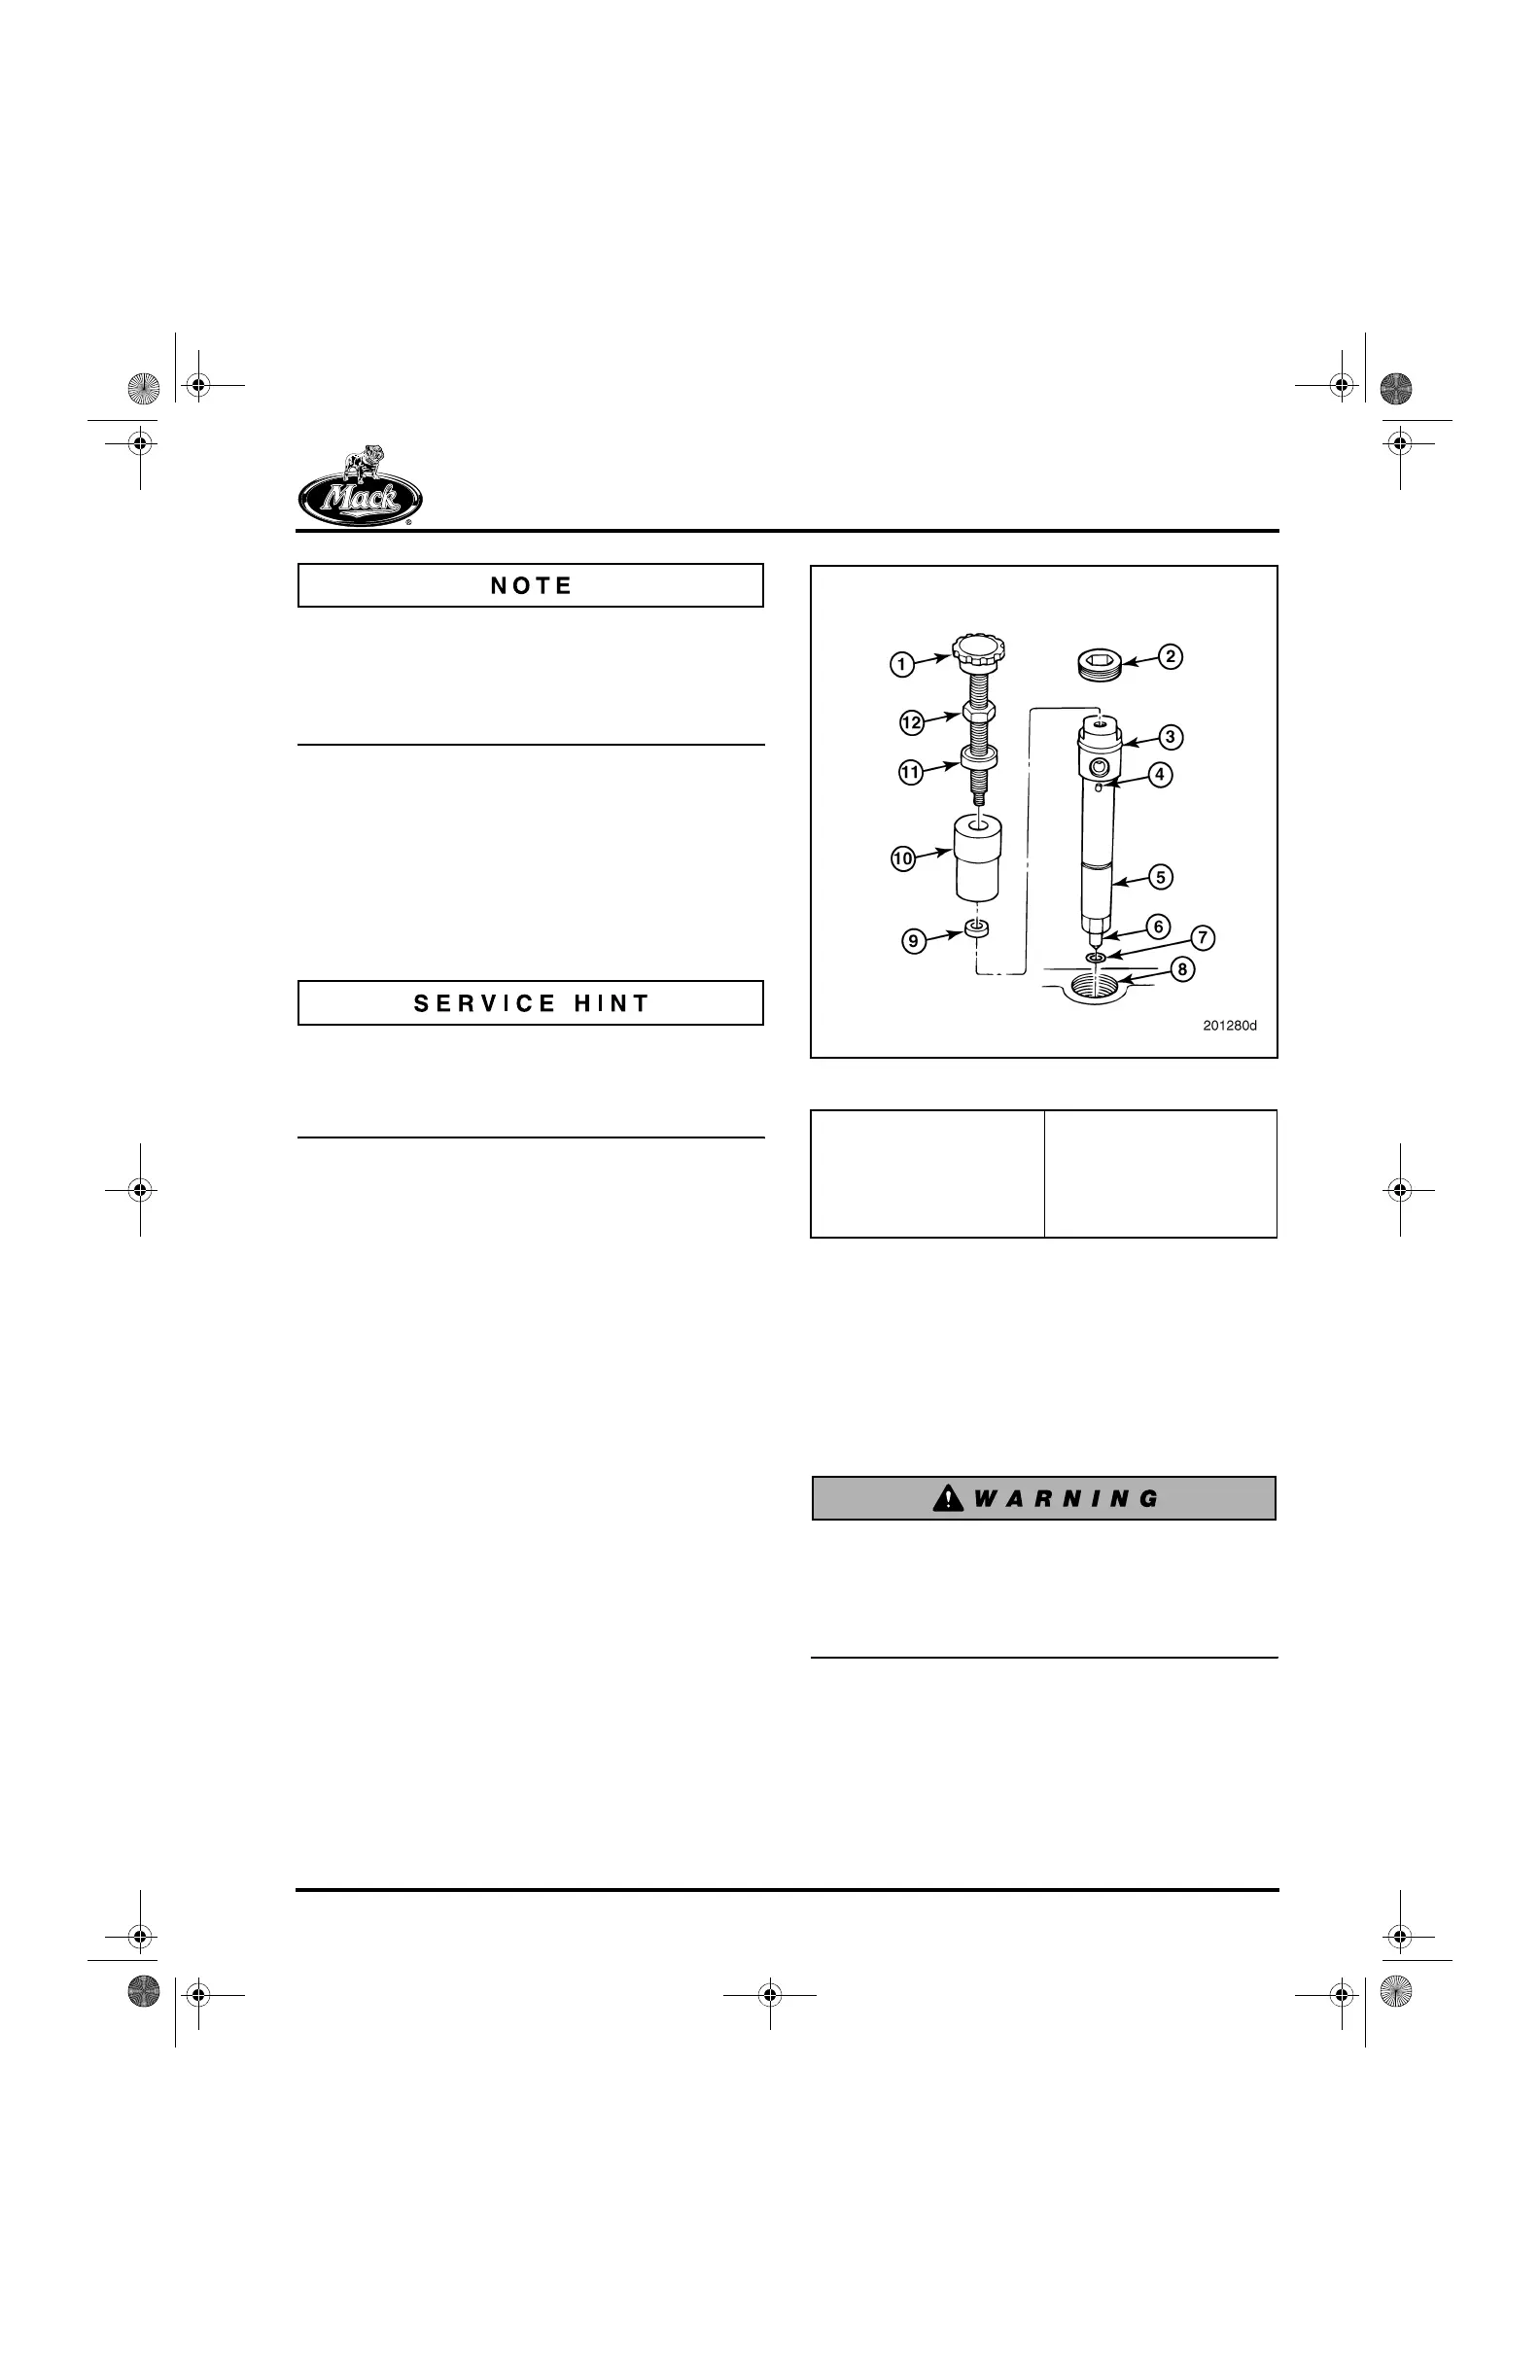
Refer to Figure 167.
1. Remove the nozzle holder retainer.
2. Assemble the injection nozzle puller J 37093
as follows:
a. Attach the nut, bearing, spacer and
rubber washer to the tool handle.
b. Install the handle in the threaded hole
of the nozzle holder until the rubber
washer is slightly compressed.
3. With the tool in position, turn the nut
clockwise to draw the nozzle holder from the
insert in the cylinder head.
4. Continue turning the nut until the nozzle
holder is free of the insert. Remove the
nozzle holder and puller tool as an
assembly.
5. Remove the nozzle holder gasket. The
gasket is manufactured from a special iron
material 0.060-inch (1.524 mm) thick.
6. Remove the remaining nozzle holders in the
same manner.
167
Figure 167 — Nozzle Holder Removal
Cylinder Head Assembly Removal
[213 EV]
Refer to Figure 168.
1. Remove the 20 mounting bolts from each
cylinder head.
Cylinder head assemblies are heavy. Lifting a
cylinder head requires the help of an
assistant or suitable lifting device. Attempting
to lift a cylinder head without assistance may
result in severe personal injury.
2. Using a suitable lifting device, remove the
heads from the cylinder block.
3. Remove the gaskets and six fire rings.
Discard the gaskets and fire rings.
1. Handle
2. Nozzle Holder Retainer
3. O-Rings
4. Alignment Pin
5. Nozzle Holder
6. Nozzle
7. Gasket
8. Nozzle Mounting Hole
9. Rubber Washer
10. Spacer
11. Bearing
12. Nut
5-111.bk Page 173 Monday, July 10, 2006 2:26 PM