Page 154
REPAIR INSTRUCTIONS, PART 1
Early-production engines will use coupling
adapters in combination with the one-piece cool
tube assembly. On vehicles so equipped:
앫 Loosen and remove the clamp from the cool
tube coupling hose adapter at the EGR
cooler tube mounting flange. Remove and
discard the wire-mesh seal. Inspect the
adapter for corrosion or damage and replace
as required.
앫 Loosen and remove the clamp from the cool
tube coupling hose adapter at the EGR
mixer tube. Remove and discard the
wire-mesh seal. Inspect the adapter and
replace as required.
Do not attempt to remove the EGR MASS Flow
sensors from the tube. The sensors are an
integral part of the tube and must be replaced as
an assembly.
HOT TUBE REMOVAL
1. Loosen and remove the clamp connecting
the hot tube-to-EGR cooler inlet flange
(Figure 138).
138
Figure 138 — Hot Tube-to-Cooler Connection
2. Loosen and remove the clamp connecting
the hot tube-to-EGR valve outlet flange. The
hot tube also is fitted with wire-mesh seals in
the flanges at both ends. Remove and
discard the seals. Inspect the tube for
corrosion or damage and replace as
required.
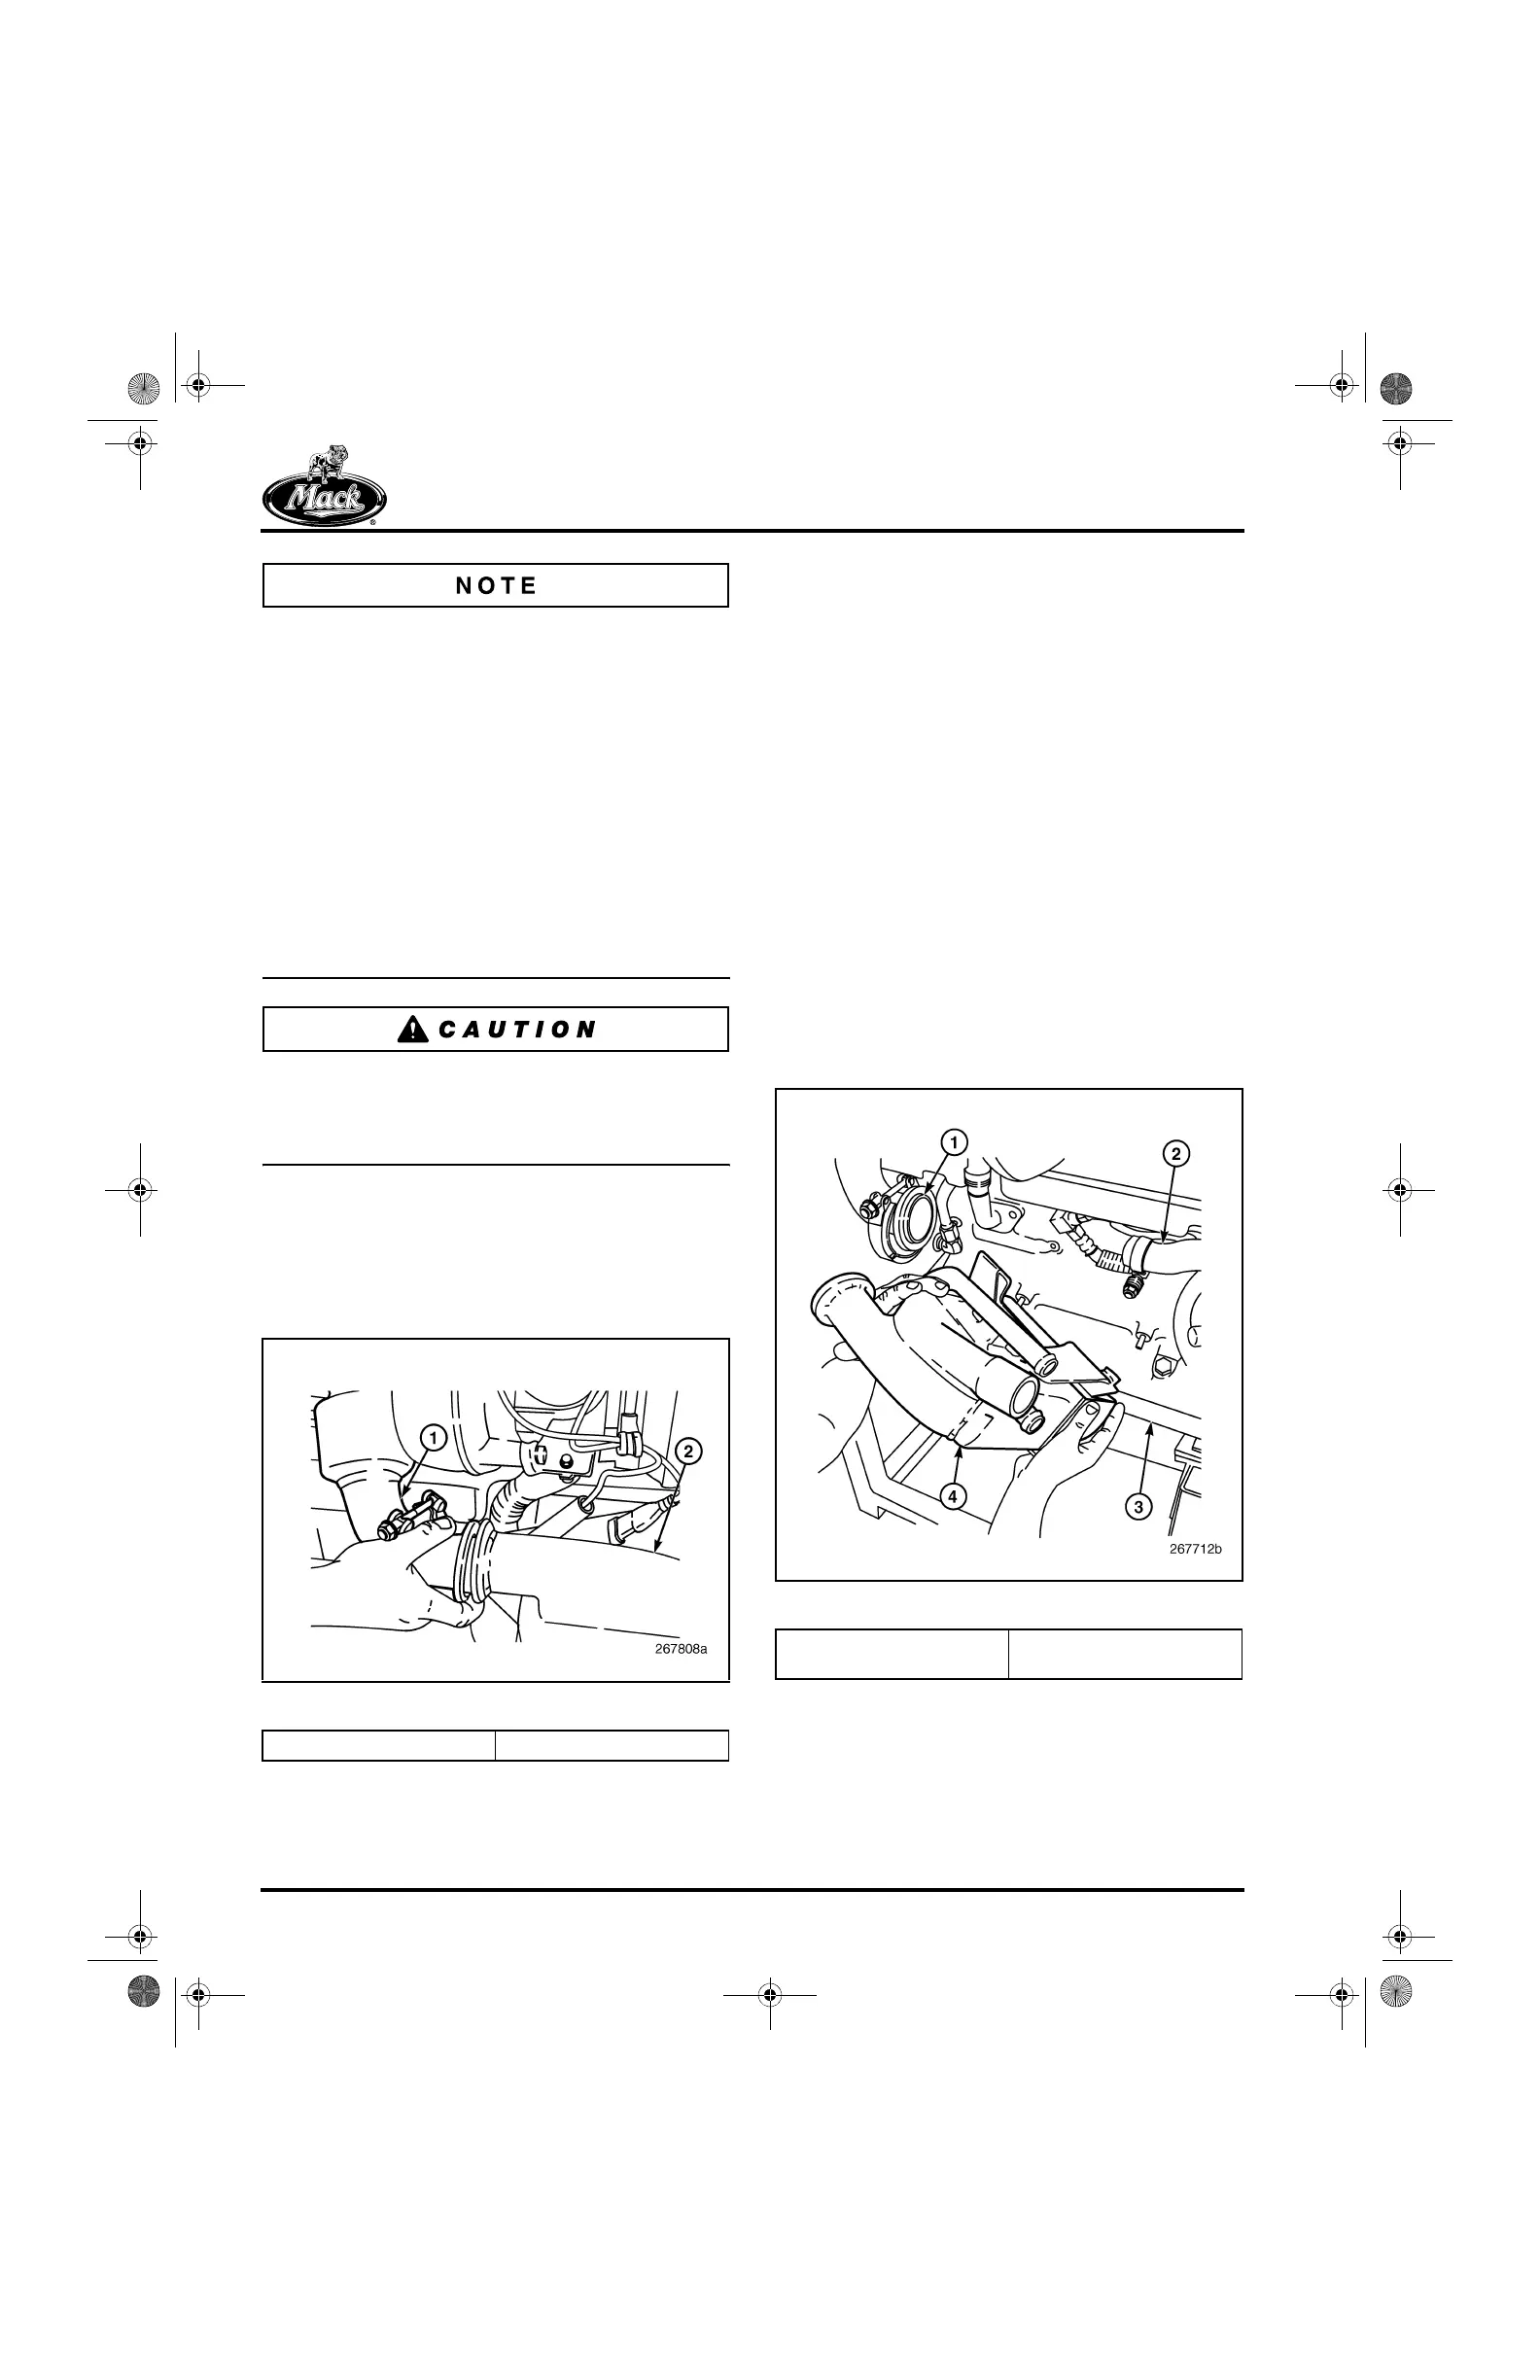
EGR Cooler Removal
[214 HM]
1. Check to make sure that any residual
coolant has been drained from the cooler. A
petcock is located at the lower rear corner of
the cooler to drain coolant.
2. Remove the four retaining nuts, two at each
side, attaching the cooler assembly to the
cylinder block and remove the assembly
(Figure 139). Inspect the cooler assembly
for damage and test for leaks as required.
139
Figure 139 — EGR Cooler Removal
1. EGR Gas Hot Tube 2. EGR Cooler
1. EGR Hot Tube
2. Coolant Return Hose
3. Cylinder Block
4. EGR Cooler
5-111.bk Page 154 Monday, July 10, 2006 2:26 PM