Page 194
REPAIR INSTRUCTIONS, PART 1
Cup Plug Replacement
REMOVAL
Refer to Figure 192.
1. Using a hammer and punch, drive one edge
of the plug inward. The plug should rotate
causing the opposite edge to move outward.
When the edge moves out far enough, grab
it with a pair of pliers and pull it out.
If, after several taps with a hammer, the plug
does not rotate and is being driven inward, stop
tapping. Drill a hole approximately 1/8 inch
(3.2 mm) in diameter in the center of the plug.
Insert a sheet-metal screw in the hole. Leave
enough of the screw protruding from the plug to
allow a pry bar to be inserted under the head of
the screw and pry the plug out.
2. Clean the plug hole(s) with a wire brush or
wire wheel. After cleaning, visually check the
surface for cracks.
192
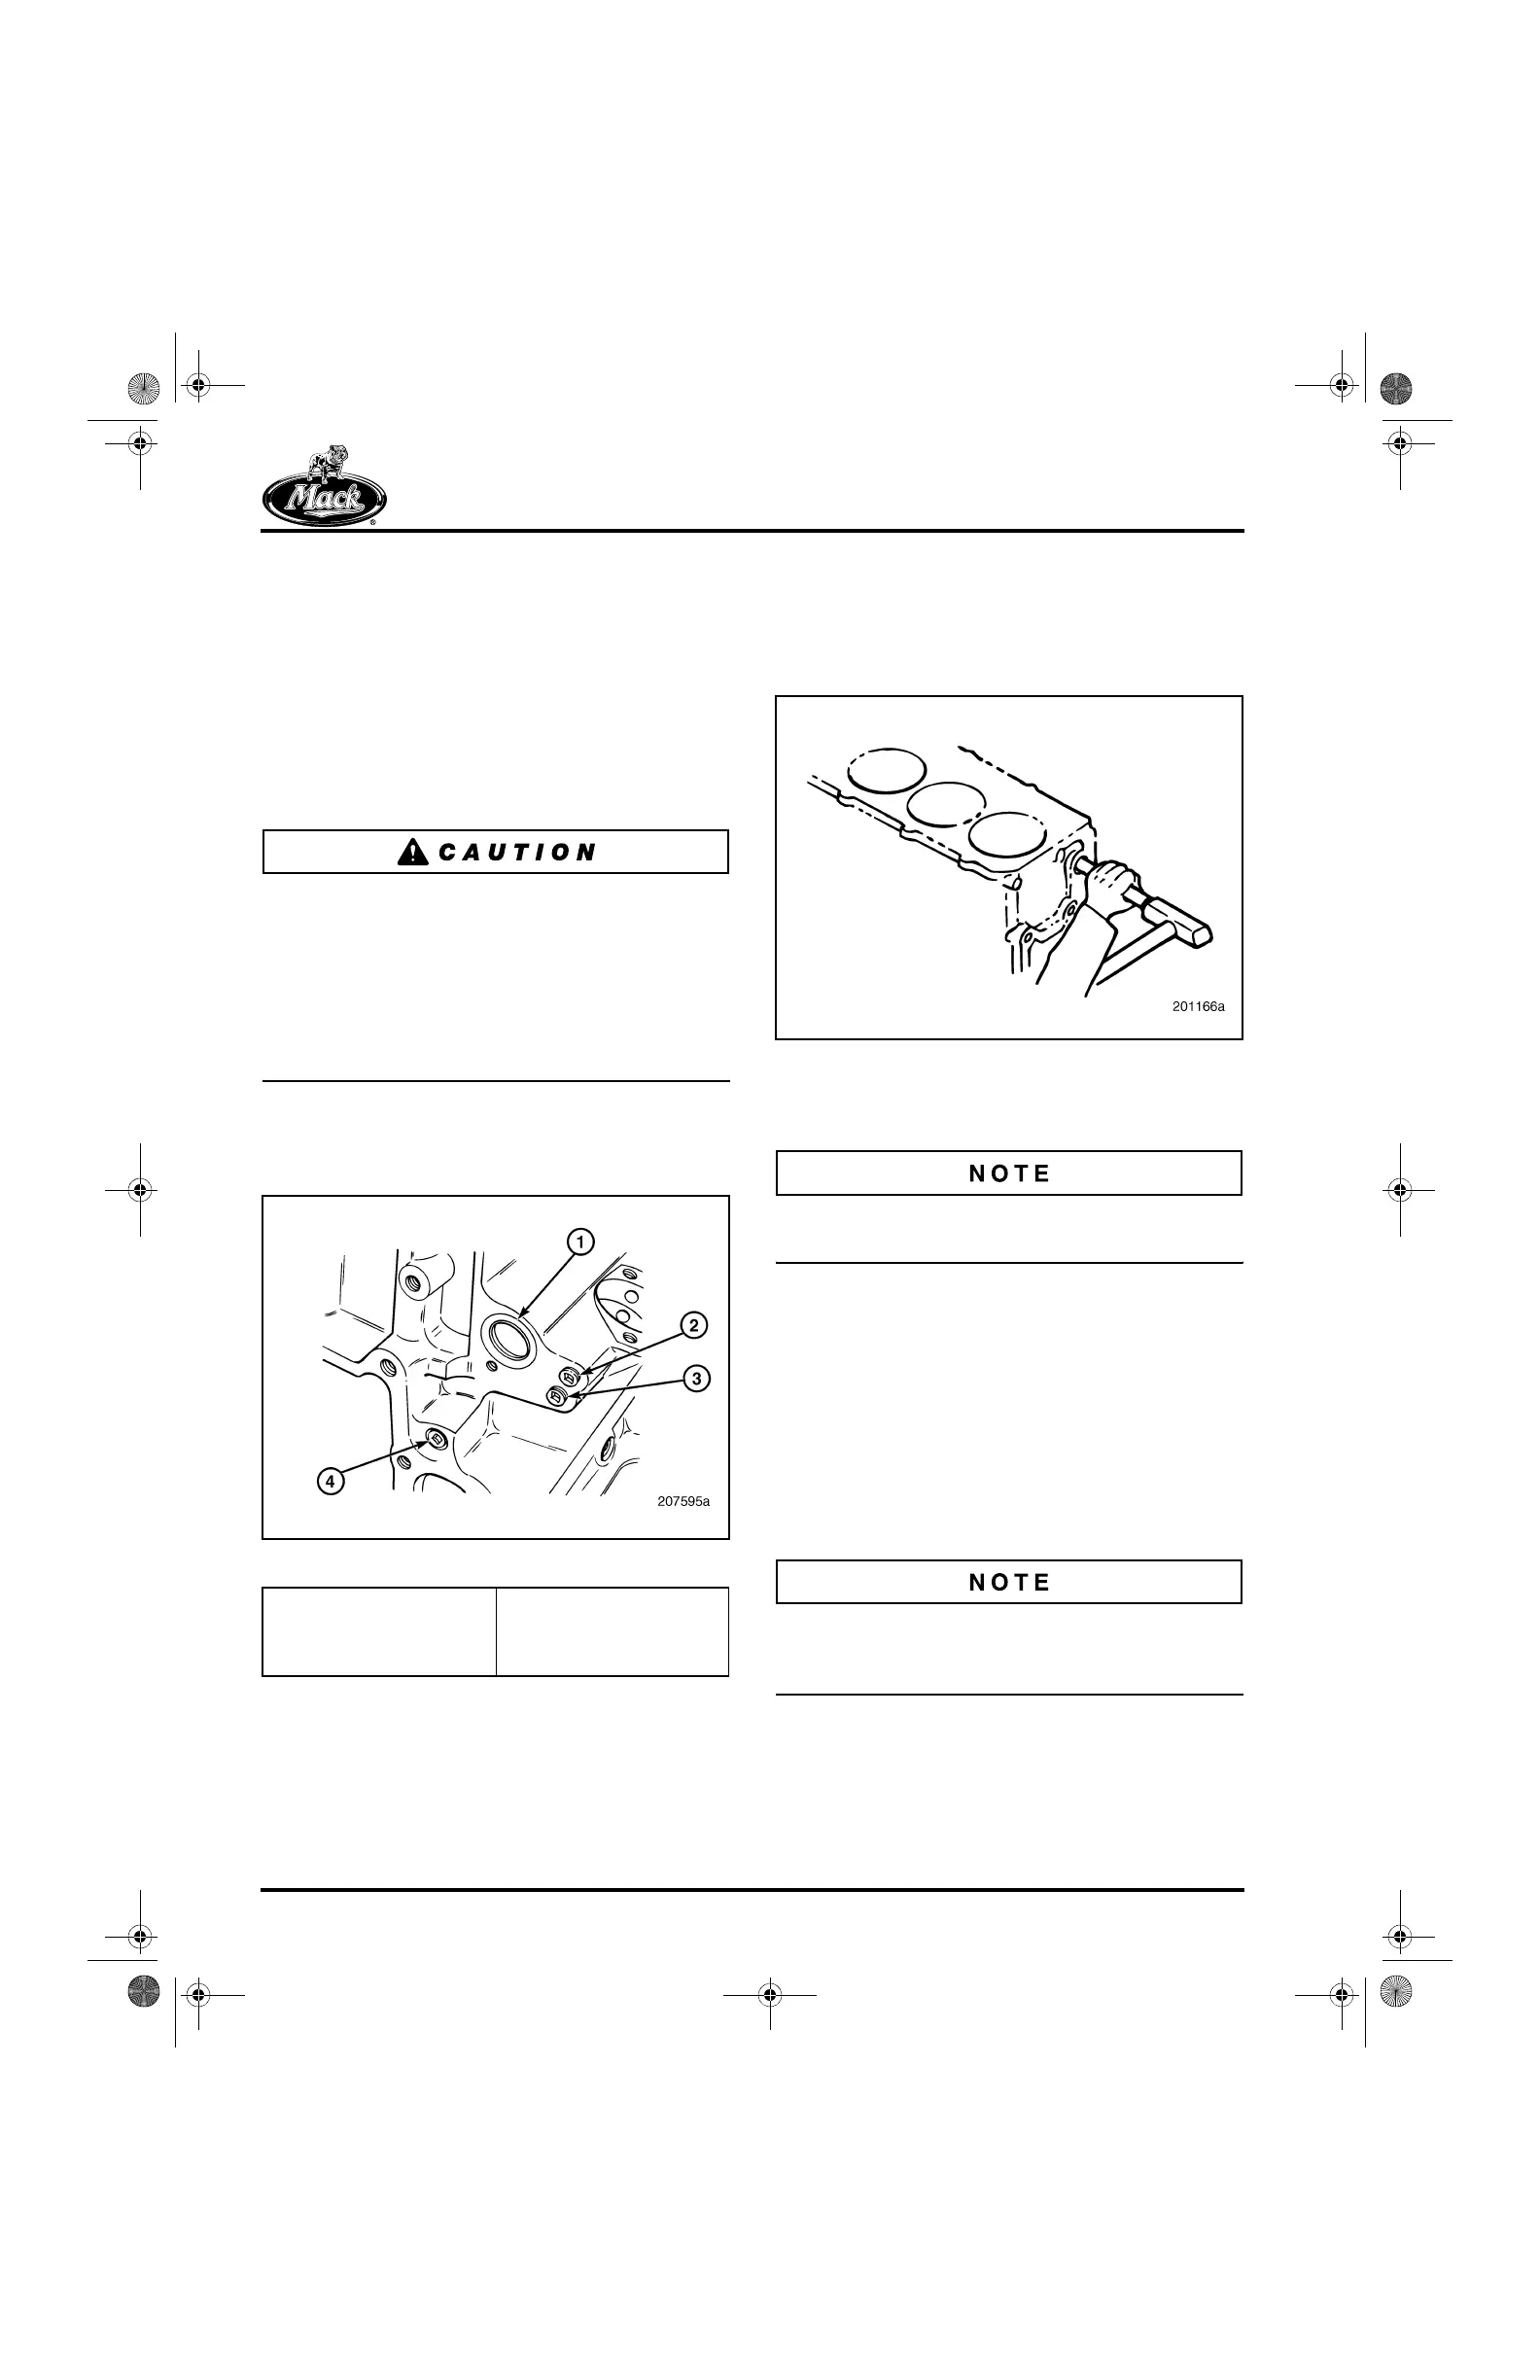
Figure 192 — Cylinder Block Plugs
INSTALLATION
1. After cleaning the plug hole, apply a thin
coat of Loctite
®
277 to both the surface of
the hole and the outer edge of the plug.
2. Using a proper driver, align the plug in the
hole and drive it inward until the outer lip of
the plug is 0.090 ± 0.040 inch (2.286 ±
1.016 mm) below the machined
counterbore. Refer to Figure 193.
193
Figure 193 — Cylinder Block Cup Plug Installation
Pipe Plug Replacement
Any rust around a pipe plug is an indication of a
leak and the plug should be replaced.
REMOVAL
1. Using an appropriate wrench, remove the
plug.
2. Clean the threads in the cylinder block by
running a tap into the hole, just far enough to
remove any rust on the threads without
expanding the diameter of the hole. Use
compressed air to remove any chips from
the block.
It is best to replace a leaking pipe plug. However,
if reusing the same plug, clean it thoroughly,
paying special attention to the threads.
3. Using a wire wheel, clean the threads of the
plug. Visually check the thread surfaces for
burrs or damage. Then clean and check the
remaining surfaces.
1. Coolant Passage Cup
Plug
2. Upper Fuel Gallery Pipe
Plug
3. Lower Fuel Gallery Pipe
Plug
4. Oil Gallery Pipe Plug
5-111.bk Page 194 Monday, July 10, 2006 2:26 PM