Page 160
REPAIR INSTRUCTIONS, PART 1
Water Pump Housing Removal
148
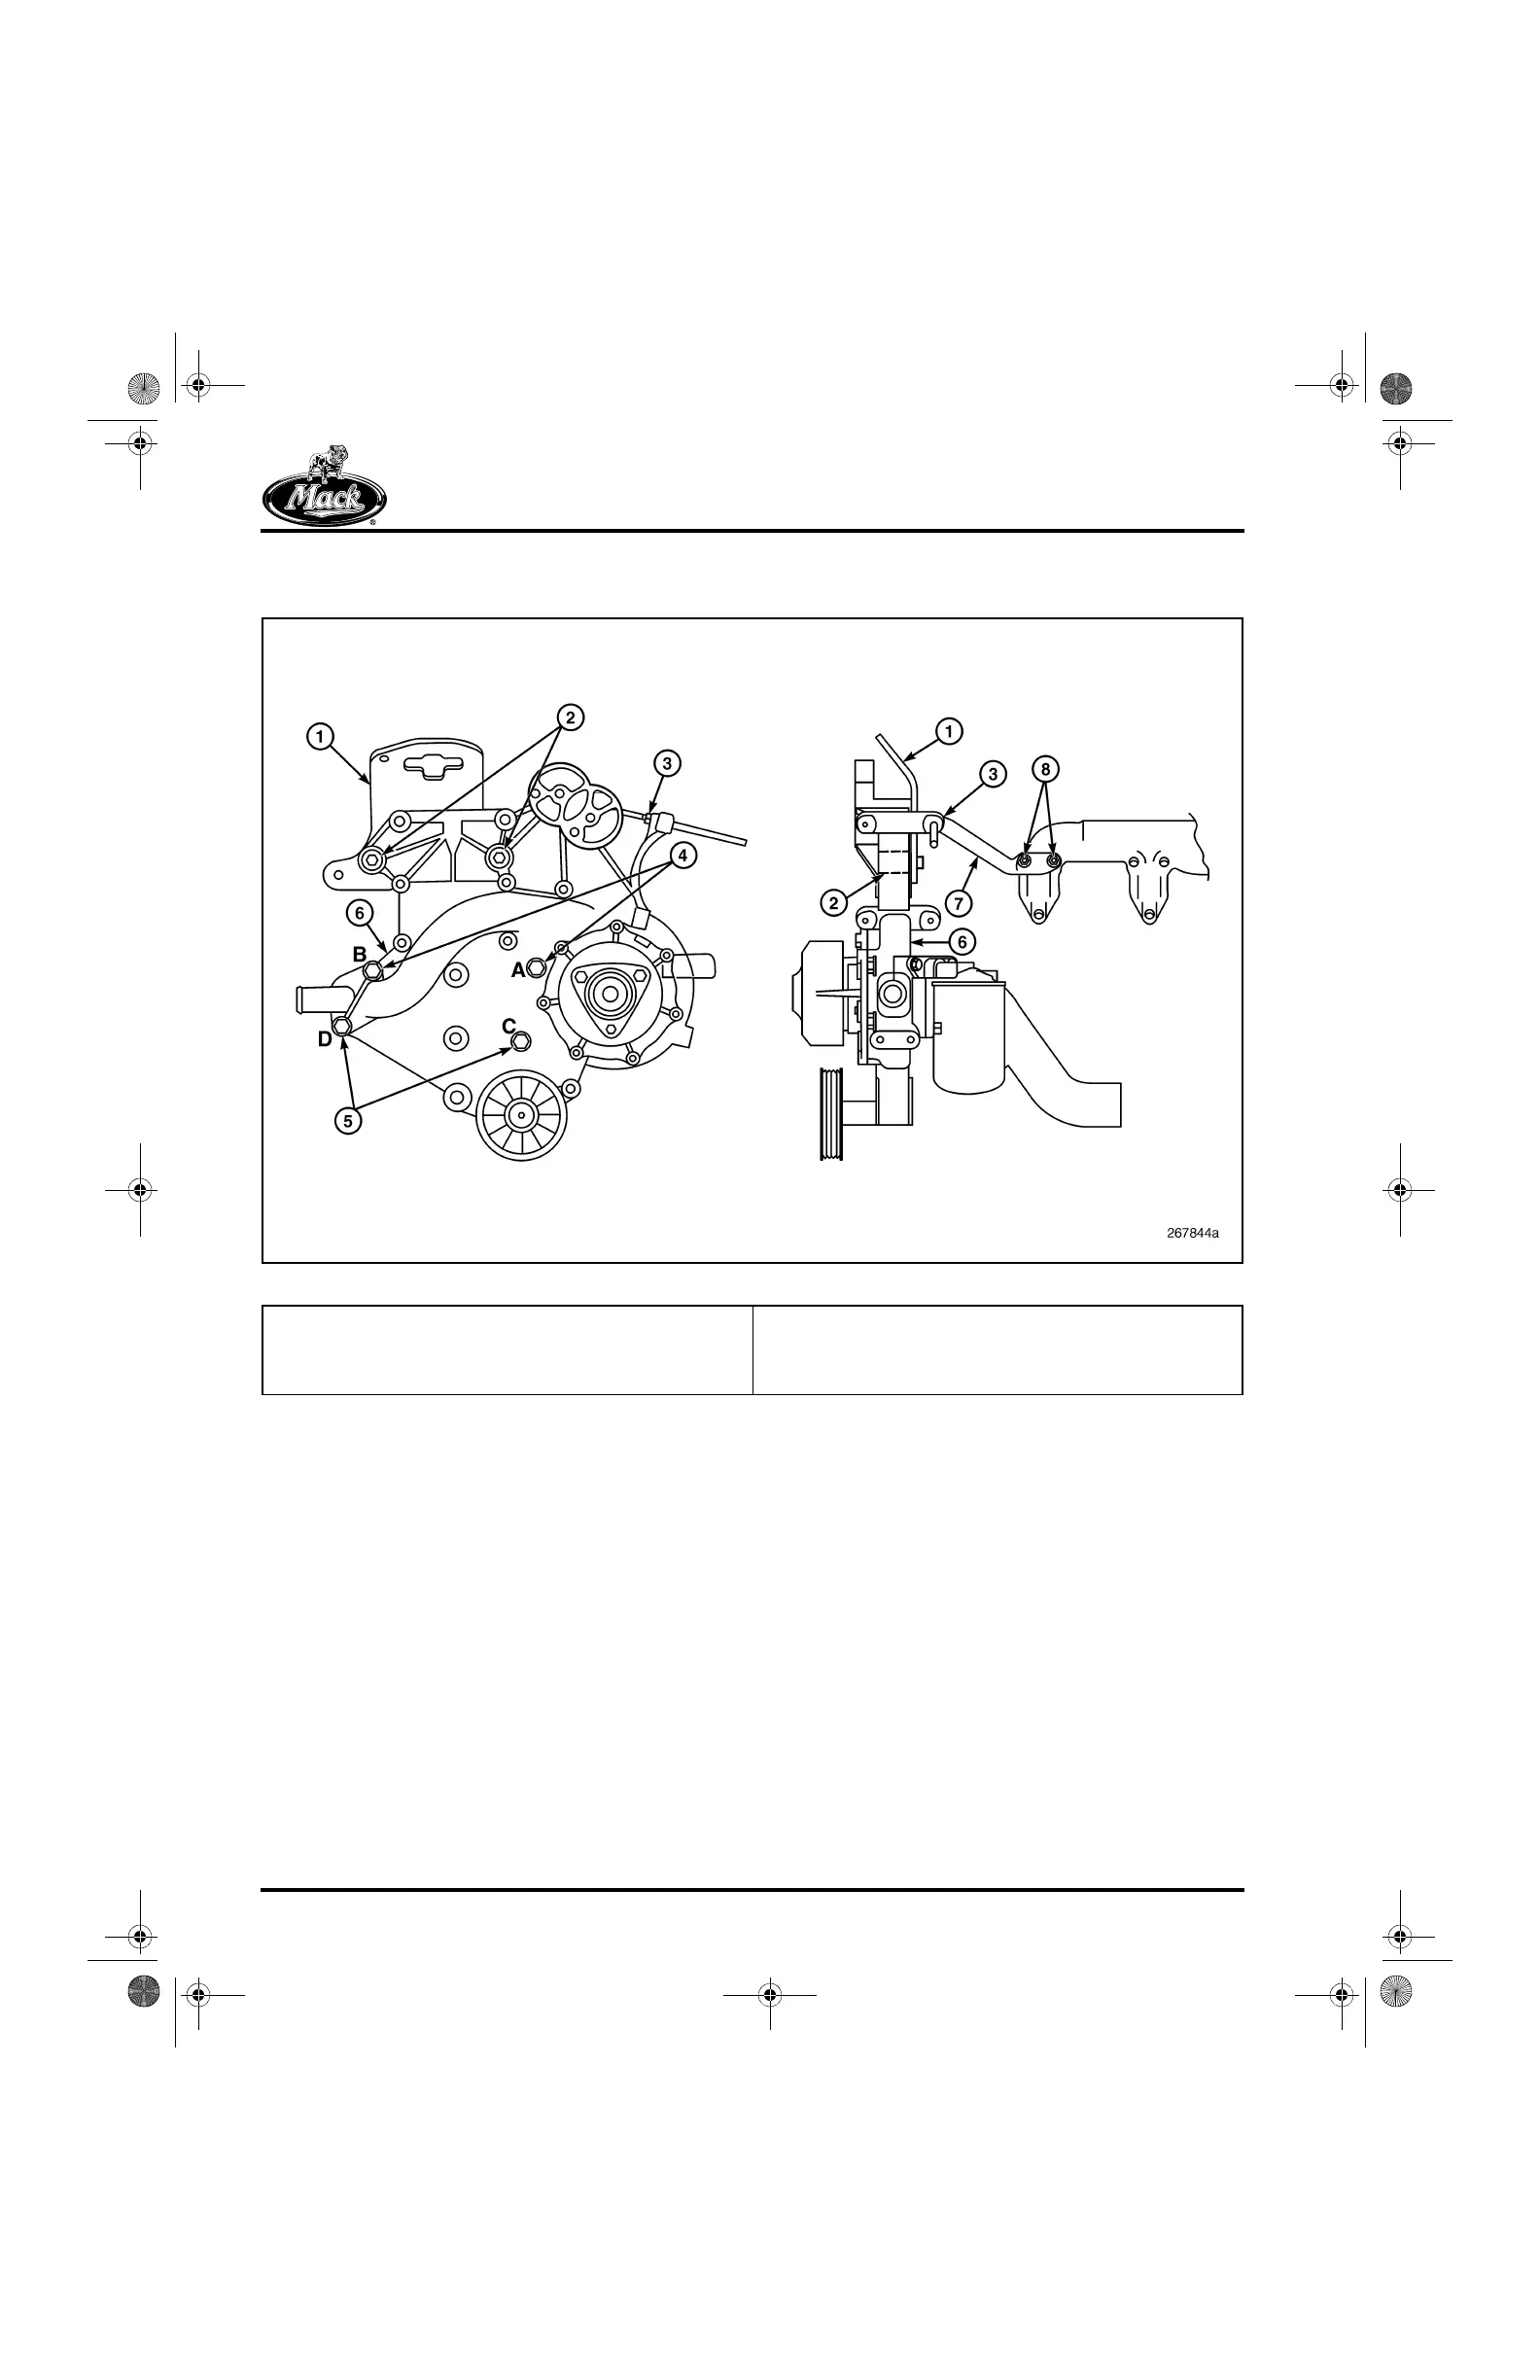
Figure 148 — Water Pump Assembly
If not already removed, first remove the coolant
conditioner as follows:
1. Place a suitable container below the coolant
filter area to catch any spilled coolant.
2. Using a suitable filter wrench, J 29927, or
equivalent, remove the coolant conditioner
filter element. Discard the element.
3. Remove the coolant conditioner head
assembly from the pump housing by
removing the mounting capscrews.
4. Remove and discard the O-rings.
5. Carefully remove and examine each check
valve assembly. Depress the check ball. If
the ball resists movement and does not
return to its seat freely, the check valve
assembly must be replaced.
To remove the pump housing, refer to Figure 149
as required to identify parts referenced in the
steps below.
1. Remove the three mounting capscrews and
remove the fan drive hub from the water
pump housing (Figure 149).
1. Engine Lifting Bracket
2. Threaded Inserts and Upper Mounting Capscrews
3. Stiffening Bracket Forward Mount
4. Mid-Position Mounting Capscrews
5. Low-Position Mounting Capscrews
6. Water Pump Assembly
7. Water Pump Stiffening Bracket
8. Stiffening Bracket Rear Mount
5-111.bk Page 160 Monday, July 10, 2006 2:26 PM