Page 214
REPAIR INSTRUCTIONS, PART 1
All new service replacement crankshafts, short
blocks or basic engines will have a dowel pin in
the crankshaft rear flange. In nearly all cases, the
flywheel will already have a hole in it to accept the
dowel pin. If an earlier version flywheel or torque
converter drive flange without a dowel pin hole is
used for replacement, it must be reworked.
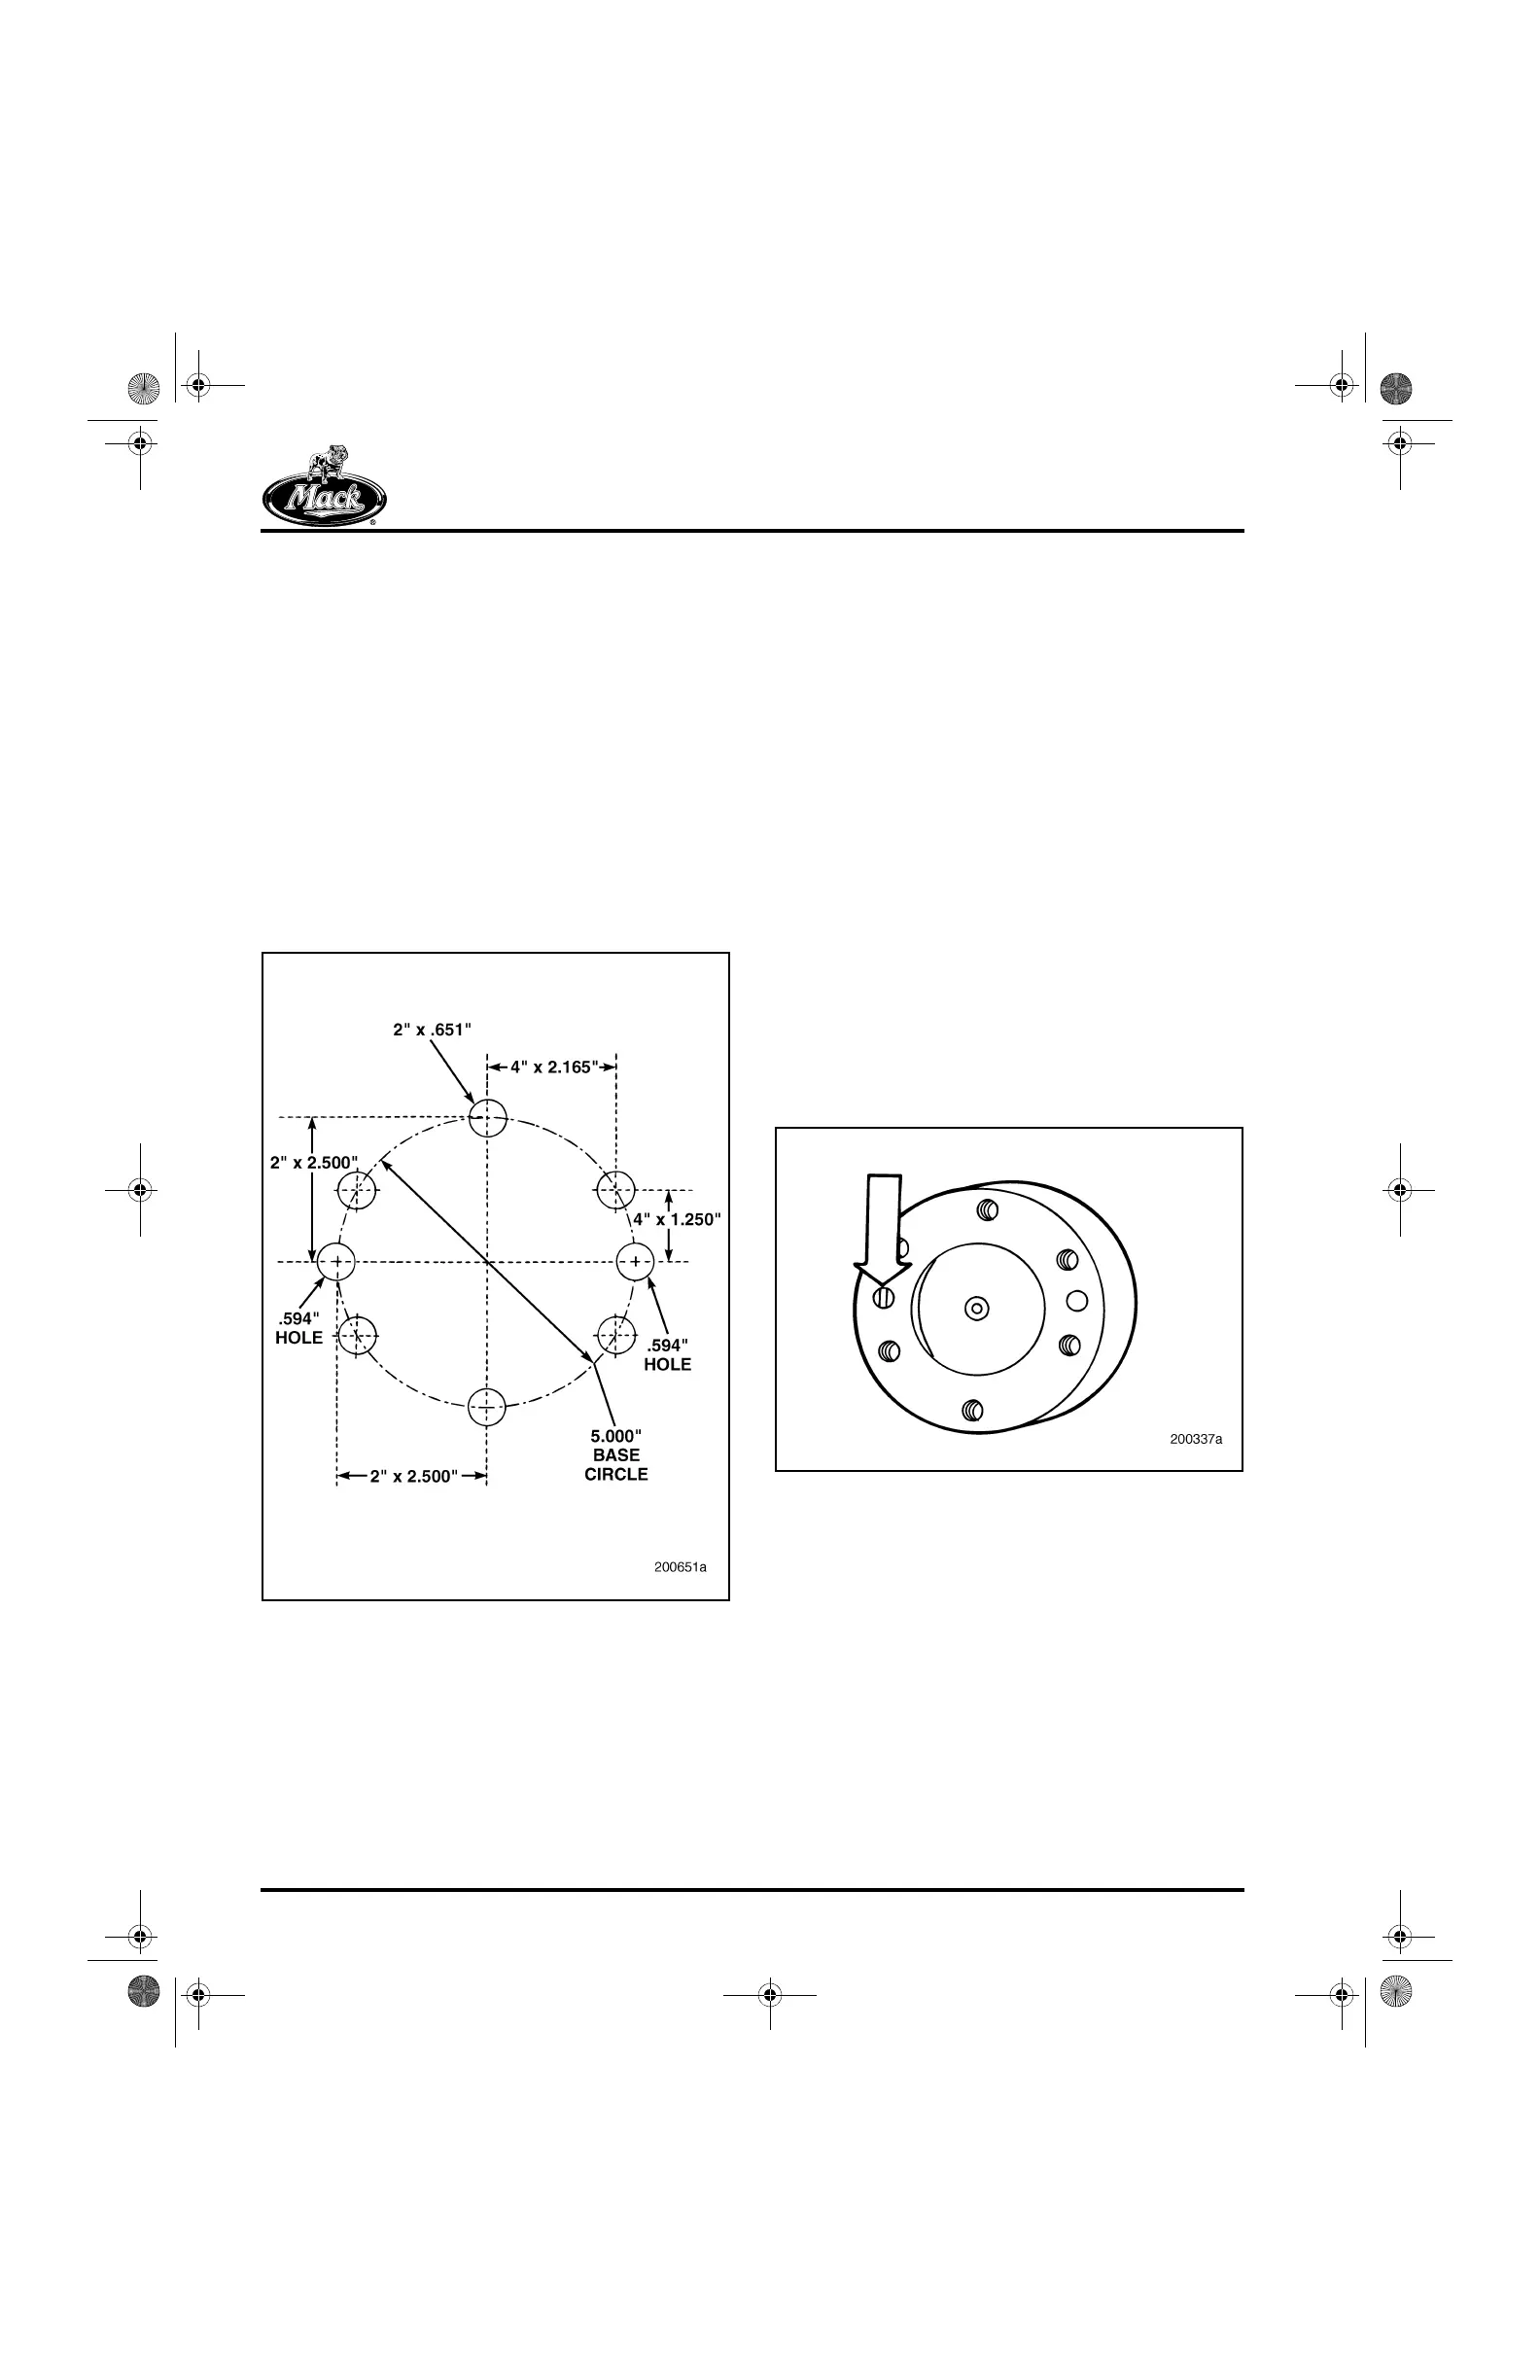
If it is necessary to rework the flywheel or torque
converter drive flange, two holes must be added
using a 19/32-inch drill bit. One hole is for the
dowel pin and another directly opposite the first
hole is to maintain balance of the flywheel/torque
converter drive flange.
Refer to Figure 219.
219
Figure 219 — Dowel Pin Hole Dimensions (Flywheel or
Torque Converter Drive Flange)
DOWEL PIN REMOVAL
To remove the crankshaft dowel pin:
1. Securely grip the dowel pin with locking
pliers.
2. Rotate the dowel pin back and forth while
exerting outward pressure until the pin is
removed.
DOWEL PIN INSTALLATION
To install a replacement crankshaft dowel pin:
1. Position the dowel pin in a 0.5562-inch
(14.1275 mm) diameter unthreaded hole in
the rear flange of the crankshaft. The pin
must be installed with the flat surface
aligned parallel to the center of the
crankshaft as shown in Figure 220.
2. Use a soft metal hammer and punch to drive
the pin into the hole. The pin must be firmly
seated and protrude 0.77 inch (19.56 mm)
from the crankshaft flange surface.
220
Figure 220 — Dowel Pin Alignment
Crankshaft Gear Replacement
[212 HV]
INSPECTION
After inspecting the crankshaft and determining
that it is within specification, inspect the
crankshaft gear for cracks and broken, worn or
chipped teeth. If the gear is defective, it must be
replaced.
5-111.bk Page 214 Monday, July 10, 2006 2:26 PM