REPAIR INSTRUCTIONS, PART 1
Page 175
Vibration Damper and Crankshaft
Hub Removal
[212 RB, RH]
1. Remove the capscrews attaching the
vibration damper to the crankshaft hub
(Figure 169). Six or 12 capscrews may be
used to mount the damper to the hub
depending on date of production.
169
Figure 169 — Vibration Damper Removal
2. Remove the vibration damper and fan belt
drive pulley together.
3. Using a suitable wrench, remove the
crankshaft hub capscrew.
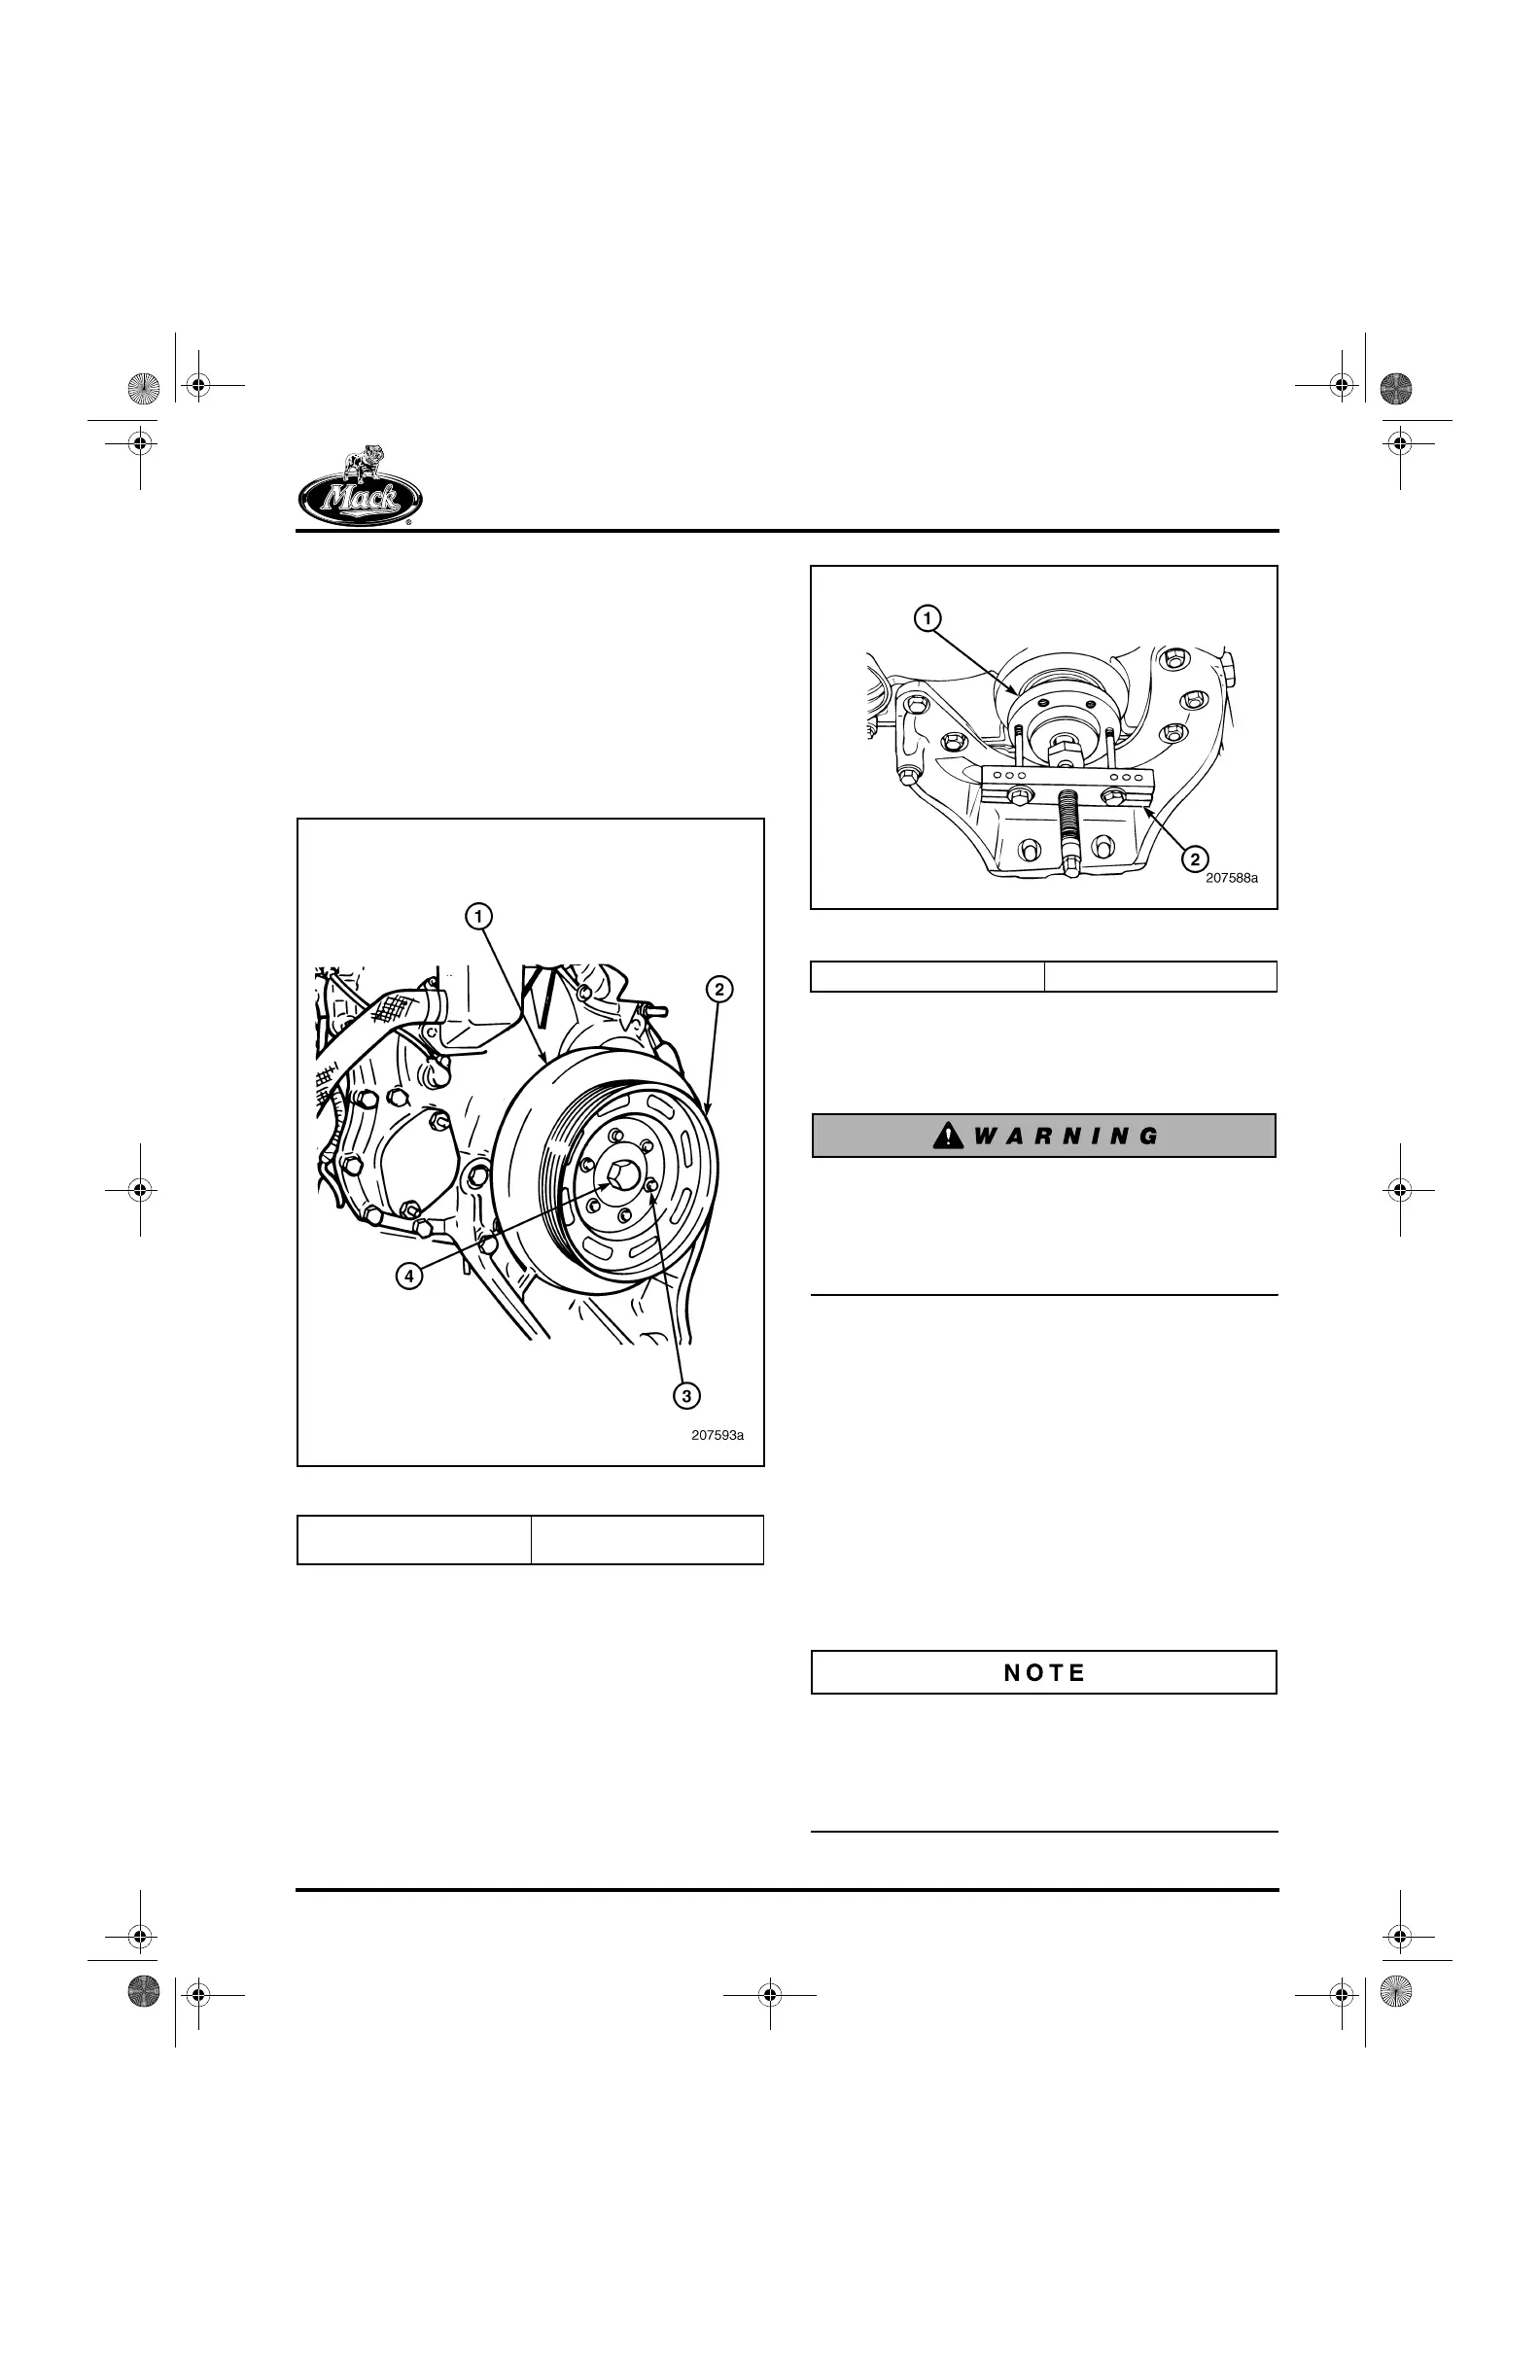
4. Using a suitable puller such as J 24420-C,
remove the crankshaft hub (Figure 170).
170
Figure 170 — Crankshaft Hub Removal
Oil Pan Removal
[211 NB]
Make sure all loose components are secured
to, or removed from, the engine before
rotating the engine on the stand. Failure to do
so may result in damage to components or
severe personal injury.
Refer to Figure 171.
1. Rotate the engine so that the oil pan rail is
upward (engine inverted).
2. Remove the two shouldered bolts securing
the oil pan to the front cover.
3. Remove the two shouldered bolts securing
the oil pan to the flywheel housing.
4. Remove the remaining integral hex-head
shouldered studs and shouldered bolts
securing the oil pan to the pan rails. Remove
the oil pan.
The oil pans are secured with shouldered bolts at
the timing cover and flywheel housing and a
combination of shouldered bolts and integral
hex-head shoulder studs (one piece) along the
pan rails.
1. Vibration Damper
2. Pulley
3. Mounting Capscrews
4. Hub Capscrew
1. Crankshaft Hub 2. Puller
5-111.bk Page 175 Monday, July 10, 2006 2:26 PM