Page 226
REPAIR INSTRUCTIONS, PART 1
Piston Inspection and Cleaning
[212 NP]
SPECIAL TOOLS REQUIRED
앫 Piston Ring Expander PT6587
앫 Keystone Ring Groove Gauge J 29510
DISASSEMBLY
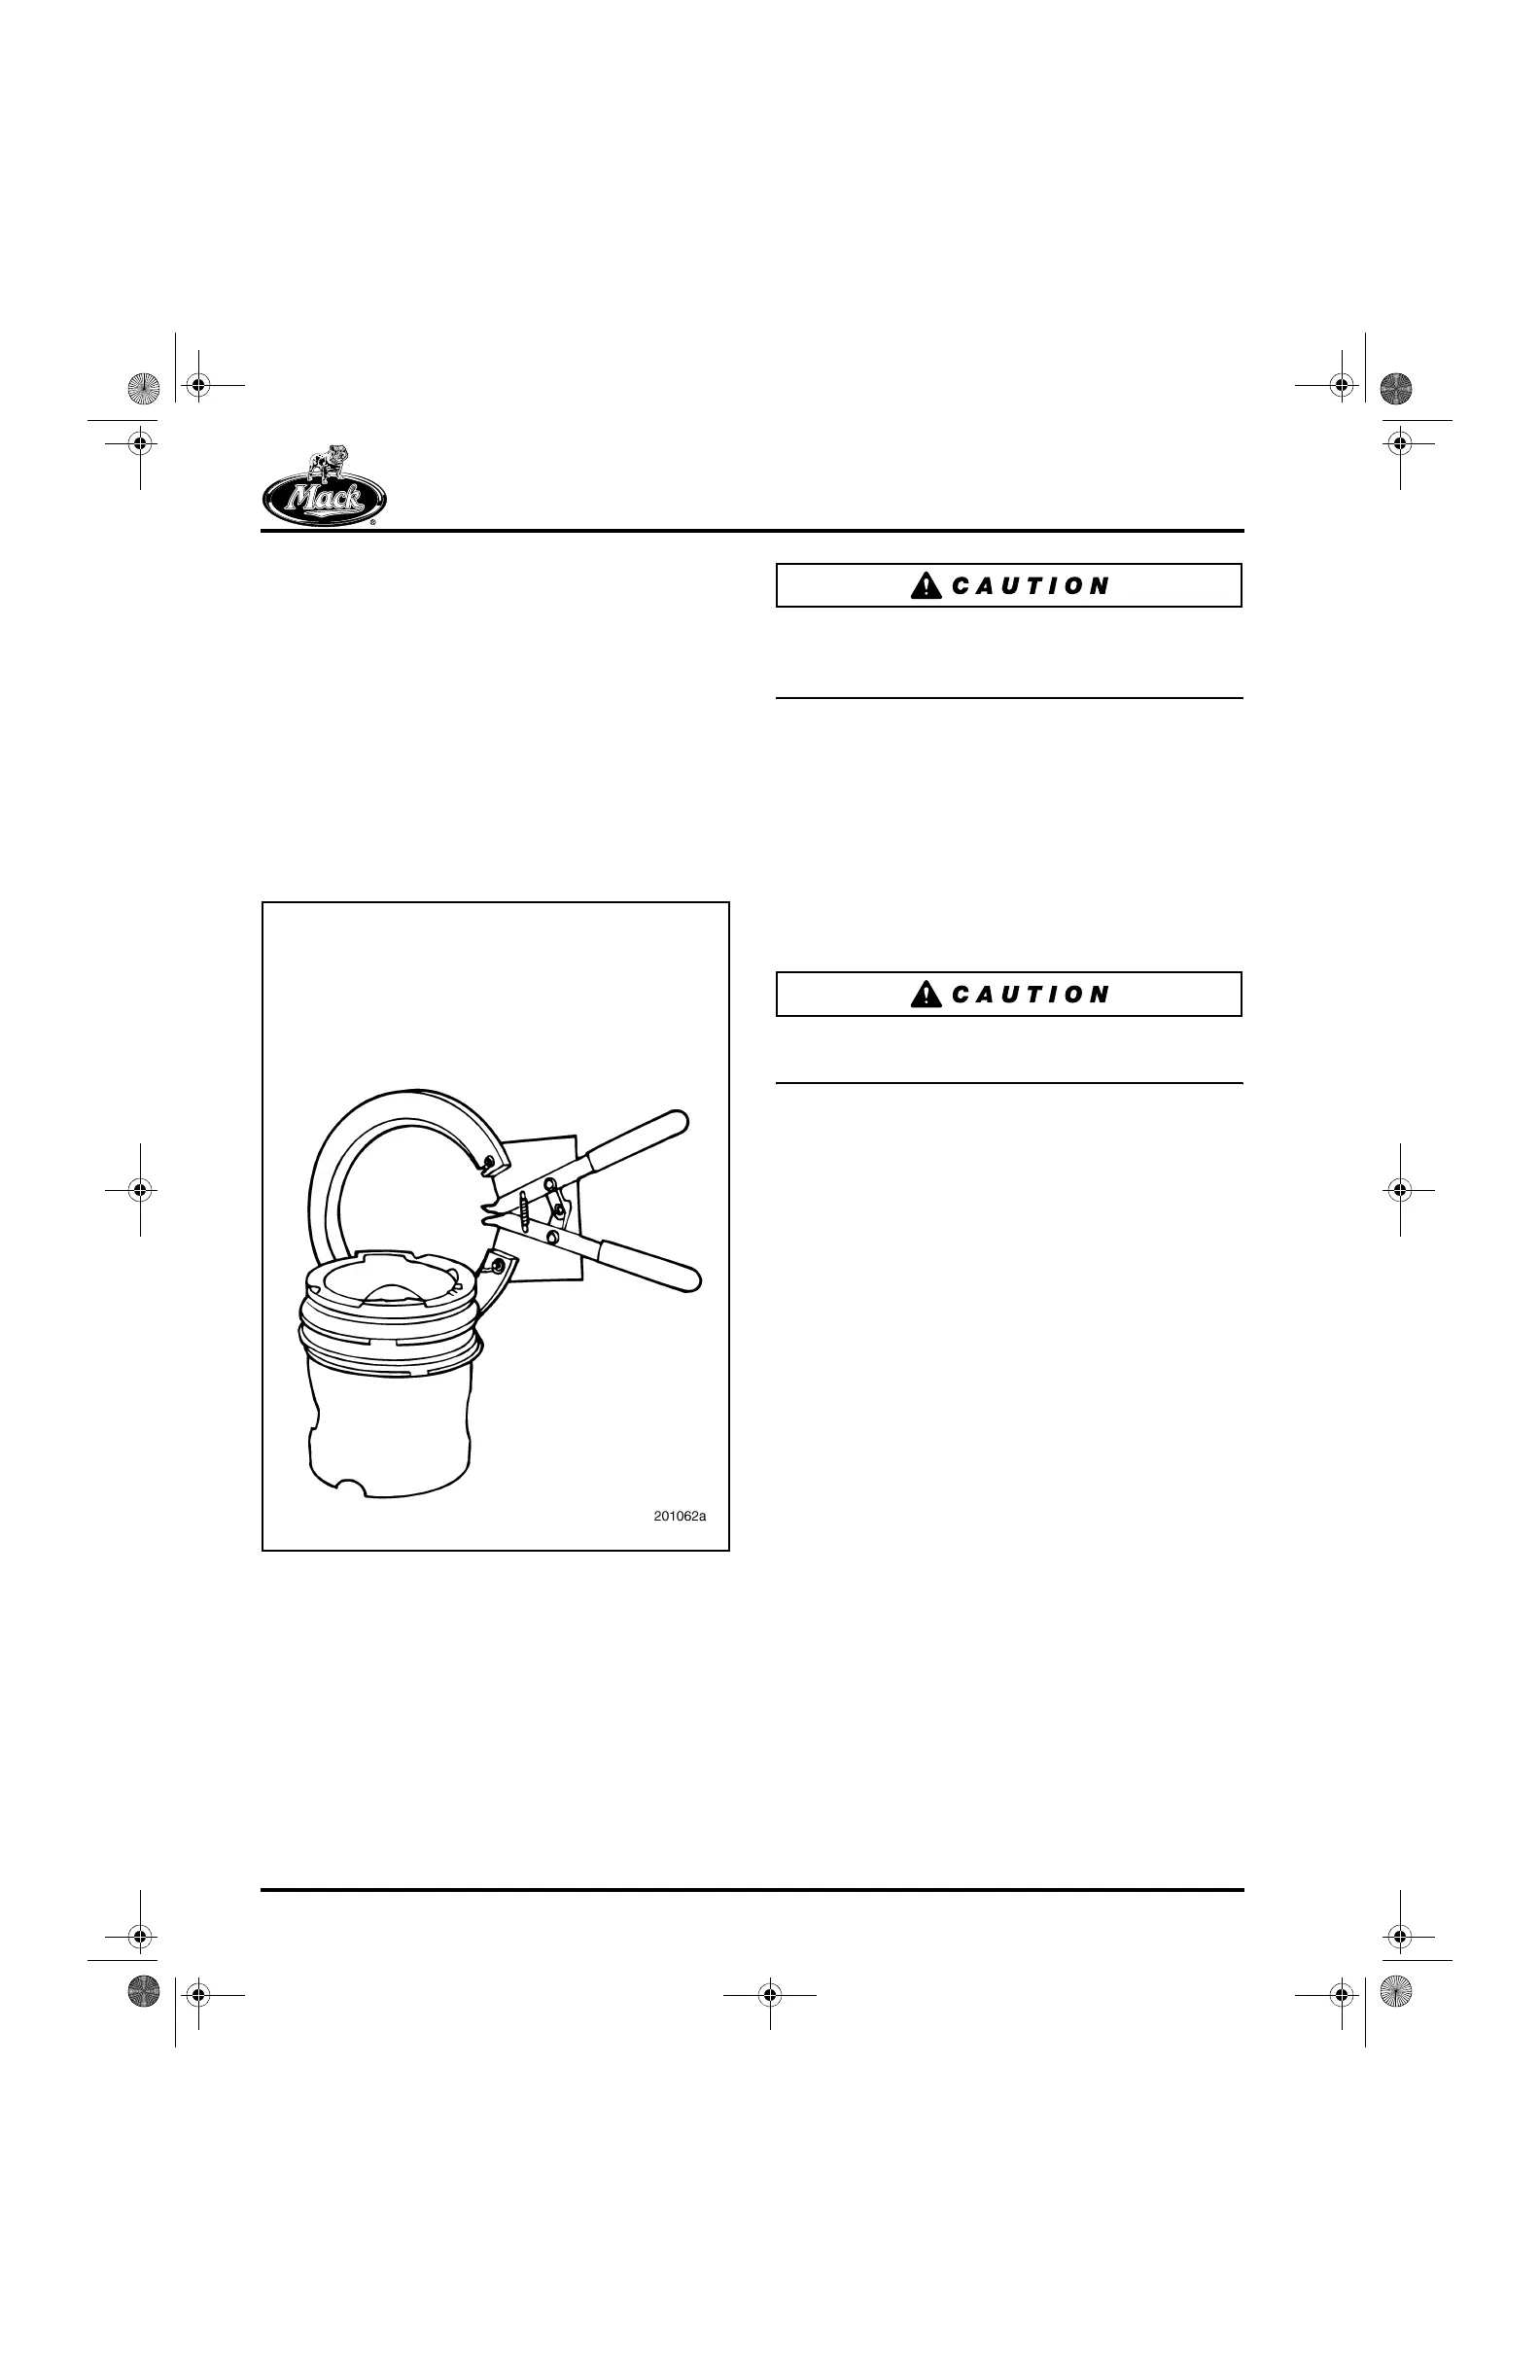
1. Using piston ring expander PT6587, remove
the piston rings (Figure 234).
234
Figure 234 — Piston Ring Removal
2. Thoroughly clean the piston ring grooves,
combustion bowl area and the snap ring
grooves. All carbon must be removed.
Carbon left in the piston ring grooves will
reduce ring clearance and prevent the
replacement rings from seating properly.
Be sure that the cleaning solvent is approved for
steel and aluminum. Incompatible solvents may
cause damage to the pistons or skirts.
3. Clean the pistons with the approved solution
and a brass brush. Take care to avoid
damaging the pistons while cleaning.
INSPECTION
Inspect the piston ring grooves, lands, piston skirt
and combustion bowl for wear, scuffing, cracks or
blow-by. Pistons are NOT repairable. Discard the
piston if it is worn or damaged.
Do not stamp or engrave on the TOP of the
piston. Doing so will reduce piston life.
To ensure that pistons are reinstalled in the same
cylinders, the pistons must be tagged with the
corresponding cylinder number when removed
during disassembly.
Piston Ring Replacement
[212 NV]
Before installing the piston rings, check the
keystone ring groove wear and ring end gap
using the following procedures.
RING END GAP CHECK
1. Place a piston ring in the cylinder sleeve.
Push it down into the sleeve with an inverted
piston to ensure that it is positioned squarely
in the sleeve.
2. Using thickness gauges, check the ring end
gap. Refer to Fits and Limits in the
SPECIFICATIONS section for end gap
tolerance. All rings to be used should be
checked in this manner.
5-111.bk Page 226 Monday, July 10, 2006 2:26 PM