REPAIR INSTRUCTIONS, PART 1
Page 215
REPLACEMENT
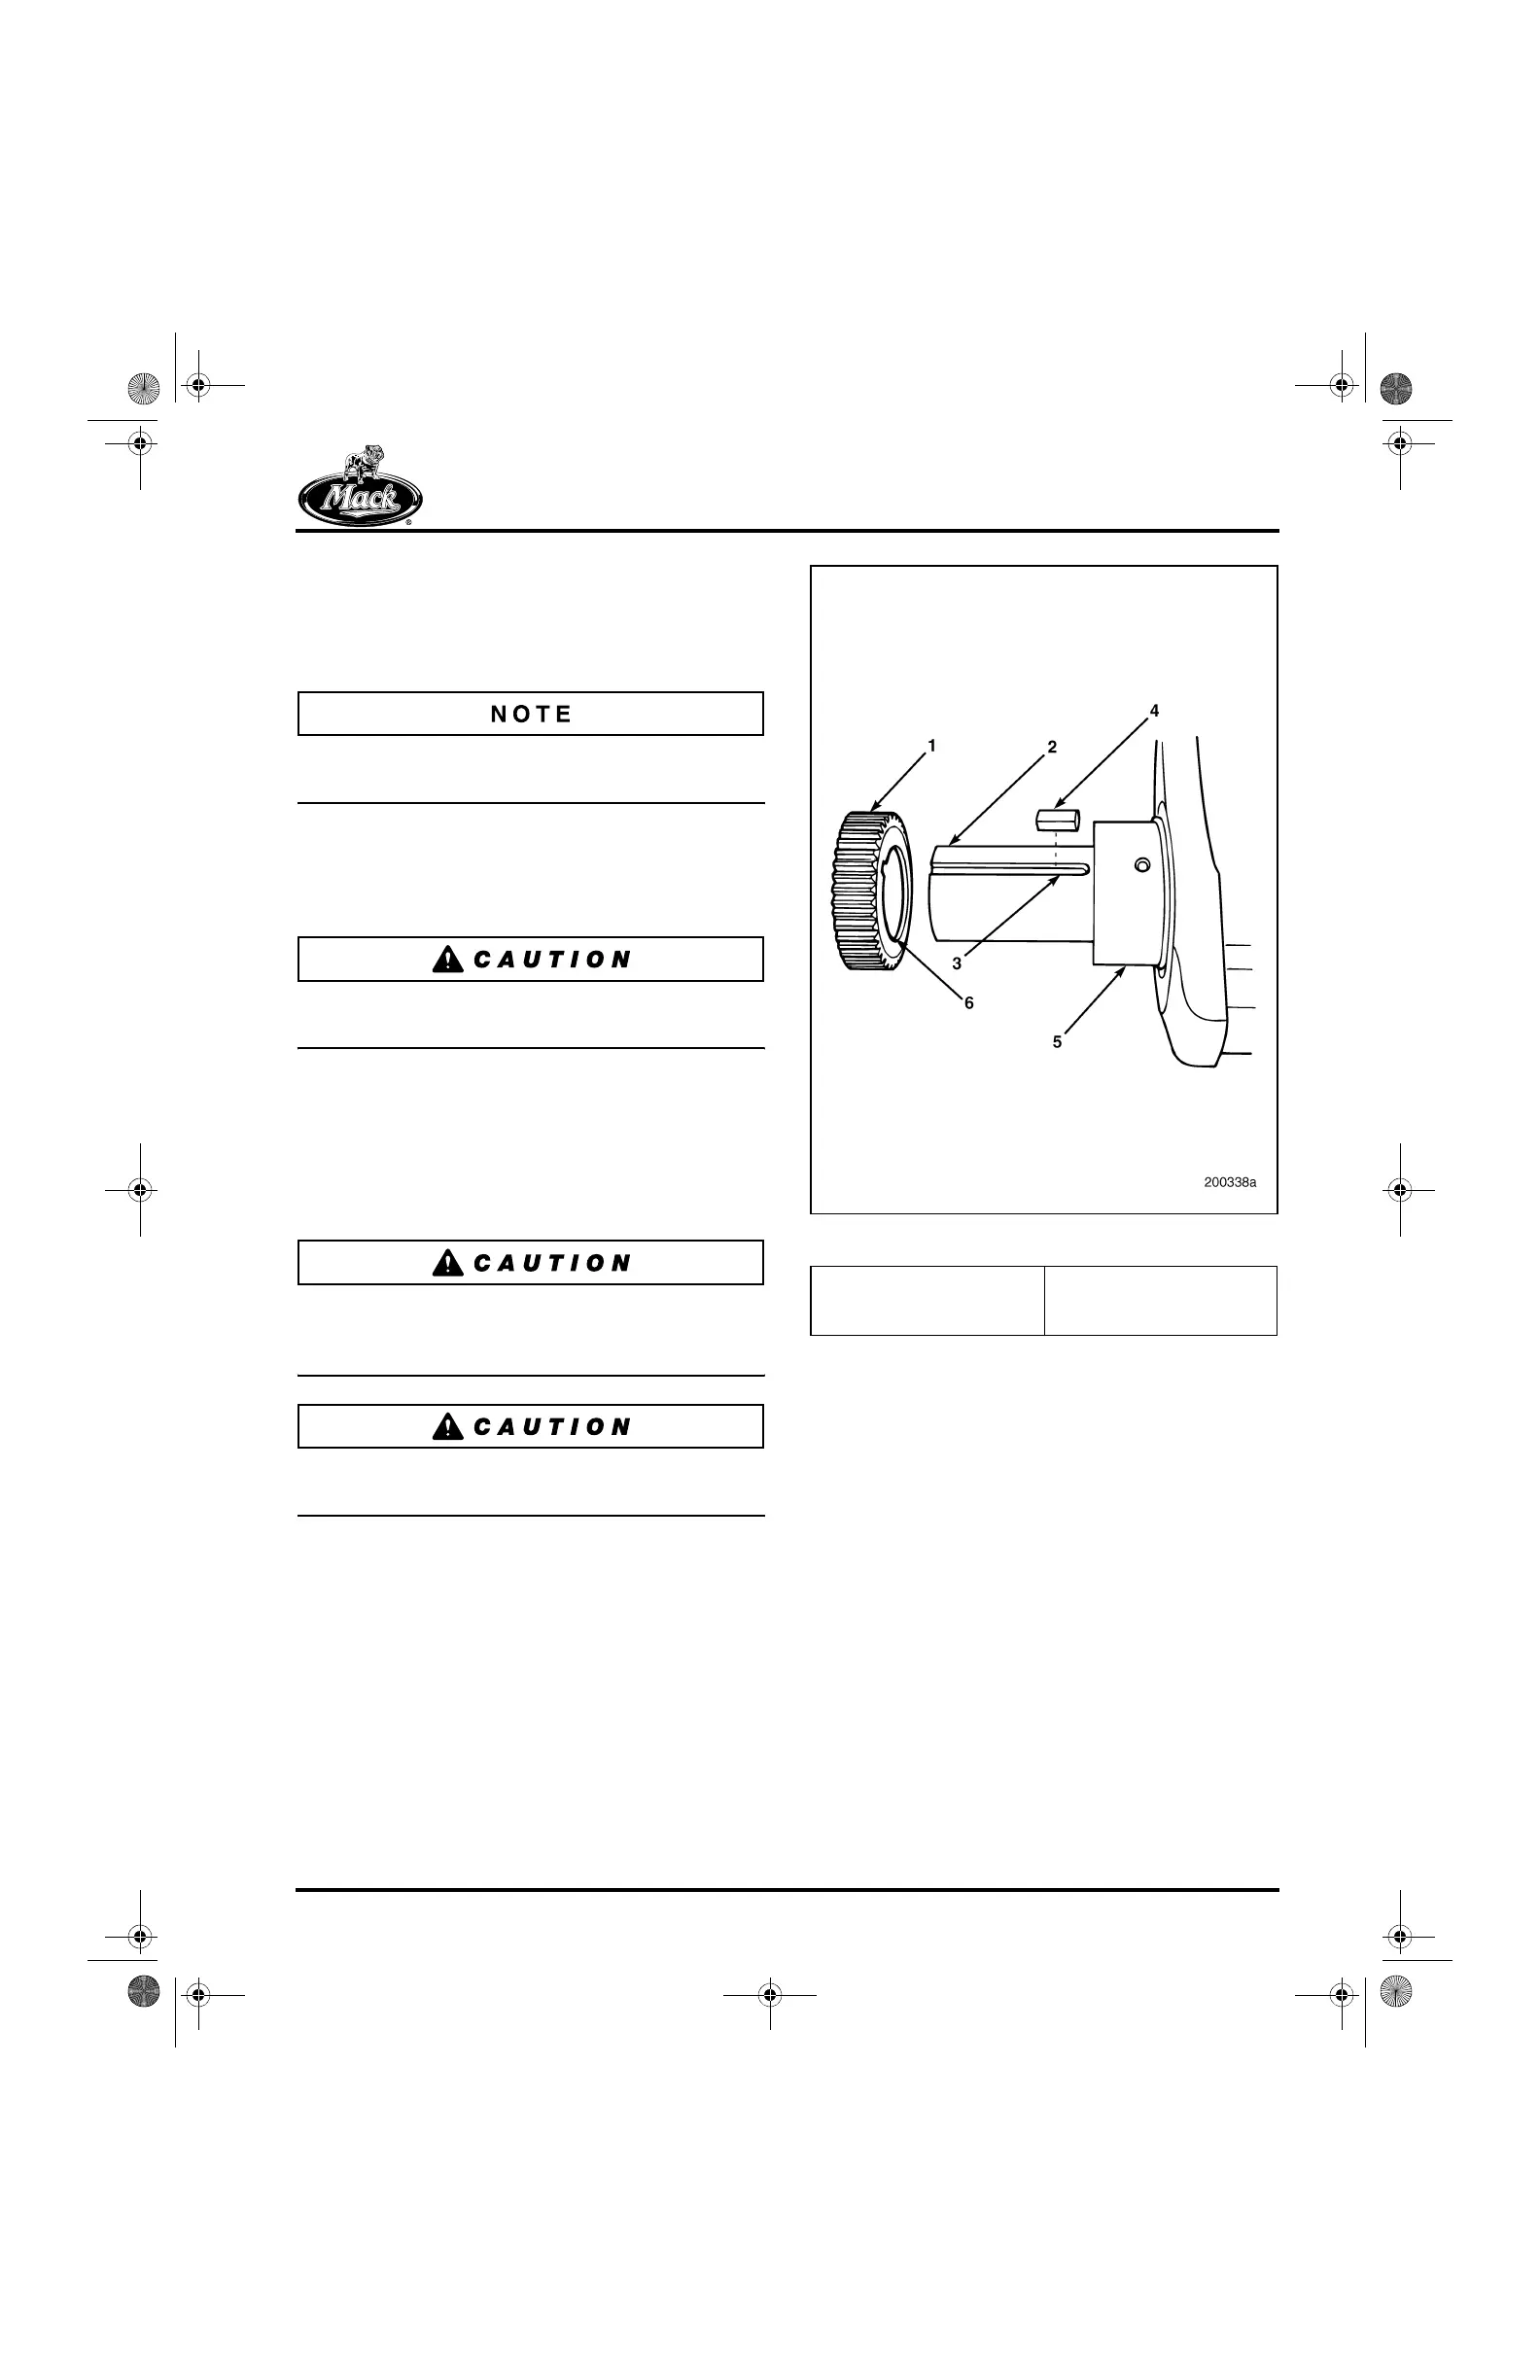
Refer to Figure 221.
1. Using a suitable puller, such as J 21834-4A,
or equivalent, remove the gear and key.
The threads in the end of the crankshaft are
M8 x 1.25.
2. Clean the gear mounting surface. It should
be free of grooves, scratches and burrs. Use
a file, sandpaper or crocus cloth, as
required.
Take care not to damage the key slot while
installing the key.
3. Insert the key into the key slot. Lightly tap
the key with a soft metal hammer to seat it in
the slot.
4. Heat the replacement gear to approximately
250°F (121°C) in a temperature-controlled
oven or on a hot plate.
Wear protective gloves when handling the heated
crankshaft gear to prevent burns or personal
injury.
Take care not to damage the gear teeth while
seating the gear.
5. Position the gear over the end of the
crankshaft with the timing mark facing
outward, the chamfer toward the rear of the
shaft, and the key slot aligned with the key in
the shaft.
6. In one rapid motion, push the heated gear
against the crankshaft flange. With the gear
properly positioned, immediately and
carefully tap the gear to help seat it against
the flange.
221
Figure 221 — Drive Gear Installation
Crankshaft Wear Ring Installation
[212 JH]
When the service oil seal is to be replaced and
the crankshaft flange is worn, the crankshaft can
be salvaged by installing a crankshaft wear ring.
An oil seal with a larger inside diameter is used
with this wear ring.
SPECIAL TOOLS REQUIRED
앫 Crankshaft Rear Seal Installer J 37716-A
앫 Wear Ring Installer J 38880
앫 Universal Driver Handle J 8092
1. Gear
2. Shaft
3. Key Slot
4. Key
5. Flange
6. Chamfer
5-111.bk Page 215 Monday, July 10, 2006 2:26 PM