Page 216
REPAIR INSTRUCTIONS, PART 1
REMOVAL
A limited number of crankshafts were
manufactured with a repair sleeve installed on the
flange. The repair sleeve is usually not noticeable
and is finish ground to standard flange size. If the
repair sleeve is damaged or becomes loose, the
crankshaft must be replaced.
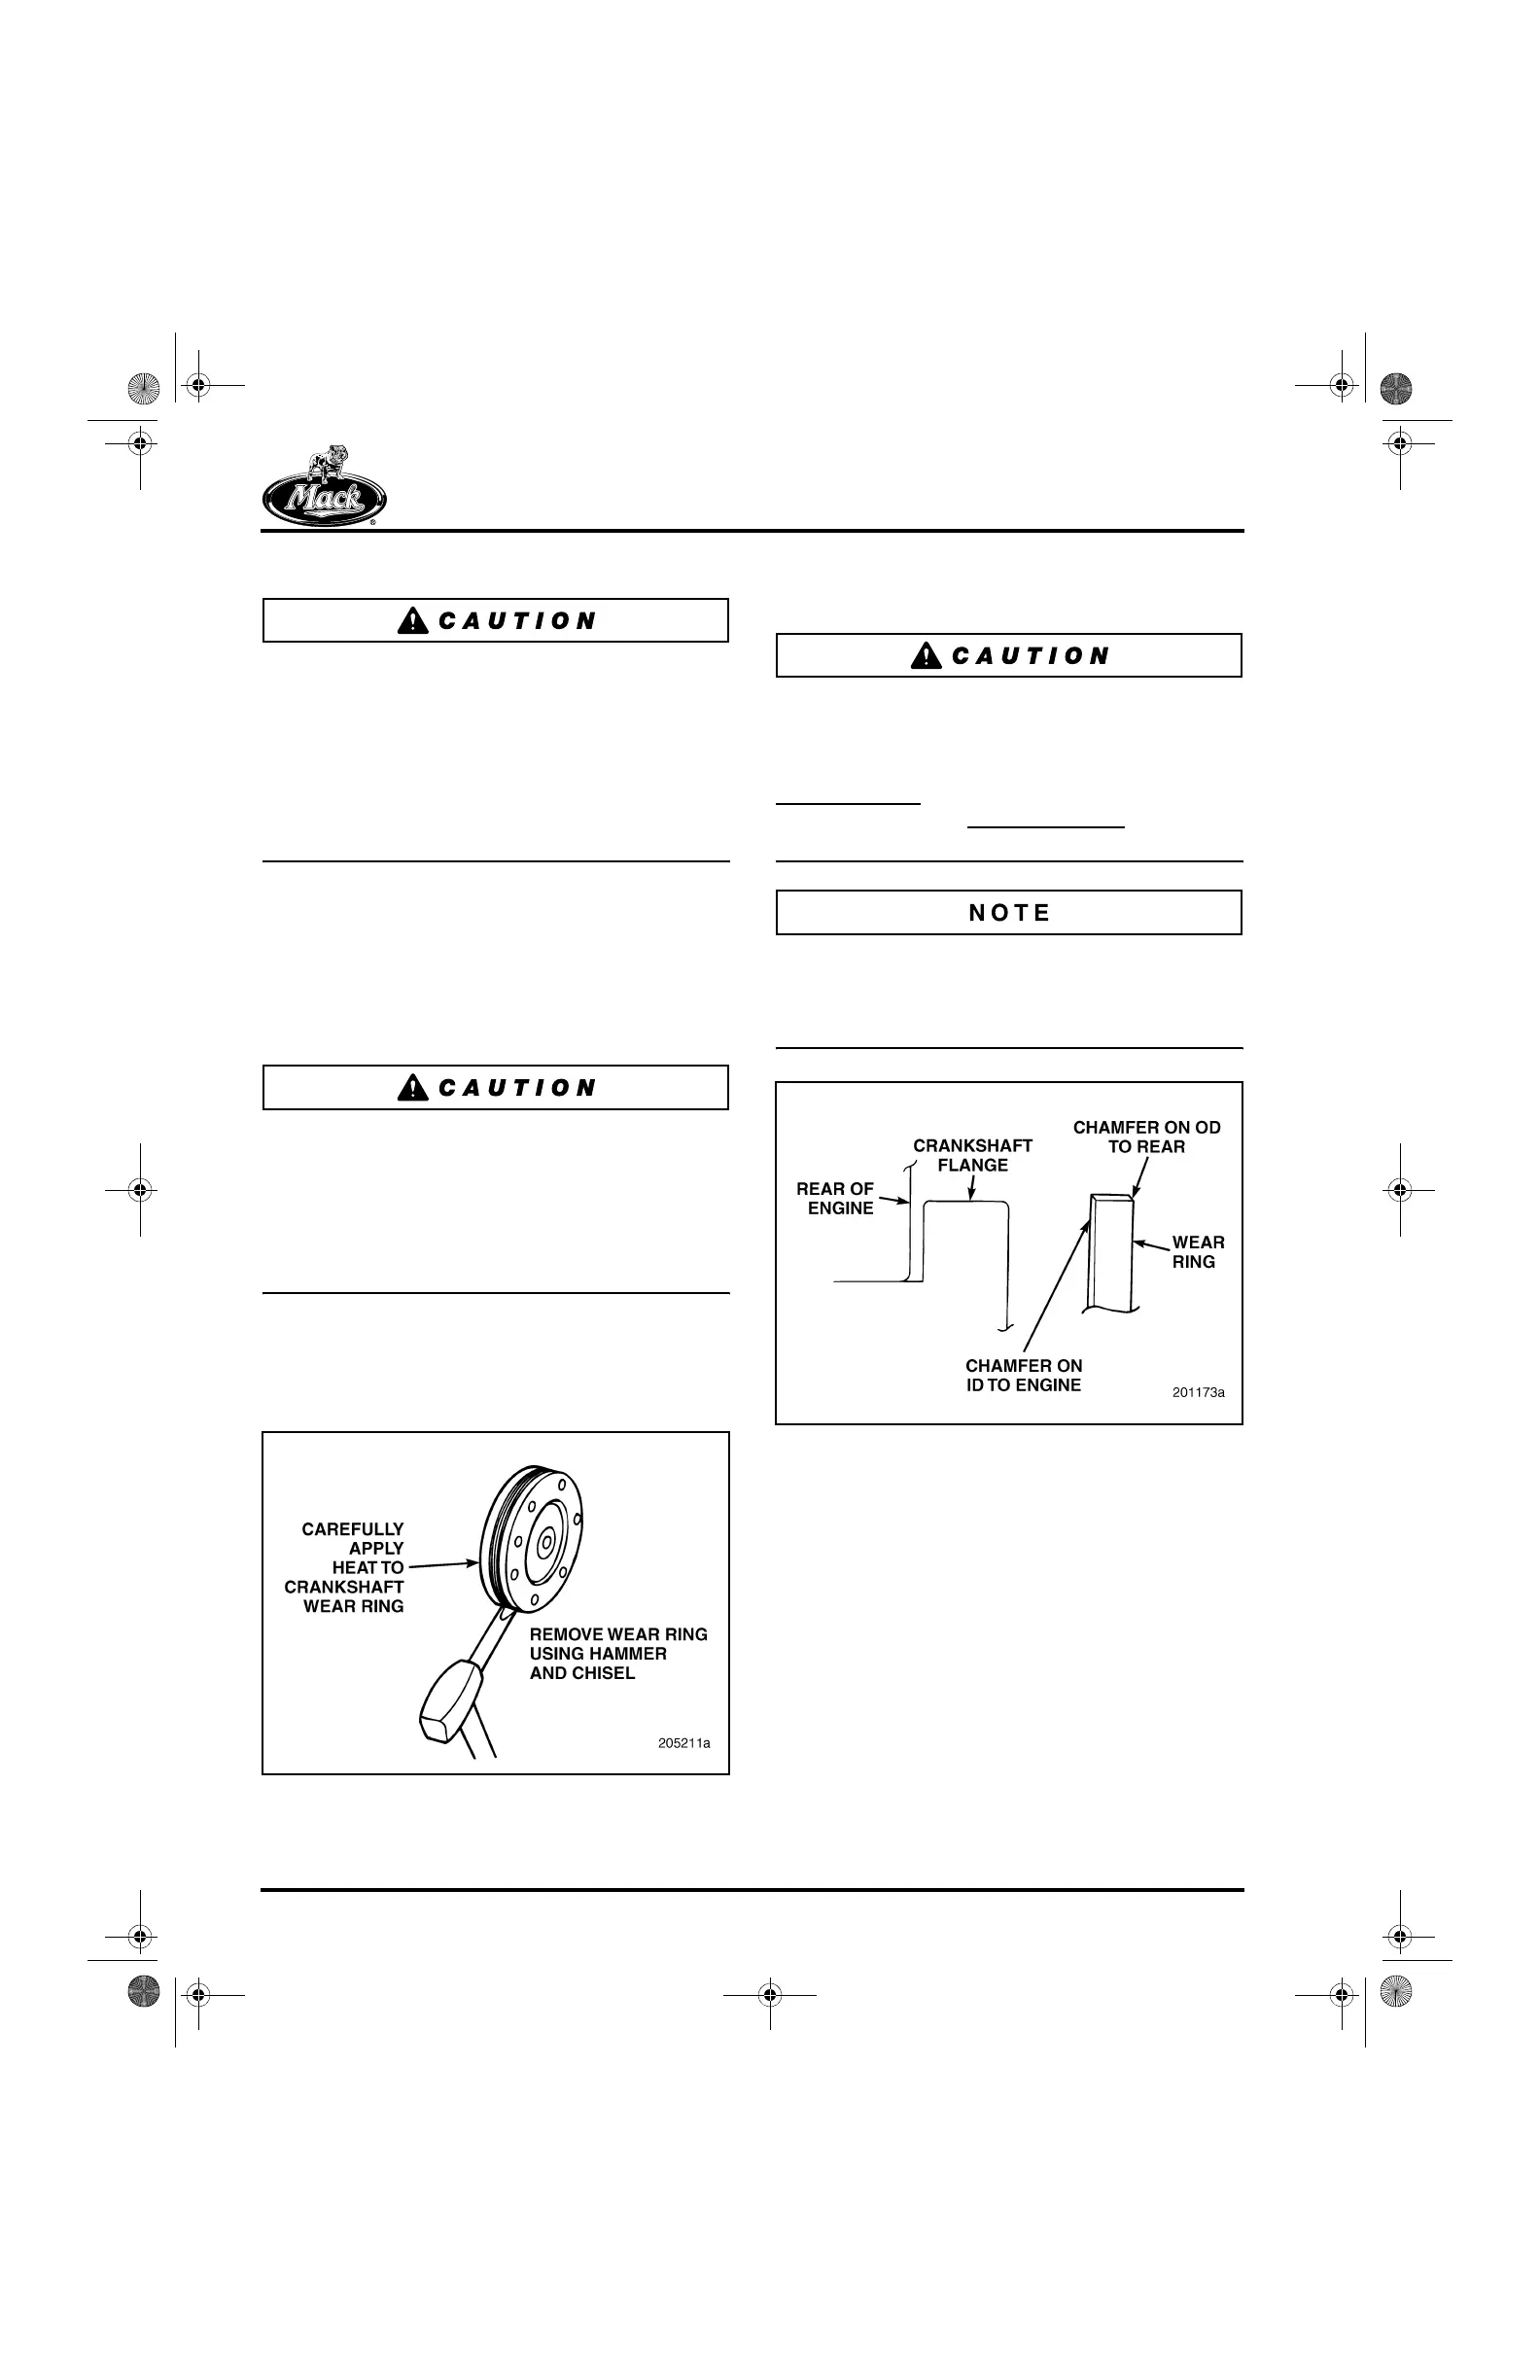
Special care must be taken not to damage the
crankshaft flange during wear ring removal.
Refer to Figure 222.
1. The wear ring can be removed by carefully
applying heat, using a ball-peen hammer to
expand the diameter, or by using a chisel to
split the wear ring. Use extreme care not to
damage the crankshaft flange.
Place the chisel face squarely on the wear ring
and carefully strike the chisel with a hammer to
cut part-way through the ring. The wear ring will
loosen enough to be removed without cutting
completely through it. The goal is to carefully
remove the wear ring in this manner and not cut,
nick or damage the crankshaft flange.
2. Thoroughly clean the flange area of the
crankshaft. Check for nicks or scratches and
repair any damaged areas with crocus cloth
as necessary.
222
Figure 222 — Crankshaft Wear Ring Removal
INSTALLATION
Refer to Figure 223.
On some wear rings it may be difficult to
determine the direction of the arrow on the inside
diameter. In this case, ensure proper installation
by installing the wear ring with the chamfer on the
inside diameter
positioned toward the engine.
The chamfer on the outside diameter
of the wear
ring must face away from the engine.
The crankshaft wear ring is a shrink fit on the
crankshaft flange. Use wear ring installer J 38880
and universal driver handle J 8092 to install the
ring to the proper depth.
223
Figure 223 — Proper Crankshaft Wear Ring Installation
1. Position the wear ring in the spring clips of
the wear ring installer J 38880 with the arrow
pointing away from the installer tool. Refer to
Figure 224.
5-111.bk Page 216 Monday, July 10, 2006 2:26 PM