REPAIR INSTRUCTIONS, PART 2
Page 381
1. With the engine in an upright position and
the hub correctly aligned with the mounting
bolt holes, place the idler hub against the
block and verify proper alignment of the
mounting holes.
455
Figure 455 — Hub Correctly Positioned on Block
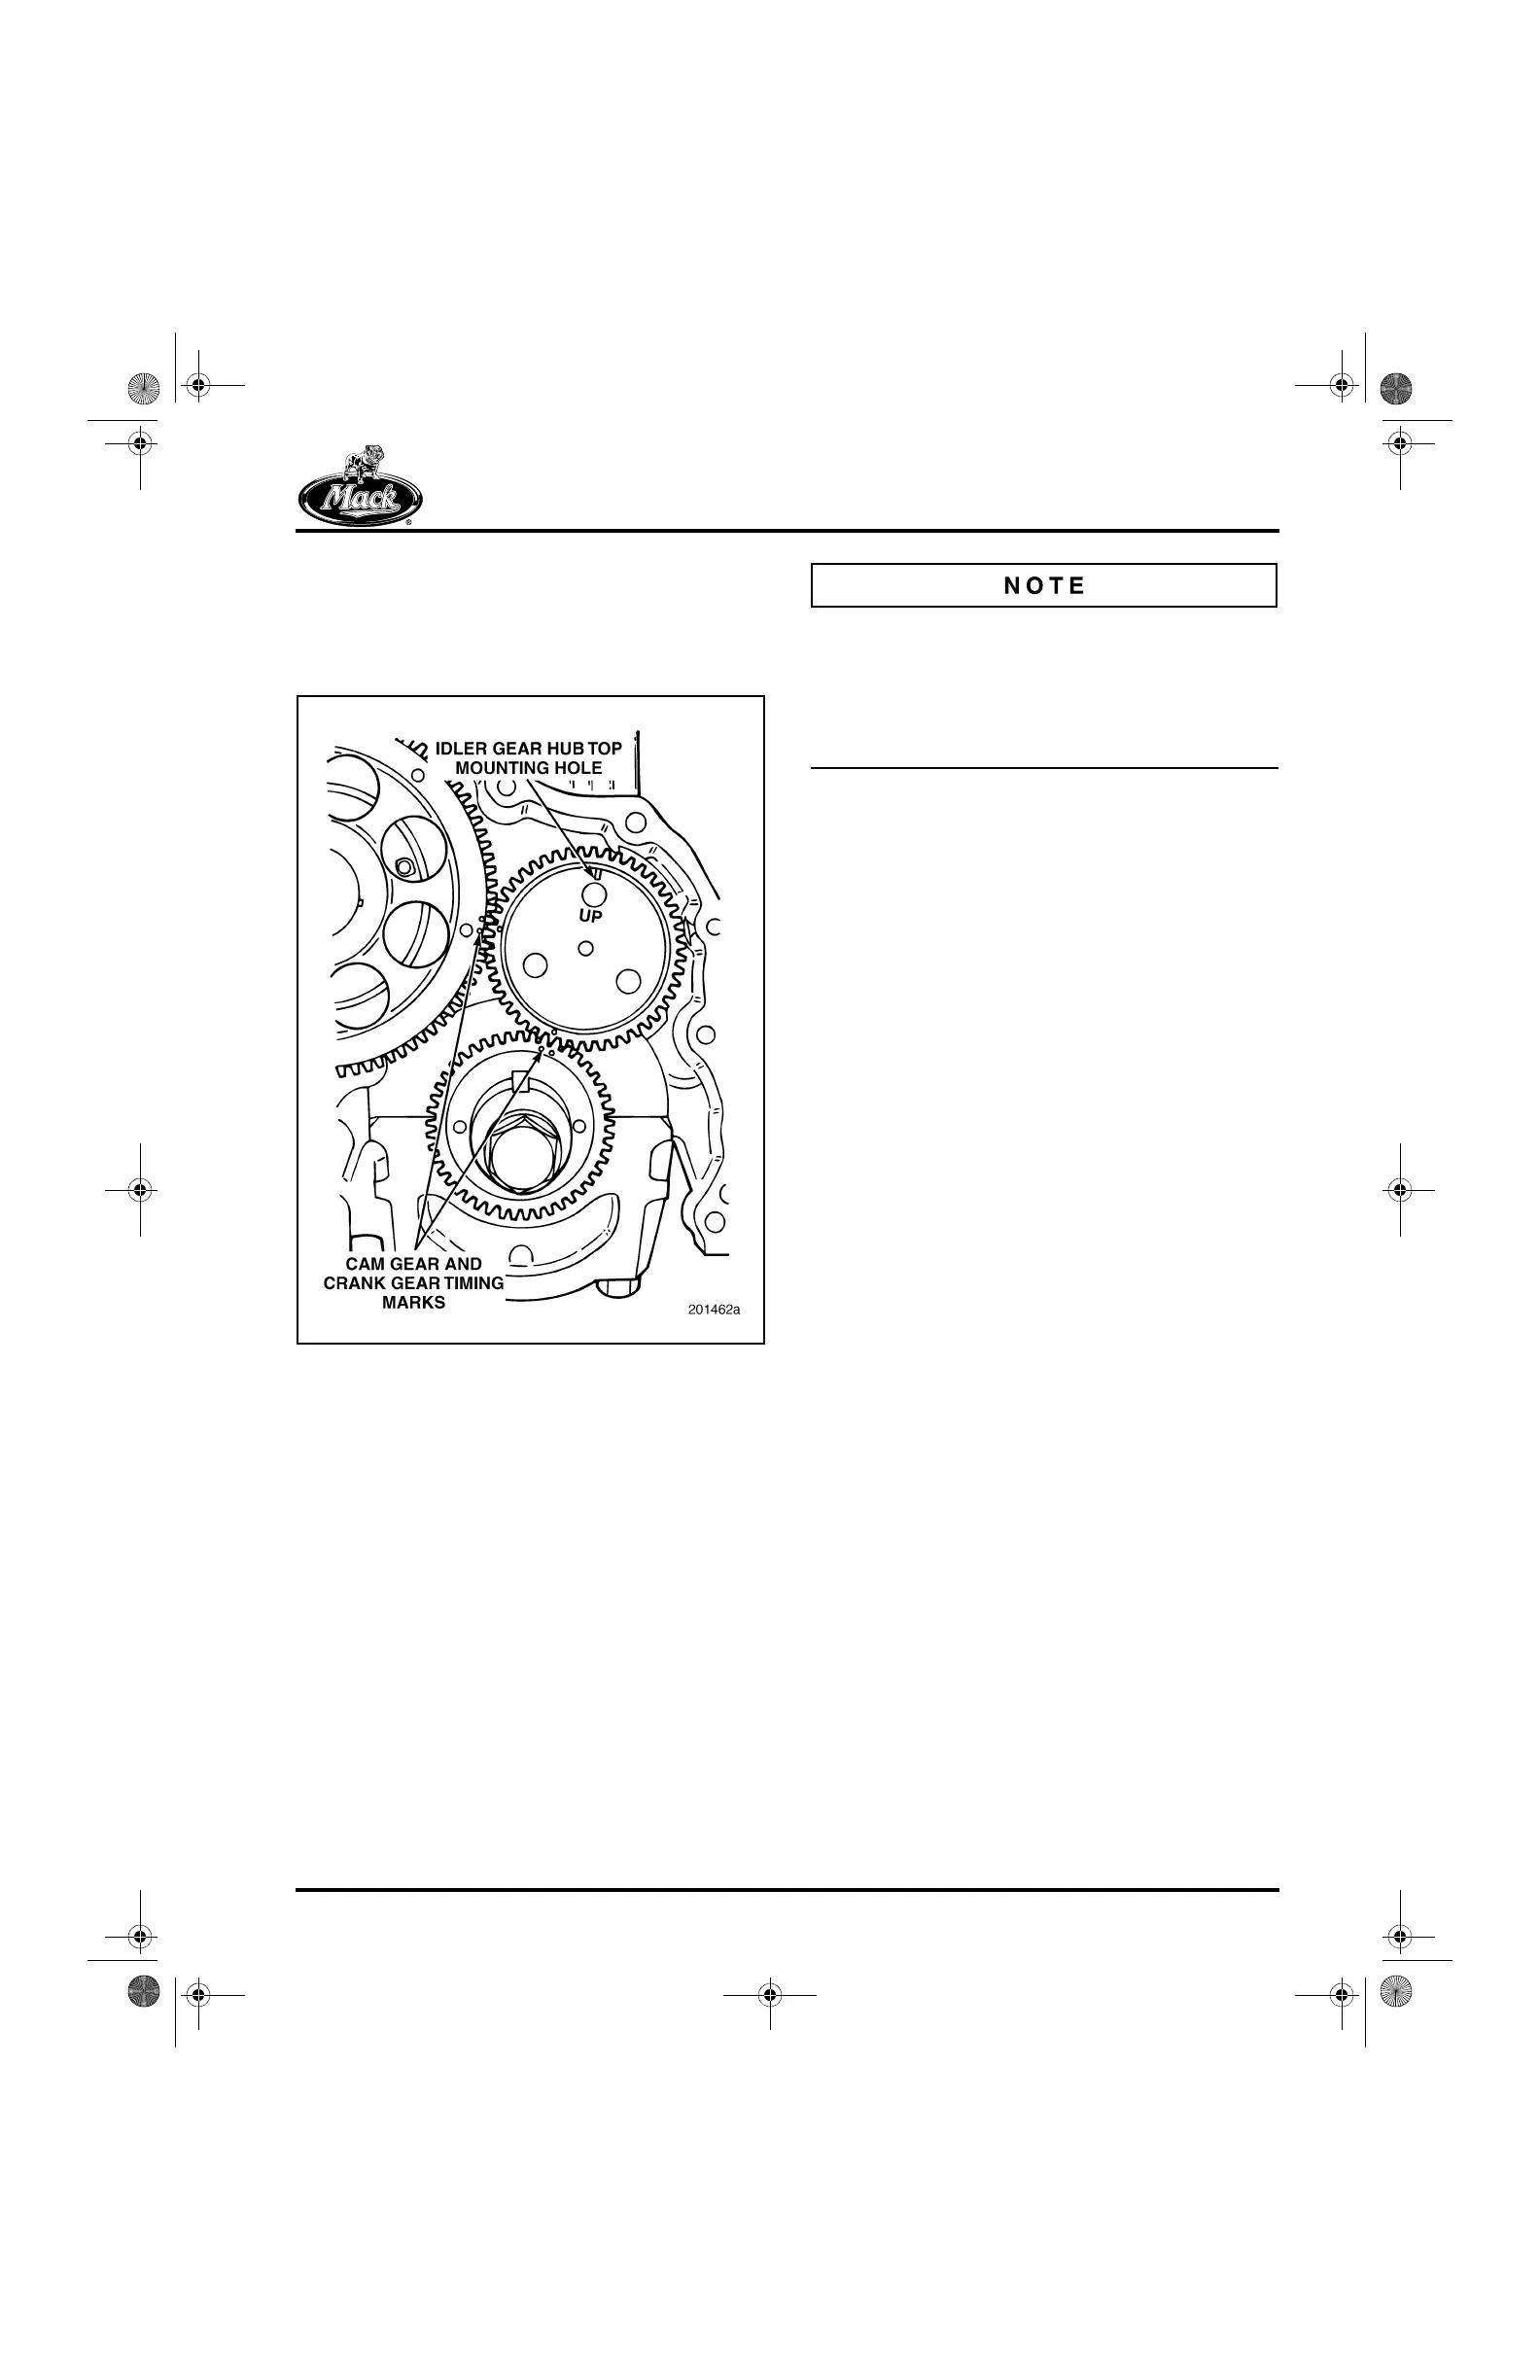
2. Align the timing marks. First look at the
timing marks on both the camshaft and
crankshaft gears. Note that two teeth are
marked (side-by-side) on each gear. These
double timing marks must align with the
single timing marks on the idler gear. When
properly installed, the two single timing
marks on the idler gear will fall between the
double timing marks on the camshaft and
crankshaft gears. To attain correct
alignment, rotate the crankshaft and
camshaft gears until the camshaft timing
marks are in approximately the 3:30
position, and the crankshaft gear timing
marks are in approximately the 1 o’clock
position (with engine in upright position and
viewed from the front).
There are 45 gear teeth on the crankshaft gear,
90 teeth on the camshaft gear and 48 on the idler
gear. Because the idler gear has three more teeth
than the crankshaft gear, the timing marks align
only once every 16 revolutions of the crankshaft.
This is called a “hunting tooth” system.
3. Slide the idler gear onto the hub assembly
with the timing marks facing out.
4. Position the idler gear timing marks so they
align with the crankshaft and camshaft gear
timing marks. Then slide the idler gear/hub
assembly into position on the engine block.
5. Coat the hub bolts with clean engine oil and
thread the bolts a few turns into the
respective bolt holes at the front of the
engine block.
6. Tap the hub portion of the assembly with a
brass hammer to seat the components.
7. Tighten the bolts evenly to specification,
70 lb-ft (95 N폷m). Do not use an impact
wrench or other air tool to tighten the bolts.
Final Assembly
Complete the reassembly of the engine by
installing the front cover, water pump/housing,
seals, oil pan, push rods, rocker shaft
assemblies, engine brake assemblies (if
equipped), valve covers, electronic unit pumps
and roller tappets, EGR components (AC engine
only), other engine accessories/drives, radiator,
hood and fender assembly, etc.
Once the engine reassembly has been
accomplished, follow the procedures under
“Engine Setup and Adjustments,” and “Final
Preparation and Operational Check” in the
REPAIR INSTRUCTIONS section to complete
the camshaft replacement.
5-111.bk Page 381 Monday, July 10, 2006 2:26 PM