REPAIR INSTRUCTIONS, PART 2
Page 405
4. Loosen and remove the clamp connecting
the hot tube-to-EGR valve outlet flange. The
hot tube also is fitted with wire-mesh seals in
the flanges at both ends. Remove and
discard the seals. Inspect the tube for
corrosion or damage and replace as
required.
HOT TUBE INSTALLATION
Whenever an EGR hot tube clamp has been in
service and is removed, the retaining nut may gall
the threads of the T-bolt. Always install a new
T-bolt and nut in the clamp body whenever a
clamp has been removed. However, the body of
the clamp can be reused and should not be
replaced unless it is broken or damaged.
1. Loosen the four mounting nuts securing the
EGR valve to the exhaust manifold. DO NOT
remove the valve.
If reusing the EGR hot tube, make sure that there
is flex in the tube to ensure good alignment with
the mating flanges of the EGR valve and cooler.
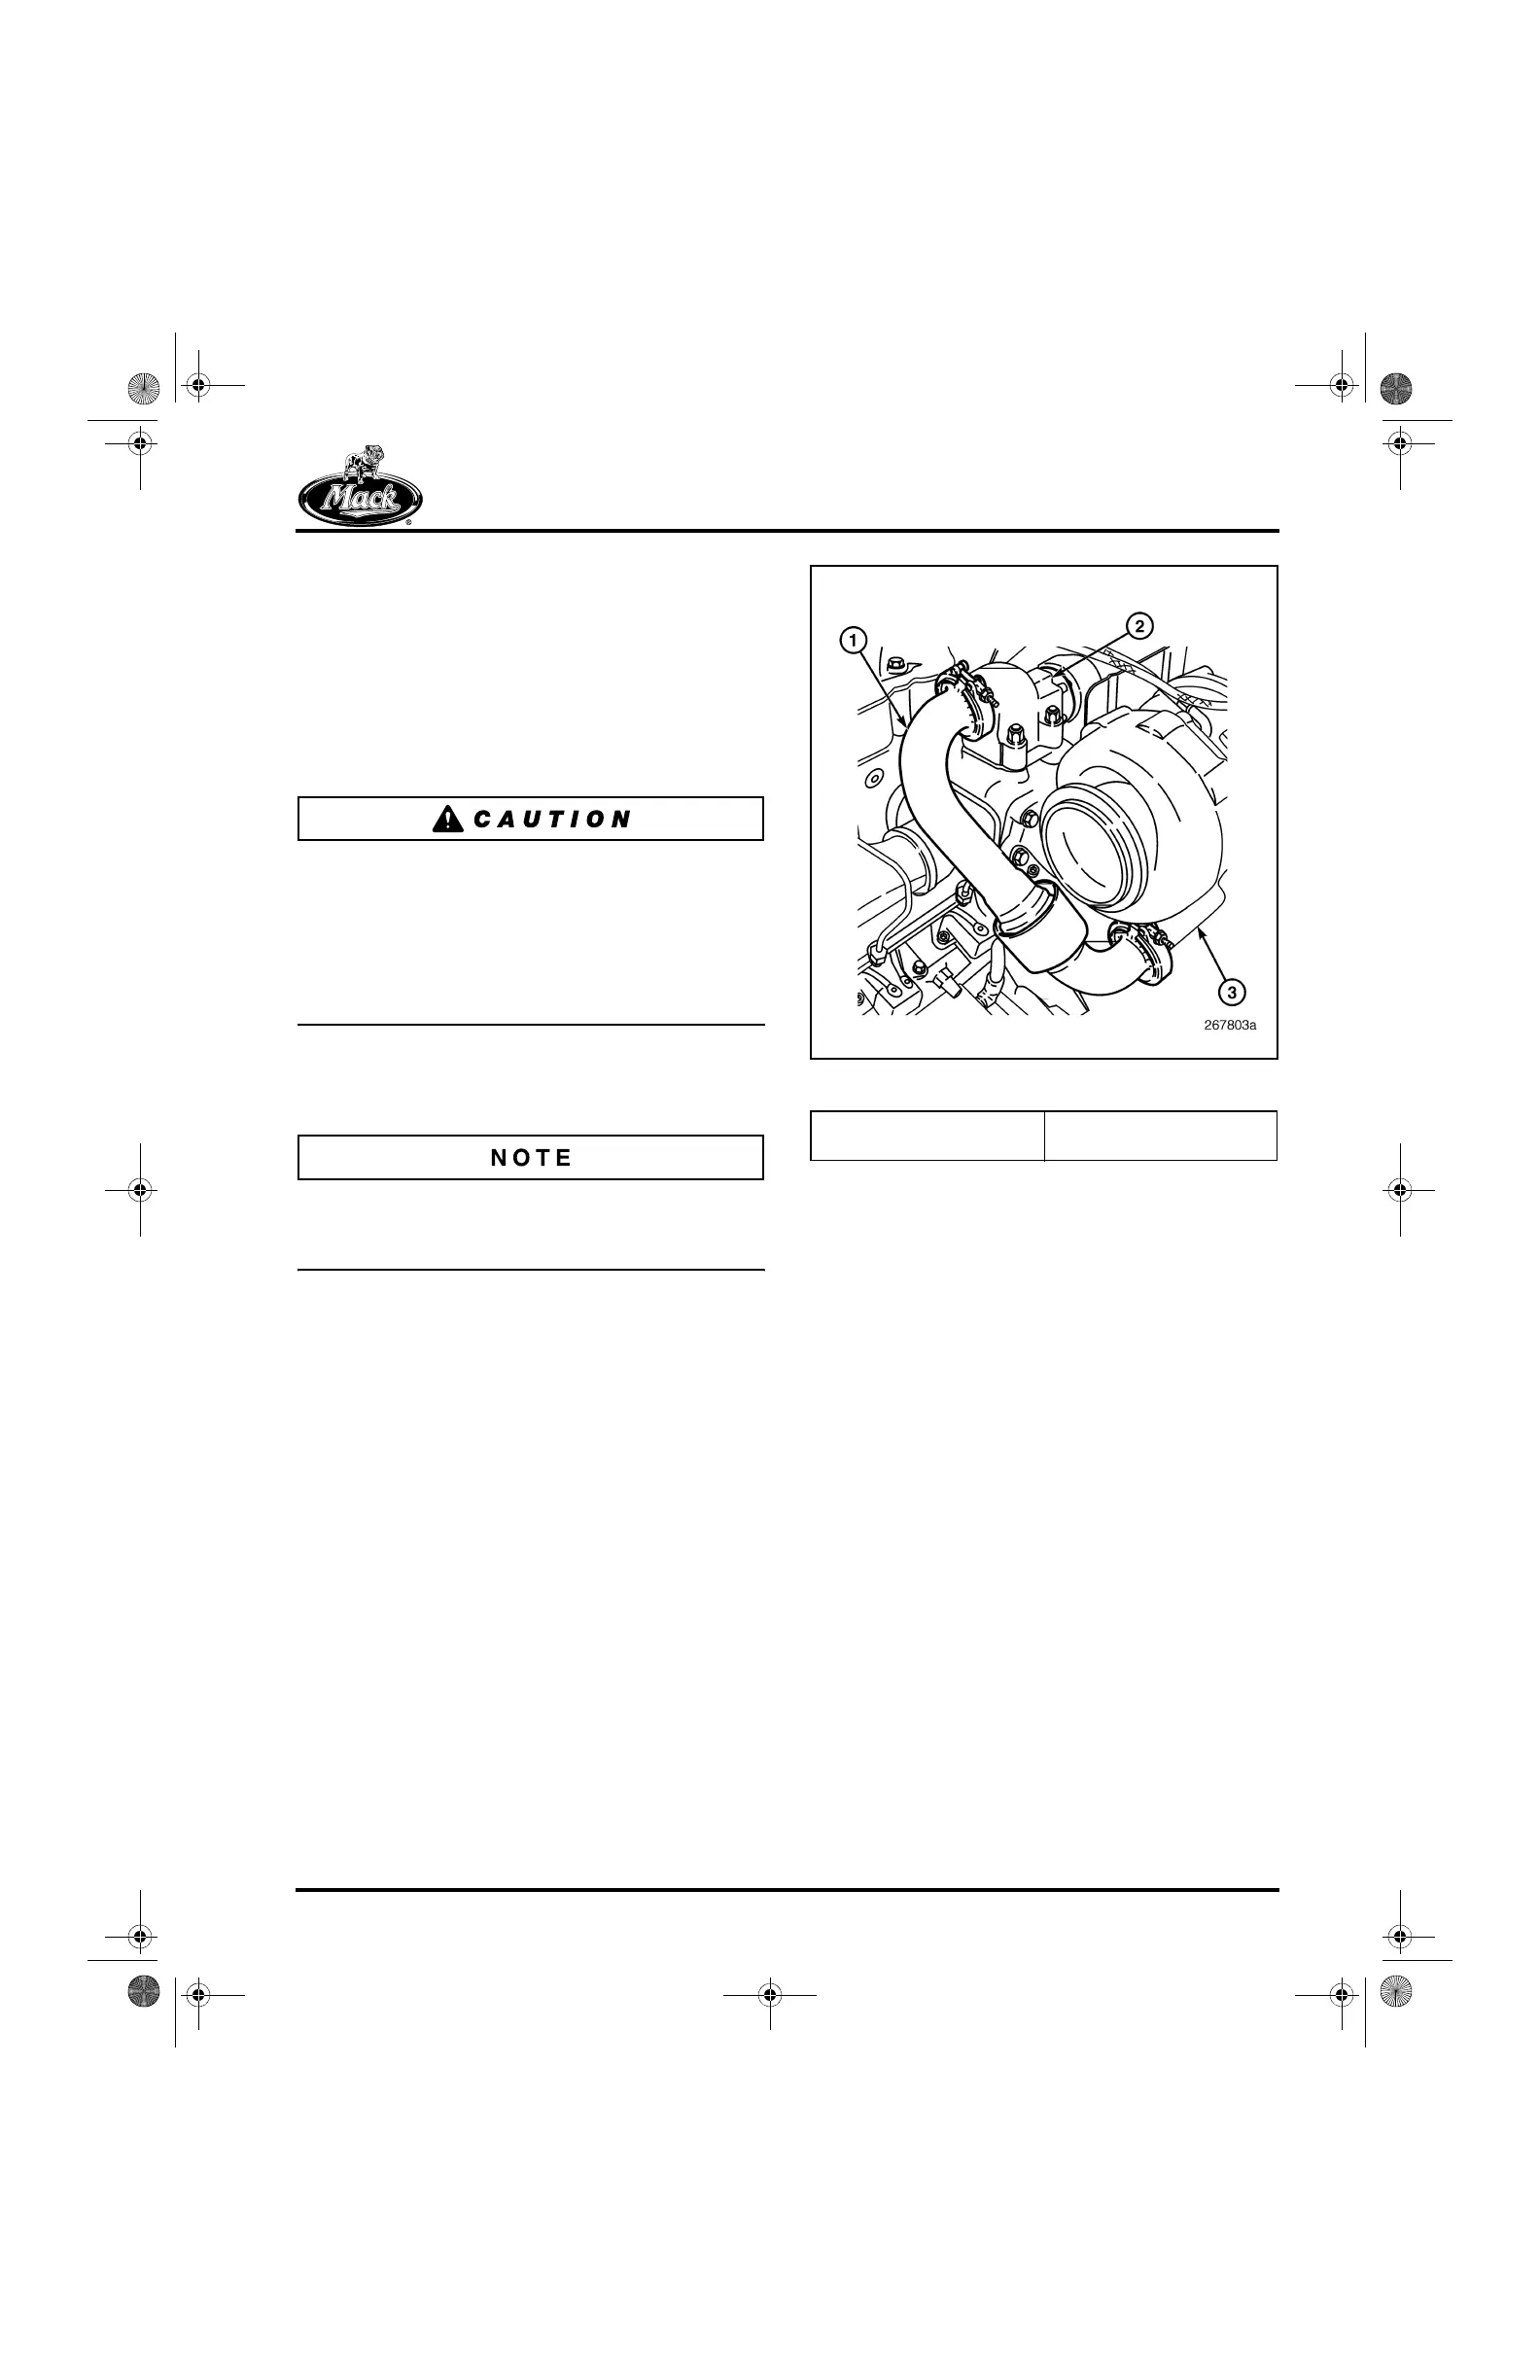
2. Install new seals in the flanges at each end
of the EGR hot tube. Place the hot tube in
position between the EGR valve and cooler
(Figure 489). Make sure that the gap
between each set of flanges is uniform all
around. Install new T-bolts and nuts in the
clamps and tighten to specification, 110 lb-in
(12.4 N폷m).
489
Figure 489 — EGR Gas Hot Tube, Installed
3. Tighten the EGR valve mounting nuts to
specification, 40 lb-ft (54 N폷m).
4. Install the three spacer studs on the longer
EGR valve mounting studs. Tighten the
spacer studs to 40 lb-ft (54 N폷m).
5. Install a flat washer on top of each spacer
stud and then install the clamp bracket and
three bracket retaining nuts. Tighten the
nuts to 40 lb-ft (54 N폷m).
6. With the installation complete, tap each new
clamp several times with a light rubber
mallet and then retorque the clamps.
1. EGR Gas Hot Tube
2. EGR Valve
3. EGR Cooler
5-111.bk Page 405 Monday, July 10, 2006 2:26 PM
 Loading...

