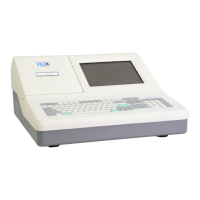
Integritest Exacta Filter Integrity Test Instrument
Operating and Maintenance Manual Maintenance and Calibration 181
BACKGROUND/INTRODUCTION
There are four components in the Integritest Exacta unit that require calibrations:
1. The primary pressure transducer
2. The secondary pressure transducer
3. The electronic pressure regulator
4. The internal temperature sensor
External Calibration
The Integritest Exacta system provides an automated calibration function that allows on-site
calibration of the instrument against a reference standard (this is called an external
calibration). The calibration program provides a printout as a permanent record for regulatory
purposes. The calibration consists of the following:
• Determining that the devices being calibrated are operating within their
specifications, and making adjustments to their calibration coefficients as
necessary.
• ”Matching” (for pressure calibration only) the transducers and regulator so that
they read the same value, within proper tolerances.
Internal Calibration
The Integritest Exacta system also provides a pressure calibration check, called an Internal
Calibration (only applicable to pressure calibration), which is conducted without an external
reference. In this process the primary transducer is considered the reference and is compared
against the secondary transducer and the electronic pressure regulator.
Calibration Approach
• No physical adjustments are required. All calibration adjustments are
accomplished through software algorithms.
• The manufacturer’s specifications for the transducers and temperature sensor are
used to define component “failure”; i.e., that the component is “broken.”
• Each component has a defined and understood degree of random variability.
Adjustment within this variability enlarges the observed variability rather than
diminishing it. Therefore adjustments to the calibration are only made when
necessary.
Calibration Frequency Recommendations
The instrument should undergo a full external calibration at least once every 6 months.
The unit should also undergo an internal calibration after each 100 filter tests have been
performed. It is often advisable, however, to recalibrate more frequently than the period
defined in the hardware specifications in order to assure product quality and lot standards.

 Loading...