Device Configuration 5 - 333
3. Select a target device from the device browser in the lower, left-hand, side of the UI.
4. Select Security to expand its sub menu options.
5. Select Auto IPSec Tunnel to configure its parameters.
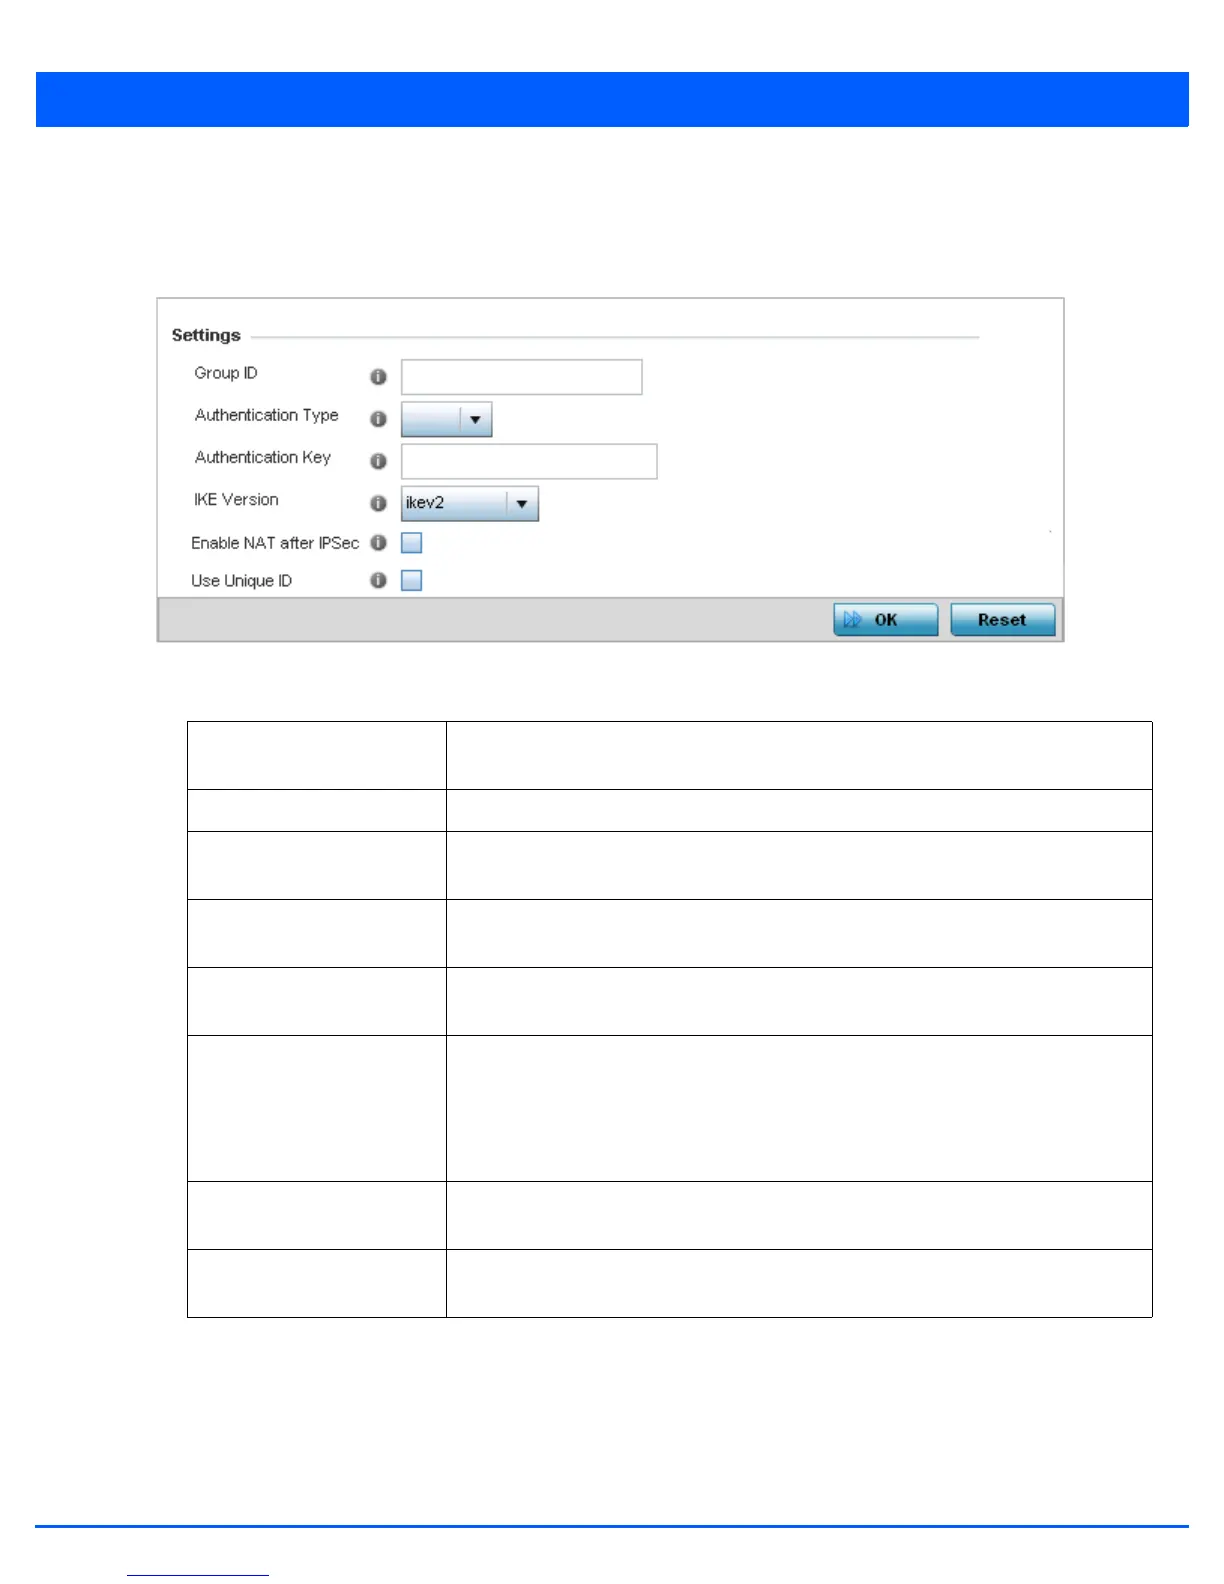
Figure 5-220 Device Overrides - Security – Auto IPSec Tunnel screen
6. Refer to the following table to override the Auto IPSec tunnel settings:
7. Select OK to save the updates made to the Auto IPSec Tunnel screen. Selecting Reset reverts the screen to its last saved
configuration.
Group ID Configure the ID string used for IKE authentication. String length can be between 1-64
characters
Authentication Type Set the IPSec Authentication Type. Options include PSK (Pre Shared Key) or rsa.
Authentication Key Set the common key for authentication between the remote tunnel peer. Key length is
between 8-21 characters
IKE Version Configure the IKE version to use. The available options are ikev1-main, ikev1-aggr and
ikev2.
Enable NAT after IPSec Select this option to enable NAT after IPSec. Enable this if there are NATted networks
behind VPN tunnels.
Use Unique ID In scenarios where different access points behind different NAT boxes/routers have the
same IP address, it is not possible to create a tunnel between the wireless controller
and access point, as the wireless controller fails to identify the access point uniquely.
When selected, each access point behind a same NAT box/router will have an unique
ID which is used to create the VPN tunnel.
Re-Authentication Select this option to re-authenticate the key on a IKE rekey. This setting is disabled by
default.
IKE Life Time Set a lifetime in either Seconds (600 - 86,400), Minutes (10 - 1,440), Hours (1 - 24) or
Days (1) for IKE security association duration. The default is 8600 seconds.

 Loading...