Loosen in reverse order 6-1, then go back and disengage completely.
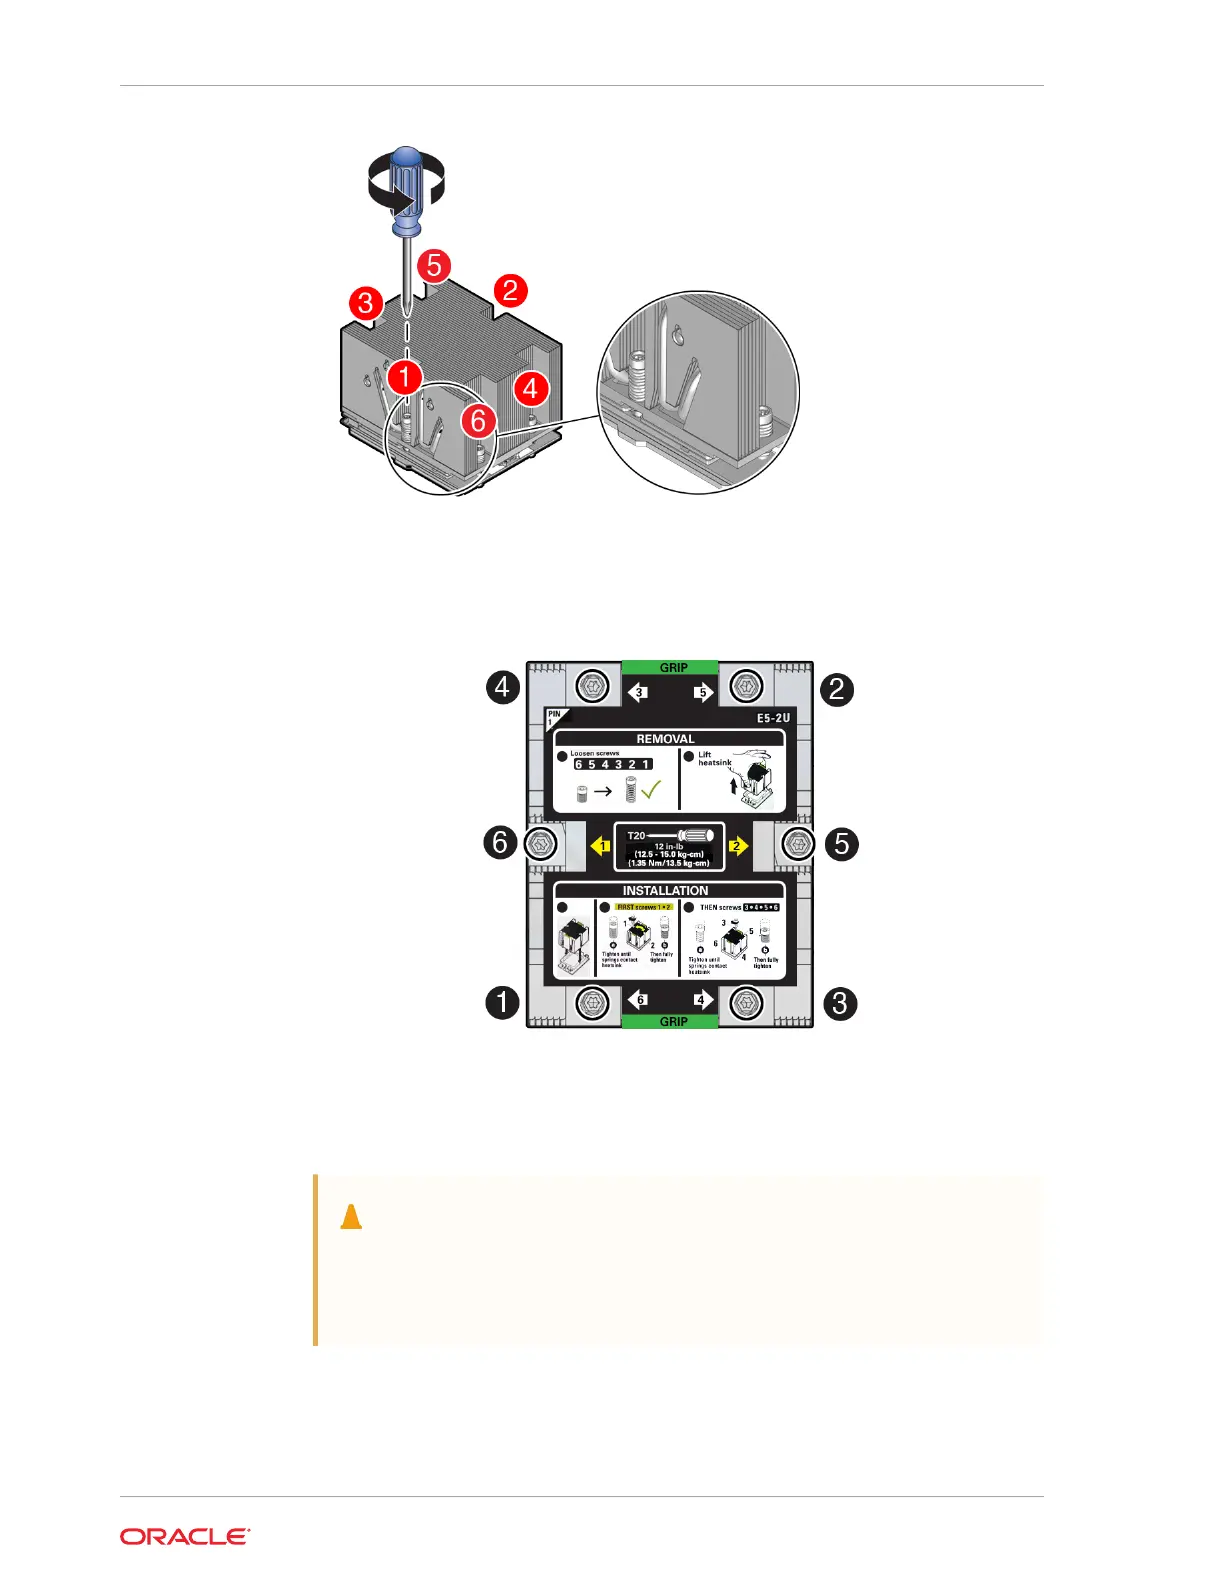
a. Loosen captive screws 6,5,4,3,2,1 in the order shown in the illustration.
b. Disengage captive screws 6,5,4,3,2,1 in the order shown in the illustration.
Use a torque driver set to 12 in-lb (inch-pound) (1.35 Nm/13.5 kg-cm) force with
T20 Torx bit.
4. Lift the heatsink from the socket.
Caution:
There is a thin layer of thermal grease between the heatsink and the
processor. Do not allow the thermal grease to contaminate the
workspace or other components.
Chapter 13
Identify and Remove a Processor
13-6