222
Polyend Tracker+ Manual
NOTES
Audio
8
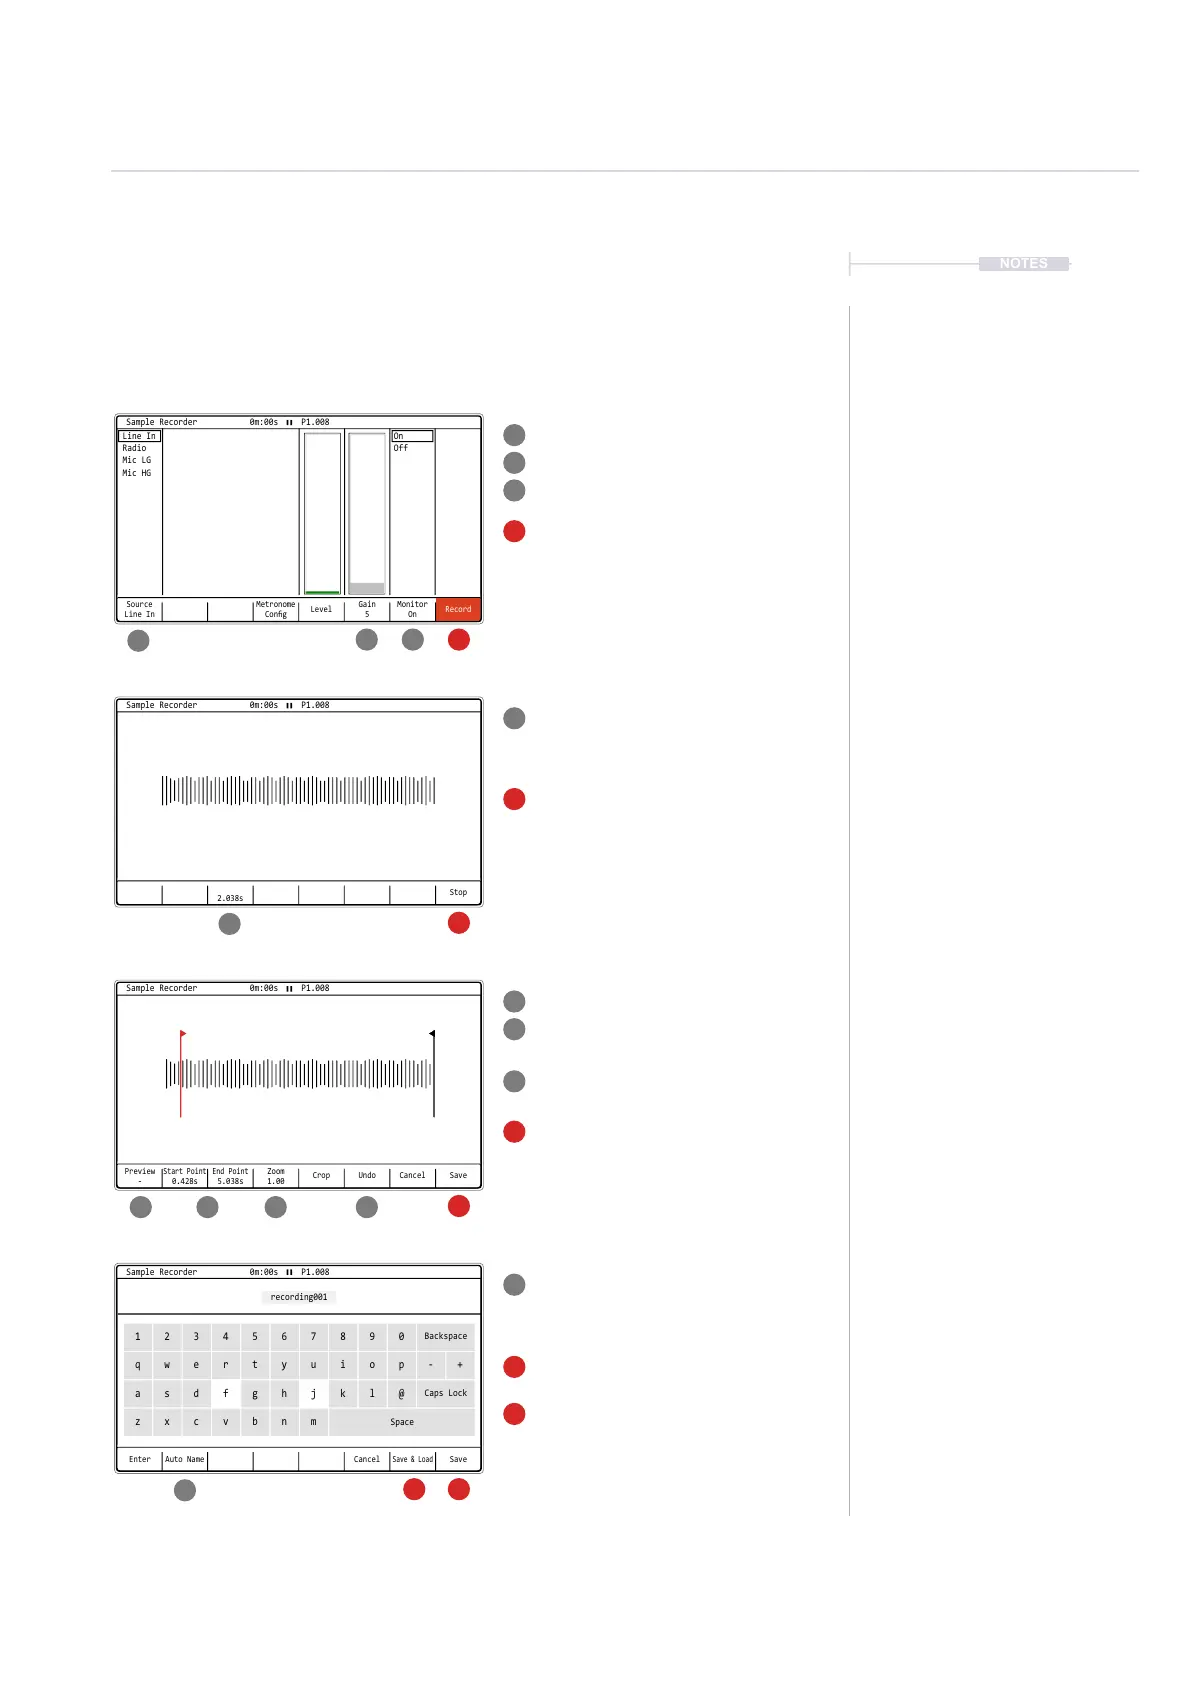
Sampling Process
Starting by selecting the [Sample Recorder] page
As pre-recording optional actions, select the
audio [Source], set [Monitor] to on and adjust
the [Gain] to establish a suitable recording
level. External devices should be auditioned
while adjusting the gain to hear the effect.
Press [Record]. 8th Screen Button, to start
sampling the incoming audio.
Play the external device.
Trim the [Start] and [End] points of the
recorded sample while previewing the audio
to get the positions correct. Also [Zoom] in or
out as a visual aid for precise editing.
The [Undo] option can reset previous state if
errors are made.
Press [Save] when editing is complete.
Alternatively Press [Cancel] to exit without
saving. Conrm cancel with [Yes].
The sampler will capture the audio into the
Tracker+ memory buffer and display the
recording time. Recording will automatically
stop if the memory is full at ~750 Secs, Mono.
Press [Stop]. 8th Screen Button, to manually
stop the sampling process.
Type in a name for the sample or use [Auto
Name] to generate a system name. Pads act
as the qwerty keyboard, [Enter] will enter a
highlighted character.
Press [Save], 8th Screen Button, to save the
le into the SD Card ‘Recordings’ folder.
Press [Save & Load], 7th Screen Button, to
save the le into the SD Card ‘Recordings’
folder and also load the sample into the
instrument list. The instrument list will open
with this option.
1
78 8 9
5
11
1
7
5
11
3
3
9
2
2
8
4
10
6
1213
4
10
6
12
13
Source
Line In
Gain
5
Monitor
On
Metronome
Cong
Record
Level
On
Off
Line In
Radio
Mic LG
Mic HG
Sample Recorder 0m:00s P1.008
Start Point
0.428s
Preview
-
UndoCrop Cancel Save
End Point
5.038s
Zoom
1.00
Sample Recorder 0m:00s P1.008
2.038s
Stop
Sample Recorder 0m:00s P1.008
Enter CancelAuto Name
Save
&
Load
Save
Sample Recorder 0m:00s P1.008
recording001
1
q
a
z
4
r
f
v
7
u
j
m
0
p - +
@
2
w
s
x
5
t
g
b
8
i
k
Backspace
Caps Lock
Space
3
e
d
c
6
y
h
n
9
o
l