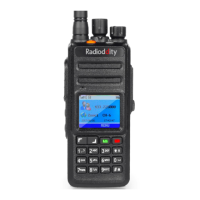
Radioddity Extended manual for Radioddity DB25-D, DB40-D & GD-88 v3.0
© Radioddity 2023 page 216 of 252
8. Set Bandwidth to ‘12.5’ (kHz).
9. Optional, set ‘RX QT/DQT’ and ‘TX QT/DQT’ for any CTCSS or DCS encoding that
might be required for connection to the local repeater. If unsure, set both
parameters initially for ‘Off’ for not using any CTCSS/DCS decoding and
encoding. That will at least allow you to hear the local repeater.
Notes: Within a future version of the CPS the names of those two parameters will
be changed to ‘RX CTCSS/DCS’ and ‘TX CTCSS/DCS’.
10. Set Encryption to ‘Off’
11. Set APRS to ‘Off’ for now
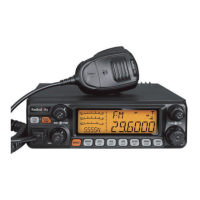
12. If a pilot tone is required to
activate the repeater, assign the
Pilot tone function [1750Hz] to
one of the programmable [P]-
keys.
13. Write your settings to the radio. Do not forget to switch to Zone ‘duplex FM’
and select channel ‘DB0OHL rpt’ (or equivalent) at your Radioddity DB25-D,
DB40-D or GD-88. Now you are ready for your very first QSO routed via your
local repeater.
16.3 Analog FM operation including analog APRS
Using analog APRS does require a bunch of settings to be made within the APRS
menu of the Radioddity CPS. For initial testing, we advise to use a beacon with a
fixed location (1) representing the latitude and longitude (2) of your current QTH.
This will make the APRS system available immediately after power up. If you set
the beacon for ‘GPS Location’ (1) you need to wait until the GPS receiver of your
Radioddity DB25-D, DB40-D or GD-88 has successfully established a connection
to at least 3 satellites. This will be indicated by a green sign / in the middle of
the topmost line of the radios display.
Furthermore, set the analog APRS reporting frequency (3) according to your local
requirements. For the US that frequency is 144.3900 MHz, for Europe it is
144.8000 MHz. For all other countries see the details on ‘TX Freq [MHz]’ regarding
that parameter.