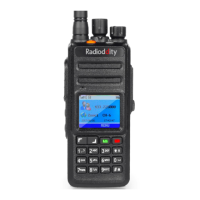
Radioddity Extended manual for Radioddity DB25-D, DB40-D & GD-88 v3.0
© Radioddity 2023 page 62 of 252
6.9 Channel Selection
The desired working channel can be selected as follows:
1. When the ‘ ’ icon, ‘PTT’ or ‘CTRL’ is shown left to the channel name of VFO A
or B, rotate the [ENC] knob or use the [▲/▼] to select the desired channel.
2. When the ‘ ’ icon, ‘PTT’ or ‘CTRL’ is shown left to the channel name of VFO A
or B, input the desired channel number by using the numerical keypad.
3. When ‘CTRL’ is shown left to the channel name of VFO A or B. press the [Menu]-
key for 3 seconds. A dialog box and total channels of current zone pops up, to
enter the desired channel number through the numerical keypad.
6.10 Switch between VFO and Channel Mode
In Standby Mode, when the ‘ ’ icon is shown left to the VFO A or B, access
the ‘MENU → Local Set → DisplayMode’ and choose VFO Mode as Display
Mode.
In Standby Mode, when ‘PTT’ is shown in the lower left to the VFO A or B,
long press the volume-key of the current VFO to switch the display mode
between VFO Mode and Channel Mode.
In Standby Mode, when ‘CTRL’ is shown left to the VFO A or B, long press the
[VFO A/B TX selection]-key to switch the display mode between VFO
Mode and Channel Mode.
6.11 VFO Frequency Set
In Standby Mode, when the ‘ ’ icon, ‘PTT’ or ‘CTRL’ is
shown left to the VFO A or B and the current VFO is in
VFO mode, the desired frequency can be entered
through the numeric keypad. For example, for
438.237500 MHz, directly input
[4] [3] [8] [2] [3] [7] [5] [0] [0]
using the numeric keyboard.
Notes: The current frequency can be increased / decreased by turning the [ENC] knob.
For more details on editing a channel please refer to chapter 10.12 Channel
Edit on page 112.