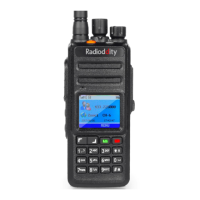
Radioddity Extended manual for Radioddity DB25-D, DB40-D & GD-88 v3.0
© Radioddity 2023 page 58 of 252
6 Basic Operation
6.1 Turning the radio On/Off
ON: Make sure the power supply is connected correctly, long press the [ J key
or turn the volume knob clockwise until you hear a ‘click’ to power
on the radio till a ‘Beep sound’ is heard (if turned on). After power on, the
Radioddity logo and ‘Powering On’ text is shown on the display. The radio is
now in standby-mode.
OFF: Long press the [ J key or turn the volume knob counterclockwise
until you hear a click to power off the radio.
6.2 Adjust Volume
For adjusting the volume on your Radioddity DB25-D, short press the
[VOL/SQL]-key , after the volume level is displayed in the upper right of the
active VFO, rotate the [ENC] button clockwise (increase) or counterclockwise
(decrease) to adjust the volume. Alternatively press the ENC-knob and keep
it depressed whilst then turning the knob to adjust the speaker volume. The
green volume scroll bar in the middle of the display will change according to
the volume level. The volume setting applies to both VFOs A and B. To store
the setting, just press the ENC-knob as long as the current volume-setting is
blinking.
For adjusting the volume on your Radioddity DB40-D, turn the volume knob
of the corresponding VFO clockwise (increase) or counterclockwise
(decrease) to adjust the volume. The green volume scroll bar of the selected
VFO will change according to the volume level. The volume settings for VFO
A and B may be set independent from each other.
For adjusting the volume of the VFO that´s currently marked as ‘CTRL’ on
your Radioddity GD-88, turn the volume knob clockwise (increase) or
counterclockwise (decrease) to adjust the volume. The green volume scroll
bar of the selected VFO will change according to the volume level. The
volume settings for each VFO A and B may be set independent from each
other.
6.3 Adjust Squelch
The ‘ ’ icon displayed left to the channel name of the upper VFO A or the
lower VFO B indicates the selected VFO. The squelch level for both VFOs, A
and B may be set separately by accessing the menu or long press the
[VOL/SQL]-key. In general, higher squelch levels do require the received
signal strength to be stronger. Settable squelch level range is from ‘0, 1 - 9’.
Level 0 is normally open, and there is background sound from the speaker