Page 196
STAT
IM
2000/2000S Service Guide
96-108639 Rev 3.0
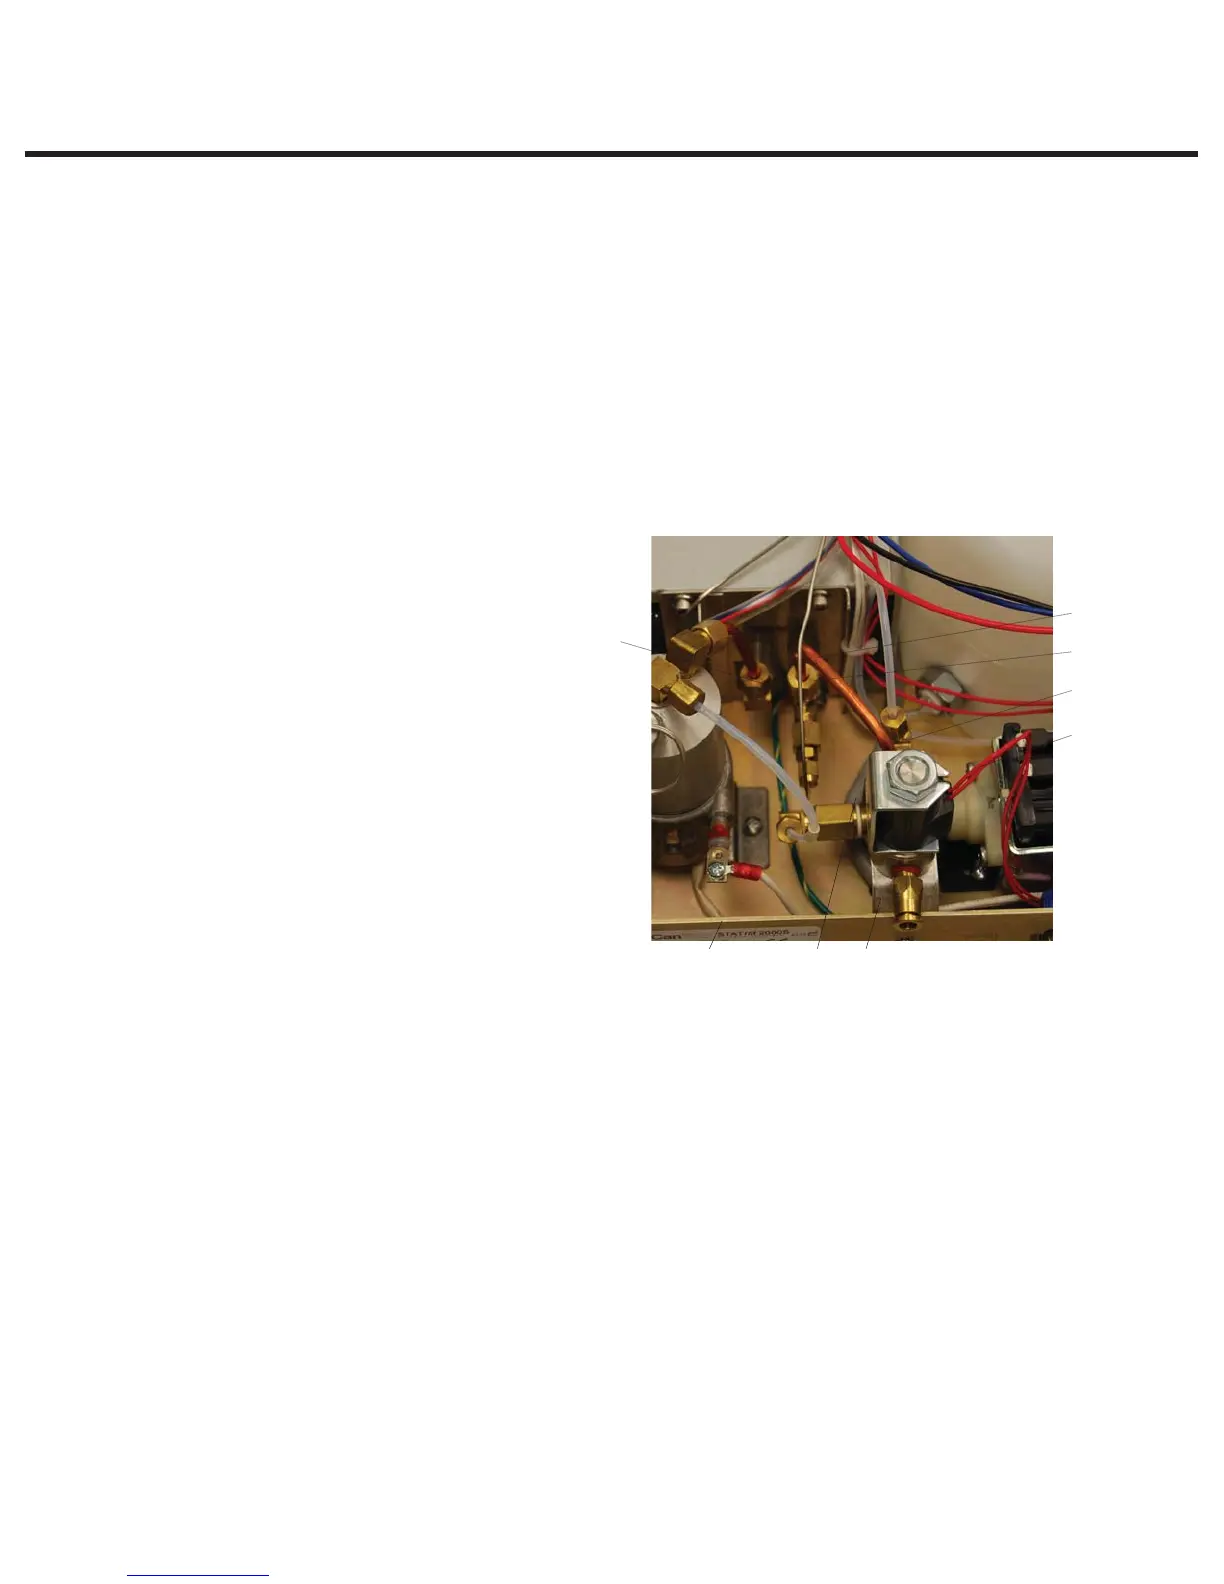
9. Solenoid Valve and Pressure Transducer
Removing the Solenoid Valve
To remove the solenoid valve proceed as follows (See Figure 3):
1. Turn the power switch OFF, and unplug the unit.
2. Carefully cut the cable ties holding the solenoid valve leads and disconnect the leads (1) from
the Controller Board terminal block positions labelled J1-7 LINE and J1-8 NEUTRAL.
3. Disconnect the compression nut (2) holding the outlet probe tube (3) to the outlet fitting (4) on
the probe bracket assembly.
4. Remove the two screws (5) that attach the solenoid valve bracket (6) to the chassis (7): one on
the inside of the chassis, one on the outer rear surface of the chassis.
5. Inspect the solenoid valve to determine
whether servicing or replacement is
warranted.
Refitting the Solenoid Valve
To refit the solenoid valve assembly, proceed as follows (see Figure 3):
1. Make sure the power switch is OFF, and the unit is unplugged.
2. Connect a new outlet probe tube (3) to the solenoid valve inlet fitting (8). Thread the
compression nut until finger tight, on the inlet fitting.
3. Place the solenoid valve assembly in the unit.
4. Connect the other end of the outlet probe tube (3) to the outlet probe fitting on the probe
bracket outlet fitting (4). Thread the compression nut until finger tight, on the inlet fitting.
Tighten the nuts on both ends of the outlet probe tube using a 7/16 inch wrench. DO NOT
OVERTIGHTEN.
5. Attach the solenoid valve bracket (6) to the chassis (7) using the two screws (5) retained from
disassembly: one on the inside of the chassis, one on the outer rear surface of the chassis.
4
756
3
2
8
1
1. Solenoid leads
2. Compression nut
3. Outlet probe tube
4. Outlet fitting
5. Screw (behind)
6. Solenoid valve bracket
7. Chassis
8. Solenoid valve inlet fitting
Figure 3
STATIM 2000/2000S/2000 G4 Service Guide