Page 260
STAT
IM
2000/2000S Service Guide
96-108639 Rev 3.0
13. Installation
Unit Placement
When placing the unit on a counter top, ensure the following:
The level indicator bubble (1) on the front panel should be balanced in
the front right quadrant of the target. This will ensure that the unit drains
properly. Adjusting the three leveler feet will help you move the bubble if
necessary.
The unit should be stable and all four feet should be securely in contact
with the counter surface. This will prevent the unit from moving freely.
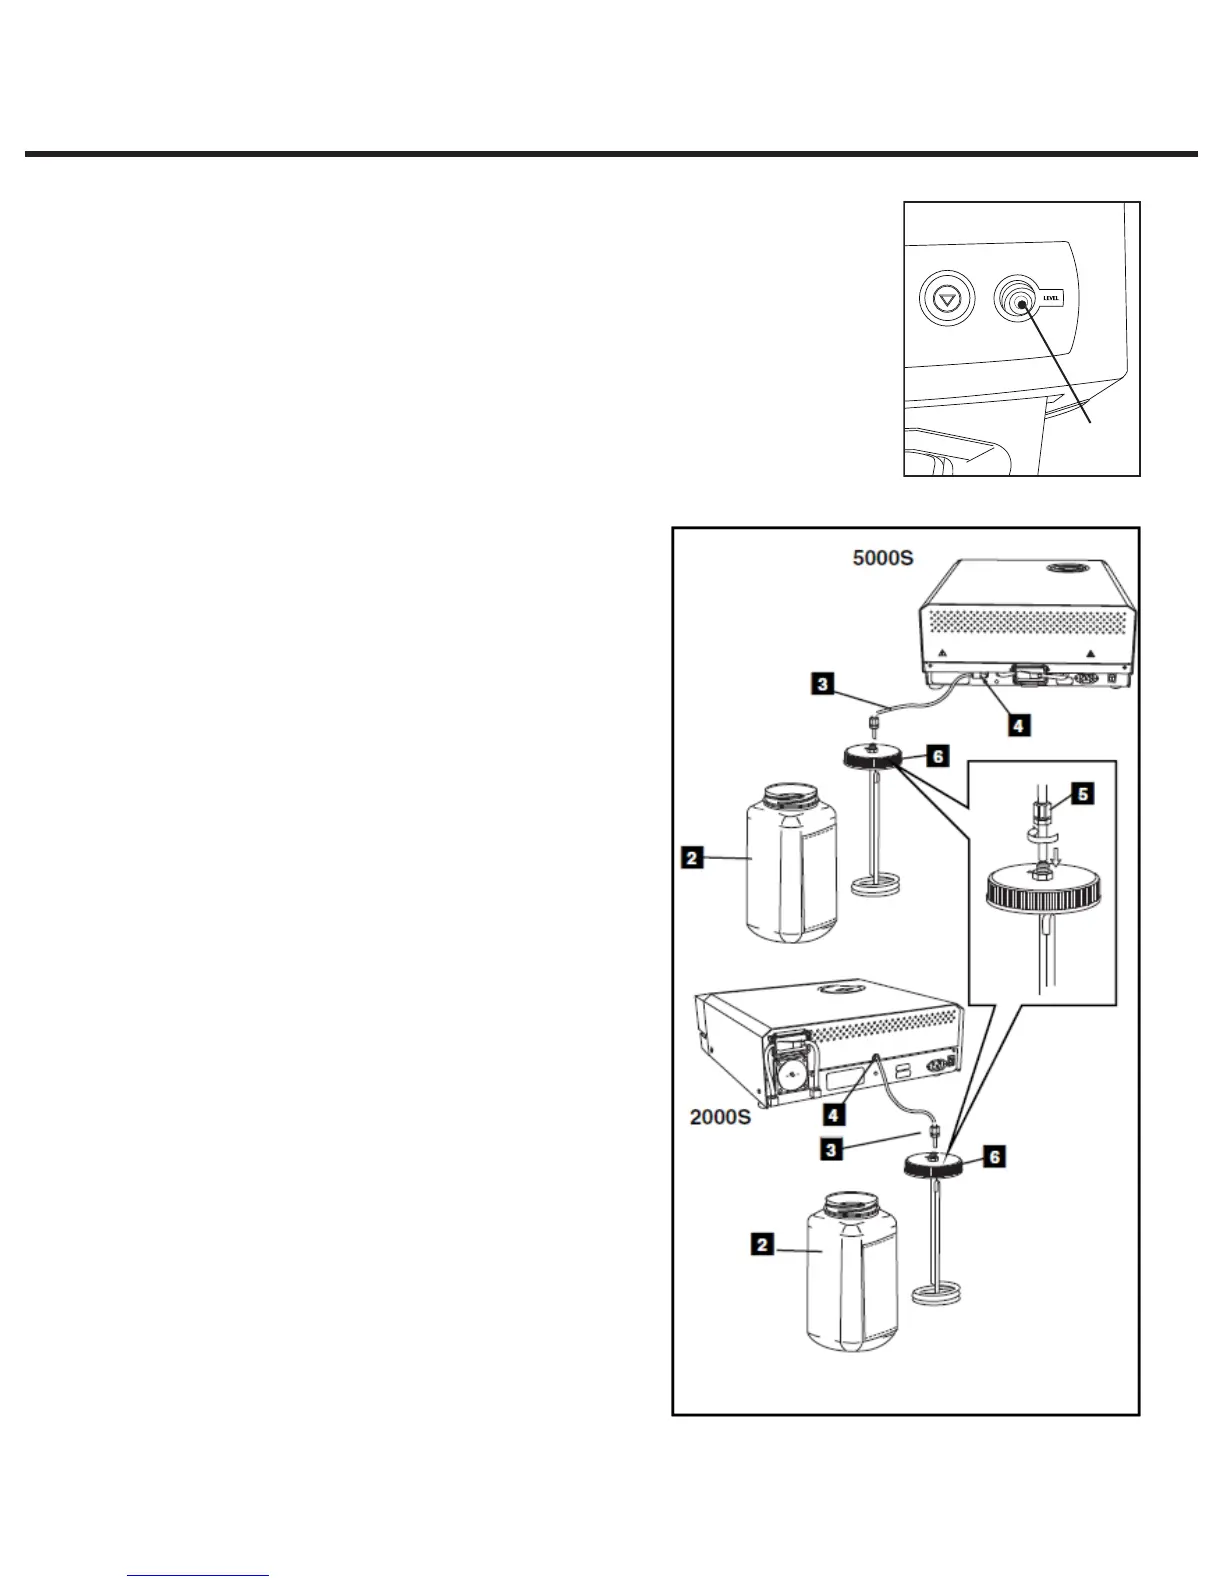
Connecting the Waste Bottle
The waste bottle (2) is used to collect the
wastewater after it has been converted to
steam and then drained from the cassette.
To connect
the waste bottle to the STATIM, follow these
steps (see Figure 2):
1. Insert the exhaust (3) tube into the fitting (4)
on the back of the unit and connect tightly.
2. Cut the tube to length and slide the waste
bottle fitting (5) into place.
3. Place the free end of the tube into the
hole in the lid of the waste bottle and
hand-tighten the fitting. Do not coil the
exhaust tube.
4. Unscrew the lid and copper condenser
coil (6) assembly from the waste bottle.
The lid and coil should come out together.
5. Fill the waste bottle with water to the
MIN line and replace the lid and copper
condenser assembly. Empty the waste
bottle often to avoid unpleasant odors
and discoloration of the contents. (A low-
level disinfectant, prepared according to
the manufacturer’s instructions, may be
added to the waste bottle to remedy this
situation). As a minimum, empty the waste
bottle each time you refill the reservoir.
6. Place the waste bottle near the unit. Store
the bottle below the unit. The tube can
be routed through a hole, (8 mm/0.3˝ in
diameter) in the counter-top and secured
with the provided nylon clamps.
1
Figure 1
Figure 2
STATIM 2000/2000S/2000 G4 Service Guide