Page 37
STAT
IM
2000/2000S Service Guide
96-108639 Rev 3.0
2. Tools, Maintenance Schedules, Procedures and Testing
STATIM 2000/2000S/2000 G4 Service Guide
1
4
432
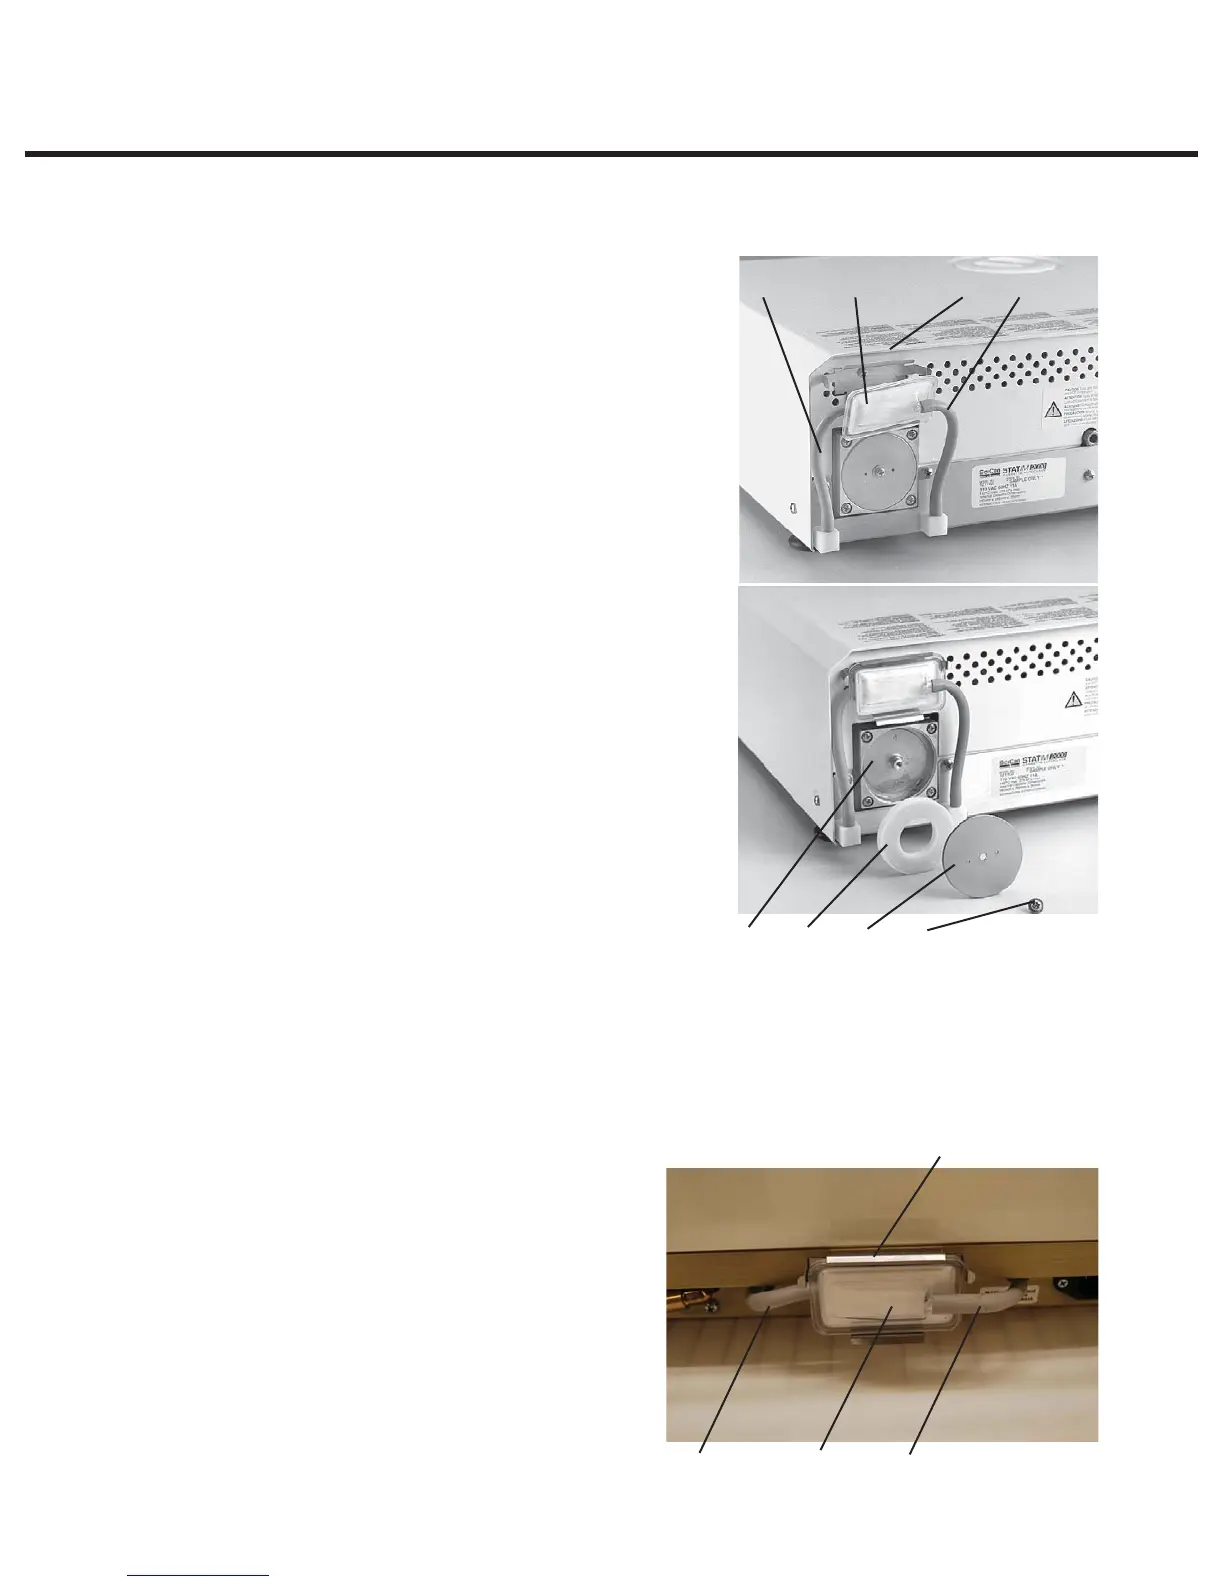
To change the filters, proceed as follows (see Figure 22):
Bacteria Retentive Filter
1. Disconnect the inlet tube (1) from the bacteria-
retentive filter (3) and remove the filter from the filter
bracket (4). Note the orientation of the Arrow mark
on the filter and bracket.
2. When the filter is free of the bracket, carefully
disconnect the outlet tube (2) from the filter. Do not
pull on this tube.
3. Before installing the replacement bacteria-retentive
filter check that the arrow mark on the filter matches
the direction of the arrow on the bracket. Push the
left hand filter fitting into the outlet tube.
4. Gently press the replacement filter into the filter
bracket. The arrow mark on the filter is facing out
and pointing to the left.
5. Re-connect the inlet tube to the right-hand filter
fitting.
Compressor Filter
1. Remove the screw (5) holding the compressor plate
(6) to the back of the compressor (7).Remove the
plate.
2. Remove and discard the old filter.
3. Install the new filter (8), and secure the compressor
plate to the rear of the compressor using the screw
retained from disassembly.
Filters on the STAT
IM
2000/2000S/2000 G4
The STAT
IM
5000 type unit draws air into the compressor via a tube connected to a cylindrical air
filter located on the chassis behind bacteria retentive filter bracket.
Note: On certain 5000 models
(dependent on compressor type) this filter may not be fitted. The air is then directed to the steam
generator and cassette, by the compressor, through a bacteria-retentive air filter which is held in a
bracket attached to the rear cover of the unit. If both filters are present, always change both filters
at the same time (see diagram below).
To change the filters (where fitted), proceed as
follows (see diagram above):
Bacteria-Retentive Filter
1. Disconnect the inlet tube (1) from the
bacteria-retentive filter (3) and remove the
filter from the filter bracket (4). Note the
orientation of the arrow mark on the filter
and bracket.
2. When the filter is free of the bracket,
carefully disconnect the outlet tube (2)
from the filter. Do not pull on this tube.
7865
Figure 22
132
Figure 23