C10 HD Installation Guide Section 4: Configuration | Page 4-1
#")&(#"
"(&#)(#"
This section provides system administrators with step-by-step guides for the basic configuration of the C10HD. The
procedures described here presume Administrator-level access to the console, and should not be attempted until the
procedures in the Installation Guide have been completed.
Before beginning the software confirguation of the control surface please ensure that the networked PC is available and
can be used for file backup – refer to the following section ‘File transfer and Backup’.
Part A then guides you through the console’s IO configuration – naming, grouping and routing the IO, and creating
Quickroute lists. Part B describes the initial configuration of the Control Surface, especially regarding Preset-level access.
More detailed configuration of the console is described in Section 5 of this manual.
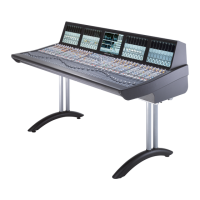
The illustration below shows the layout of the console and the names used to describe each area:
The screens above the fader strips are referred to as Channel Information Displays, and the touchscreen above the Centre
Section is simply referred to as the Touchscreen.
2 ASG 3 ASG 4 ASG 5 ASG 6 ASG 7 ASG 8
4
1 PGM 2
4
2
4
1
M
2
A 3
A 4
A 5
A 6
A 7
A 8
A
FUNCTION SELECT
E
QUALIZER
M
ONITOR CONTROLS
D
YNAMICS
M
ASTER
I
NSERT DELAY
MISC LEVELS
0
-
2
-4
-
6
-8
-10
-12
-14
-16
-20
U
SER MODES
5
kO
1
2K3
REM
M
PROT
S
AFL PFL
ON
REM
M
PROT
S
AFL PFL
ON
REM
M
PROT
S
AFL PFL
ON
REM
M
PROT
S
AFL PFL
ON
REM
M
PROT
S
AFL PFL
ON
REM
M
PROT
S
AFL PFL
ON
REM
M
PROT
S
AFL PFL
ON
REM
M
PROT
S
AFL PFL
ON
PAN
1
2
LCR
RSLFELS
D
IM CUT
FLIP
MONO
5.1
O
T/B TONE
DIMMINI
AFL PFL
MODE MODEIN IN
3
4
5
6
7
8
I/P O/P RTE
1
2
3
4
5
6
7
8
9
10
11
12
13
14
15
16
MODE
IN IN
G
AIN
L
F
LF
G
AIN
LMF
G
AIN
HMF
Q
HMF
SLOPE
Q
MODE
SLOPE
Q
Push
for
units
AUX
RATIO RLS/ATK
Q
THRESH GAIN
CUT/SOLO
MIX MINUS
P
ush for ATK
O.O
2
OO
O.O
4
OO
QO.5
O.O
1
kO
QO.5
O.O O.O O.O
1.O 3OO
15Su O.OO
mSec
N
X
O
357
468
X
E
8
91113
DOM
10 12
IMSUNIM
S
C
D
N
ETR
I
F
O
L
EPOLS
Q
.O
O
O2
F
O
ML
EDOM
.O
O
O4
5.OQ
F
O
EDOM
MH
.O
O
k1
5.OQ
F
O
k5
O
MH
EPOLS
Q
.O
O
O
ITARKTA/SLR
.OO.O
O.1OO3
Push
0
u
2
-
4-
6
-
8-
01-
21-
41-
61-
02-
rof
itsnu
S51O.O
eSm
OO
ce
U
L
N
IAG
N
Q
N
IAGQ
M
N
IAG
M
T
HRESH
EL
E
IM
B/TNOT
IDNIM
O
5
M
T
O
L
I
D UC
F
M
LO
TUC
1
O
PIL
NO
.5
MT ER
M
ORP
S
RP
MT ER
M
OR
S
TORP
S
MER
M
MT ER
M
ORP
S
MT ER
M
ORP
S
LLFAFP
MT ER
M
ORP
S
TORP
S
MER
M
RT
M
ORP
S
LF
ME
M
PIL
N
LLFAFP
O
A
N
LLFAFP
ON
LFA
O
N
LFP
N
LLFAFP
O
N
LLFAFP
O
N
LLFAFP
O
LFA
N
LFP
ON
LPFA
O
LFP
Function
Select Panel
Master
Channel
Master
Section
Centre Fader
Buttons
10
2
12
4
14
6
1
6
8
FFaaddeerr
AFL PFL
ON
9
1
11
3
13
5
1
5
7
A
SG9-16
PGM
1
PGM
2
1
P
2 ASG 3 ASG 4 ASG 5 ASG 6 ASG 7 ASG 8
4
2
4
1
S
2
4
1
M
2
A 3
A 4
A 5
A 6
A 7
A 8
A
O
o
G
2
2
o
e
5
S
S
R
R
2
6
a
t
N
X
S
T
Y
M
M MMGP
1
GP
2
M
M
M
M
M
F
F
F
F
O
P
O
4
1 12
10
2
4
11
9
1
3
1
1
1
1
1
N
N
M
M
R
8
1
16
14
6
8
13
1
5
5
7
1
1
1
1
1
C
O
1
G
6 SA1-9
G
M
M
M
M
M
M
M
N
L
N
LLFAFP
O
N
N
L
N
N
N
N
N
N
N
N
L
0
0
0
0
0
0
0
0
0
0
0
0
0
0
0
0
0
0
0
0
0
0
0
0
0
0
0
0
0
T
T
0
0
0
T
T
0
0
T
Routing Controls
Quik-Controls
Scribble Keys
On and Listen
Controls
FADER
STRIP
CENTRE
SECTION
Introduction