4: INSTALLATION
Install the Components
Install the Lights
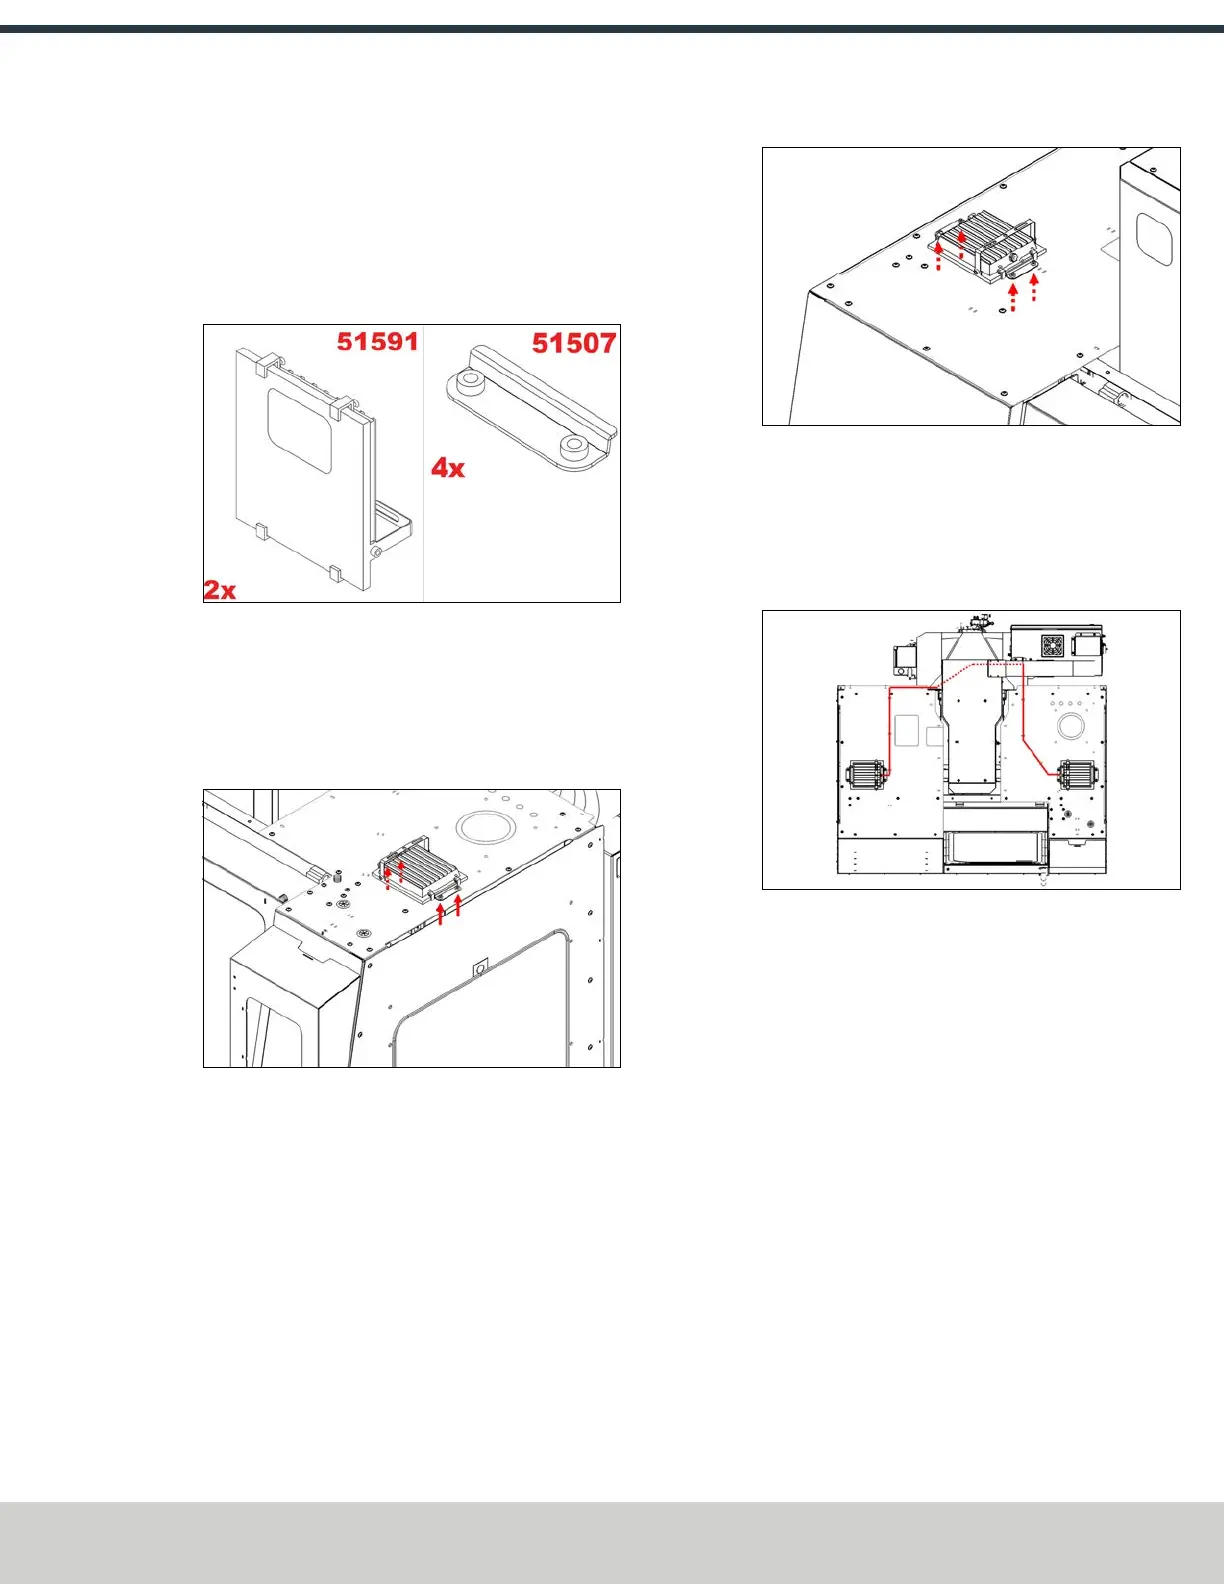
1. Identify the two LED flood lights (PN51591) and four
flood light and window retainers (PN51507).
Figure 4-61: Flood lights and window retainers.
2. Loosely install two window retainers on to the right top
enclosure panel with four M6 × 1.0 - 12 screws. Orient
the flood light so that the cable gland faces either the
mill's spindle head or the front of the machine, slide it
into the retainers, and tighten the screws.
Figure 4-62: Installing the flood light onto the right
top enclosure panel.
3. Place the remaining flood light on the left top enclosure
panel, and install it with two window retainers with M6
× 1.0 - 12 four screws. Orient the flood light so that the
cable gland faces toward the mill's spindle.
Figure 4-63: Installing the remaining flood light onto
the left top enclosure panel.
4. Connect one enclosure light extension cable (PN38389)
to each light.
5. Route the flood lights' power cables across the
enclosure’s top panels.
Figure 4-64: Routing the flood lights' power cables.
6. From the back of the machine, identify the Enclosure
Lights Power outlet on the top of the machine's
electrical cabinet. Remove the four screws securing the
cover over the outlet with a 3 mm hex wrench, and set
aside the cover and its screws.
7. Connect the power cables to the Enclosure Lights Power
outlet. Then, reinstall the outlet cover.
©Tormach® 2024
Specifications subject to change without notice.
Page 57 UM10811: 1500MX Operator's Manual (Version 0424A)
For the most recent version, see tormach.com/support
 Loading...


