12. Fasten the left chip tray to the right chip tray using two
M6 × 1.0 - 12 screws.
Figure 4-17: Fastening the left and right chip trays
together.
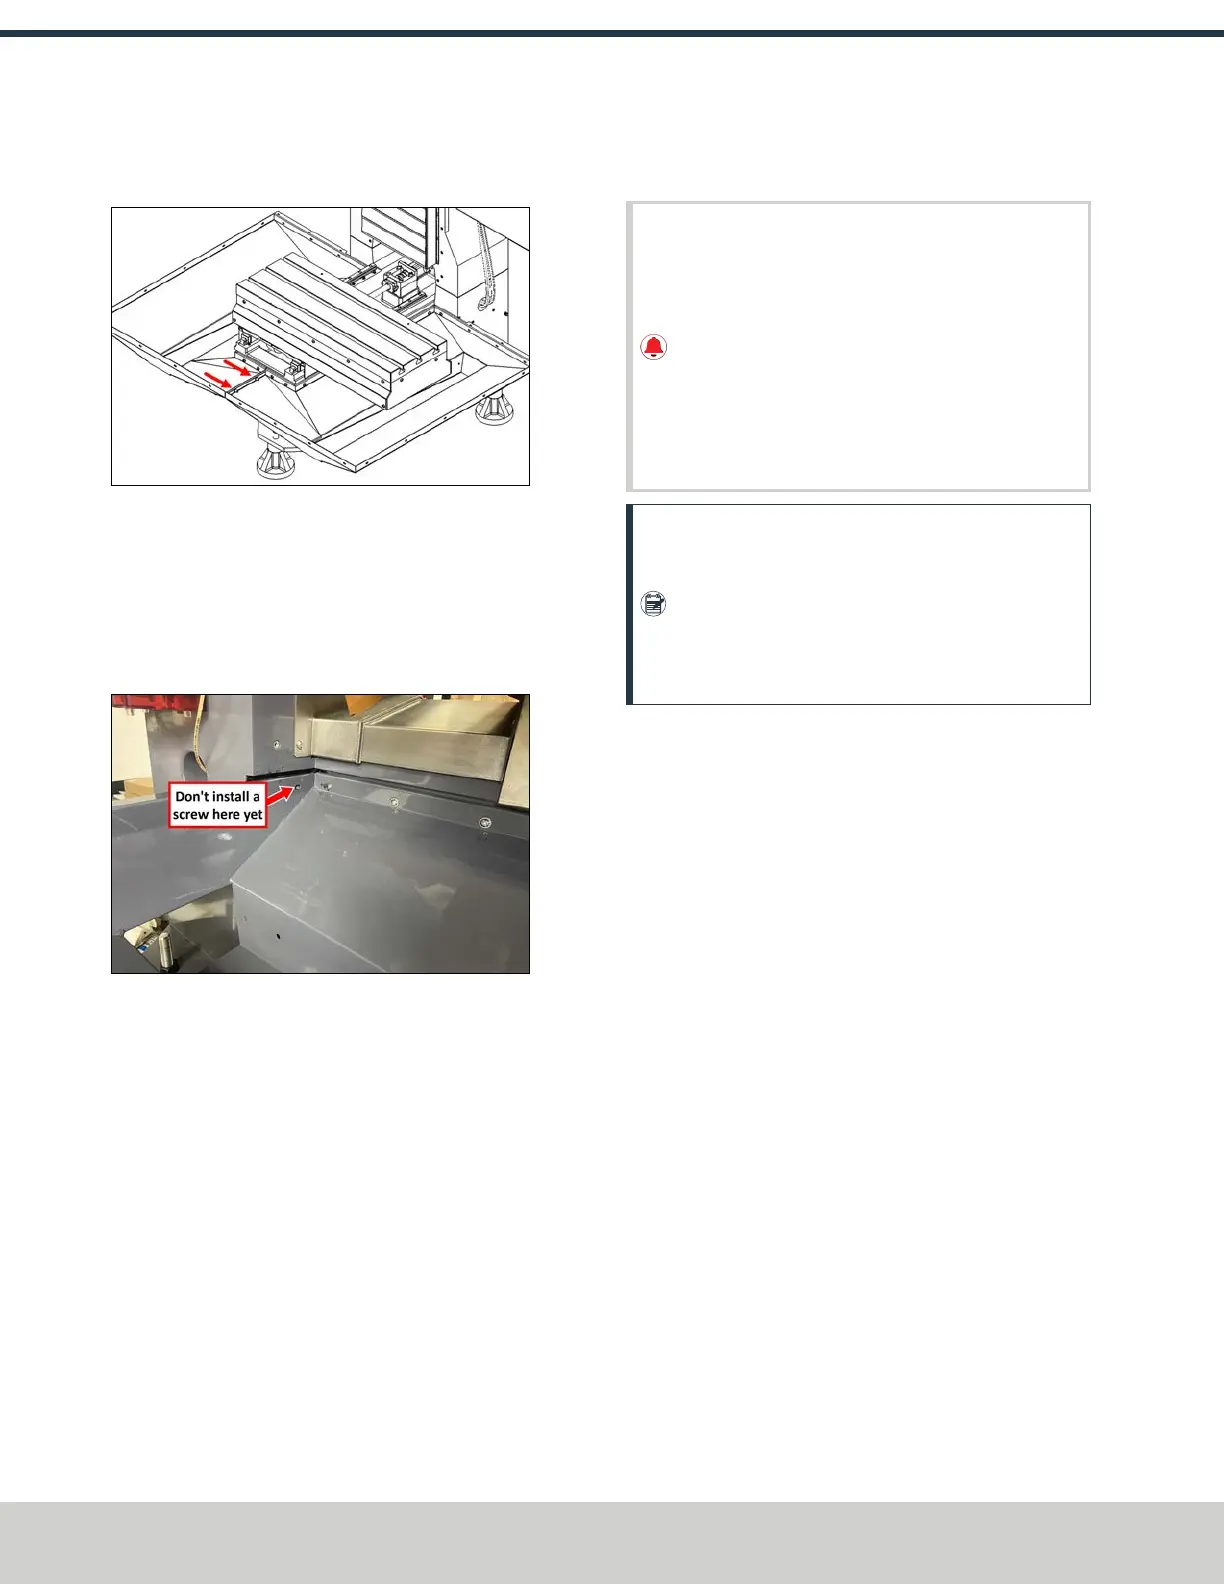
13. Fasten the front and inner face of the left chip tray’s top
edge to the mill's base casting using nine M6 × 1.0 - 12
screws. Don't install a screw onto the machine column
— you'll need to use that hole to install another
enclosure panel later in this procedure.
Figure 4-18: Location on the chip tray to later install
the side panel.
14. Repeat Steps 7 through 10 to install the coolant chute
and the support bracket onto the left chip tray, and finish
sealing the left chip tray.
Install the Enclosure Panels
IMPORTANT! The enclosure's right and left side
panels have a window panel that's installed later in
this procedure. When fully raised, the window panel
measures 9 ft (2.7 m) tall. If there isn't sufficient
clearance above the machine for installing the
window panels from above, install them before
starting with the enclosure panels. First, go to
"Install the Enclosure" (page42), then come back to
this section to finish the enclosure installation.
Note: We recommend mounting the automatic tool
changer (ATC) and its electrical cabinet before
installing the enclosure panels. Go to "Install the
Automatic Tool Changer" (page68), and then come
back to this section to finish the enclosure
installation.
1. Before you install the rear enclosure panels, you must
apply a bead of sealant to the following areas:
©Tormach® 2024
Specifications subject to change without notice.
Page 46 UM10811: 1500MX Operator's Manual (Version 0424A)
For the most recent version, see tormach.com/support
4: INSTALLATION