9. Connect the loose end of the hose to the elbow fitting
using a pair of pliers and a hose clamp.
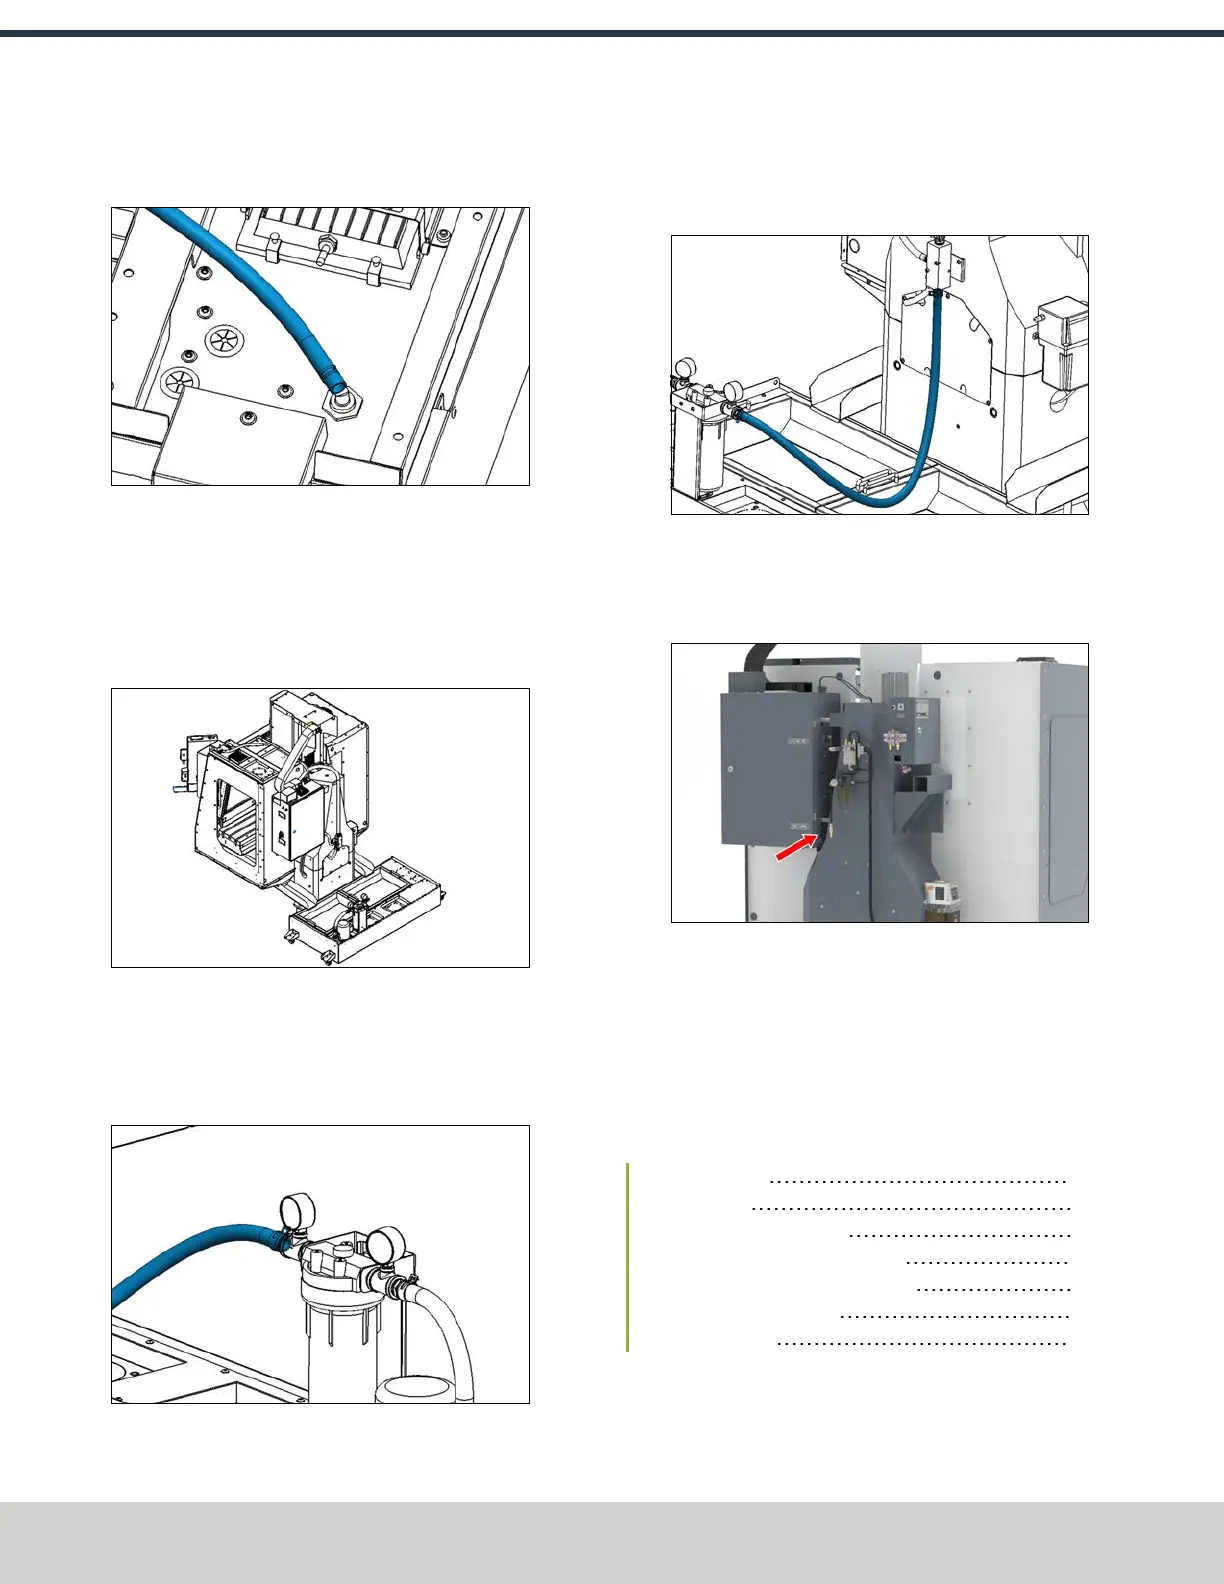
Figure 4-168: Hose connected to the elbow fitting.
Make Coolant Connections
1. Roll the coolant tank behind the machine and push it up
to the back of the machine against the base casting.
Center the tank behind the machine, making sure that
the chip chutes dump into the chip baskets.
Figure 4-169: Coolant tank behind the machine.
2. Identify the 4 ft, 1 in. ODhose (PN 51608) included with
this kit. Connect one end to the barbed fitting on the
outlet of the coolant filter with a pair of pliers and one
hose clamp (PN51558).
Figure 4-170: Hose connected to the coolant filter.
3. Connect the loose end of the hose to the barbed fitting
on the bottom of the coolant manifold with a pair of
pliers and one hose clamp (PN51558).
Figure 4-171: Hose connected to the coolant manifold.
4. Plug the flood coolant pump's power cable into the Flood
Coolant Power outlet on the side of the electrical cabinet
(on the side that's closest to the column).
Figure 4-172: Flood coolant outlet on the side of the
electrical cabinet.
5. After setting up the flood coolant kit, test the enclosure
for coolant leaks. Identify and seal any areas requiring
extra sealant.
4.8.3 Install the Automatic Chip Tray Washdown Kit
Complete the following steps in the order listed:
Before You Begin 86
Required Tools 87
Install the Washdown Pump 87
Install the Washdown Coolant Filter 87
Install the Coolant Hoses and Fittings 87
Install the Washdown Bars 88
Make Connections 88
Before You Begin
Make sure that:
©Tormach® 2024
Specifications subject to change without notice.
Page 86 UM10811: 1500MX Operator's Manual (Version 0424A)
For the most recent version, see tormach.com/support
4: INSTALLATION