4: INSTALLATION
l The machine is in its final location, with sufficient space
for access to the electrical cabinet and coolant tank.
l The machine has been rough leveled.
l The flood coolant kit is installed.
l The enclosure is installed, with either the windows open
or the window panels removed.
Required Tools
l Metric hex wrench set
l Pliers
l 13 mm wrench
Install the Washdown Pump
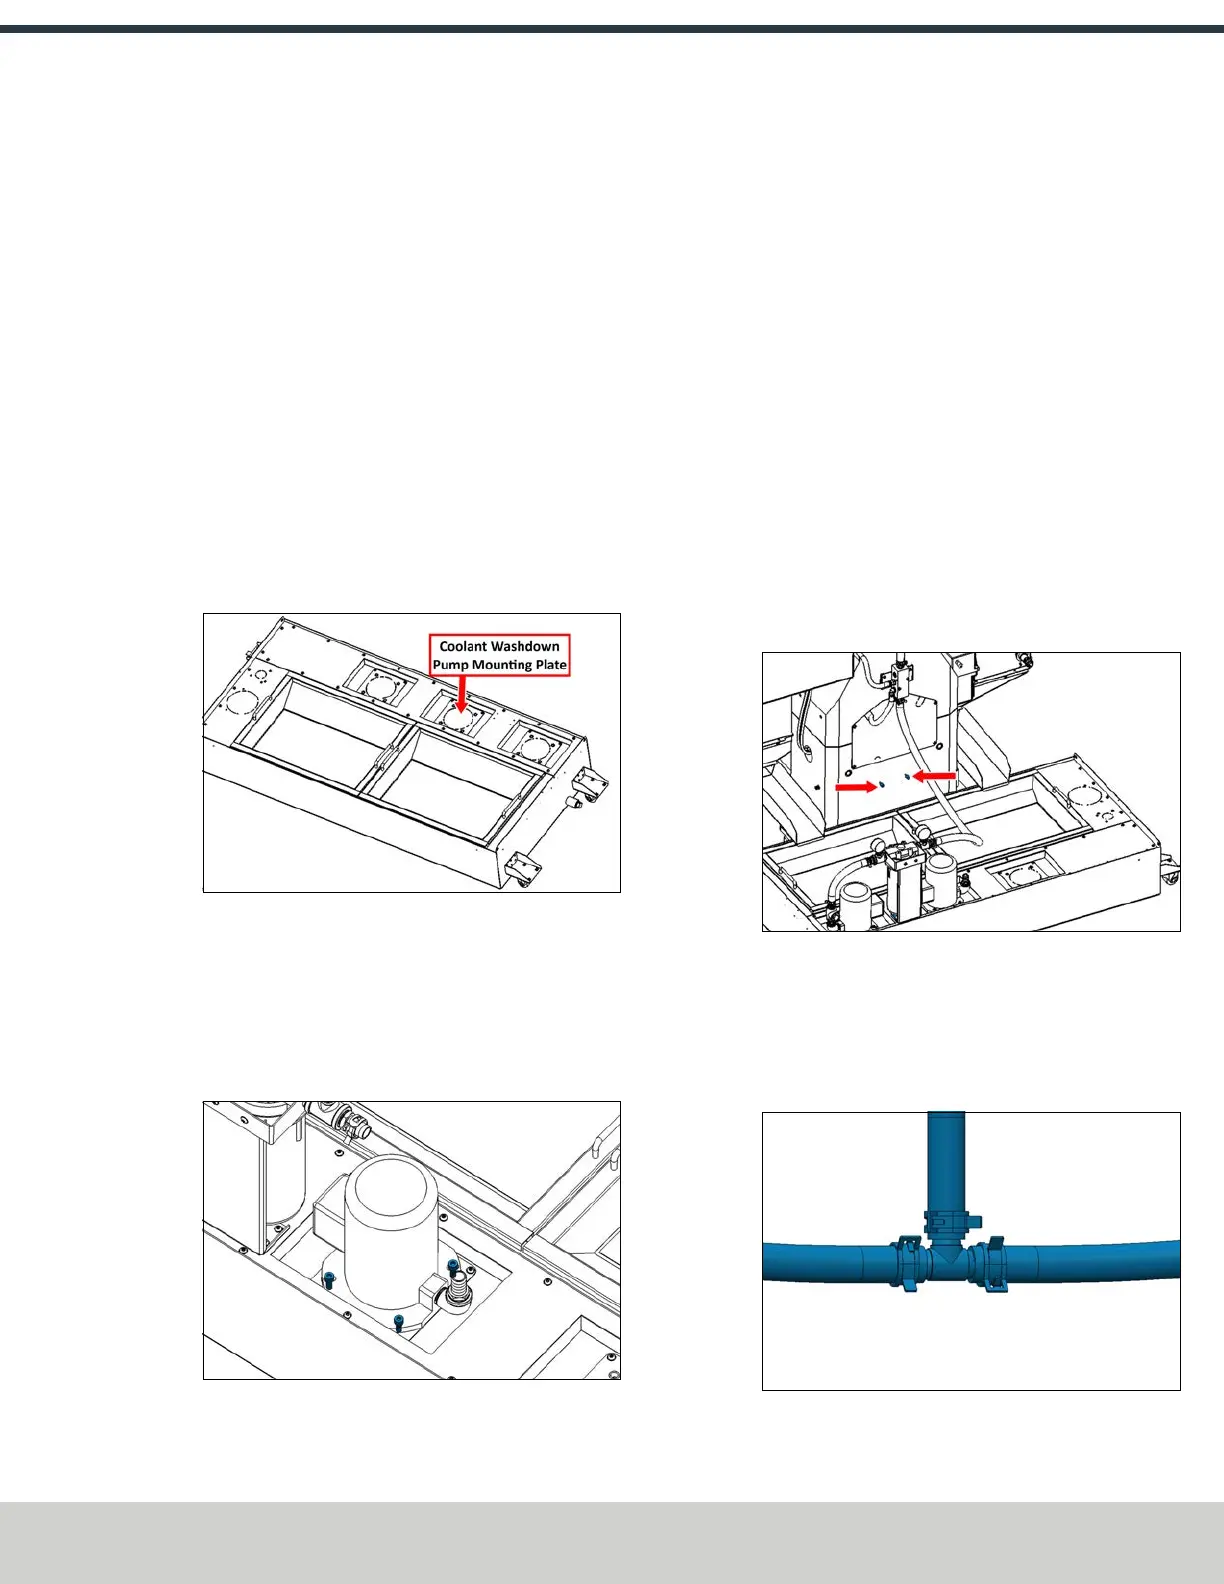
1. On the coolant tank, identify the location for the
washdown coolant pump as shown in the following
image.
Figure 4-173: Middle mounting plate used for the
washdown pump.
2. Identify the washdown coolant pump included with this
kit. Put it into the tank with the pump's outlet pointing
toward the third coolant pump mounting plate. Secure
the pump onto the tank with four M8 × 1.25 - 20 socket
head cap screws (PN 52436) and a 6 mm hex wrench.
Figure 4-174: Washdown pump installed into the
coolant tank.
Install the Washdown Coolant Filter
1. Identify the washdown coolant filter included with this
kit. Place it next to the washdown coolant pump on the
coolant tank, and secure it to the rear mounting holes
with four M5 × 0.8 - 10 flanged button head cap screws
(PN38205) and a 3 mm hex wrench.
2. Identify the 1 ft long, 1 in. OD hose included with this kit.
Install it between the barbed fittings on the outlet of the
coolant pump and the inlet of the coolant filter with a
pair of pliers and a hose clamp spring (PN51558) on
either side.
Install the Coolant Hoses and Fittings
1. Identify the two standoffs (PN51556) included in this kit.
2. On the back of the machine, identify the two holes as
shown in the following image. Install the standoffs into
the two holes with a 13 mm wrench.
Figure 4-175: Standoffs installed onto the back of the
machine.
3. Identify the three hoses, one tee fitting (PN52498), and
three hose clamps (PN51558) included in this kit. Install
the hoses and the hose clamps onto the tee fitting with
a pliers as shown in the following image.
Figure 4-176: Hoses installed onto the tee fitting.
©Tormach® 2024
Specifications subject to change without notice.
Page 87 UM10811: 1500MX Operator's Manual (Version 0424A)
For the most recent version, see tormach.com/support