4: INSTALLATION
Figure 4-181: Top hose connected to the coolant
pump.
2. Connect the loose end of each remaining hose on the tee
fitting to the barbed fitting on either side of the
enclosure with pliers and a hose clamp.
Figure 4-182: Coolant pump's hose connected to the
barbed fitting on the outside of the enclosure.
3. Plug the flood coolant pump's power cable into the
Washdown Coolant Power outlet on the side of the
electrical cabinet(on the side that's closest to the
column).
Figure 4-183: Washdown coolant power outlet on the
side of the electrical cabinet.
4.8.4 Install the MQL Kit
Complete the following steps in the order listed:
Required Tools 89
Remove the Tubing from the Pump 89
Route the Tubing 90
Mount the Pump 91
Required Tools
l 3/16 in. hex wrench
l 4 mm hex wrench
l Needle-nose pliers
l Razor blade
l Thread seal tape
Remove the Tubing from the Pump
We recommend mounting the MQL pump on the access panel
on the back of the machine's column. To route the tubing from
the spindle to the pump, you'll need to remove the tubing from
the pump side, and then reconnect it at the back of the
machine.
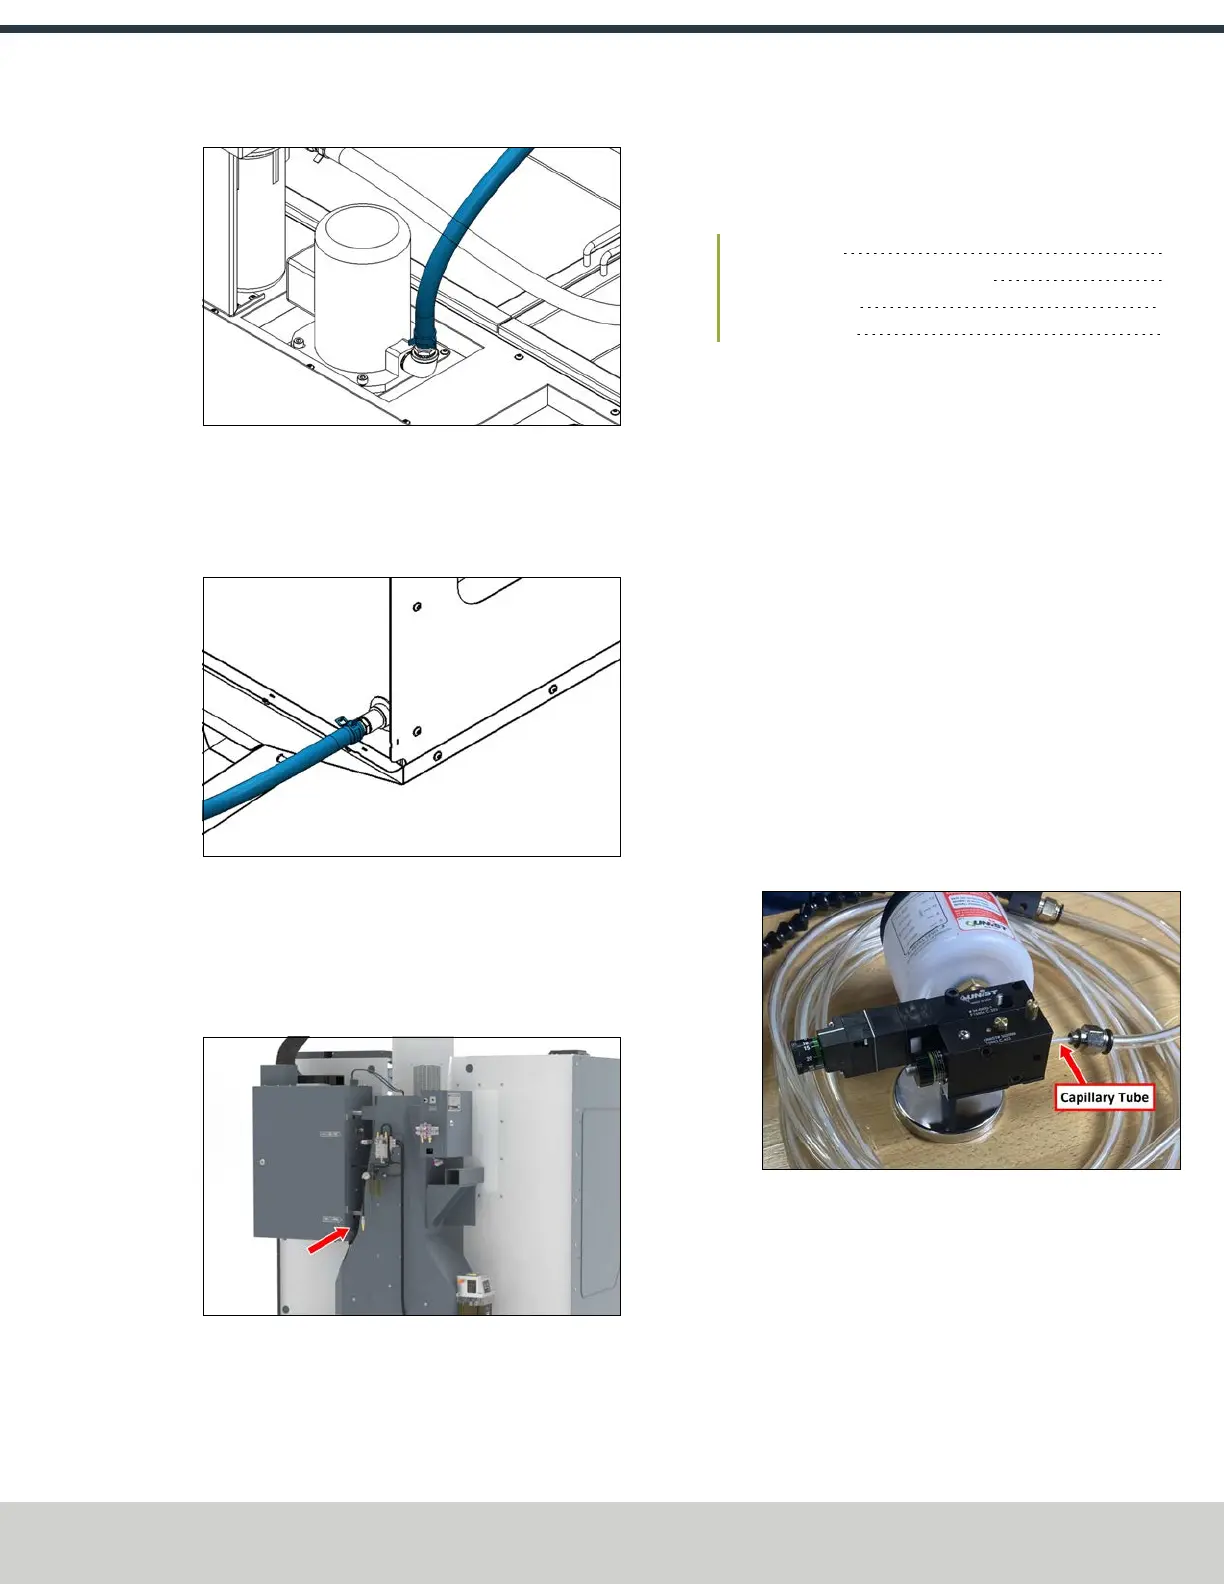
1. Unscrew the 3/8 in. push-to-connect fitting from the
pump block.
2. Pull the outer 3/8 in. tube and push-to-connect fitting
away from the pump block, exposing the 1/8 in. nylon
capillary tube.
Figure 4-184: Push-to-connect fitting removed from
the pump.
©Tormach® 2024
Specifications subject to change without notice.
Page 89 UM10811: 1500MX Operator's Manual (Version 0424A)
For the most recent version, see tormach.com/support