4. Identify the tee fitting bracket (PN52500), two M6 × 1 -
10 flanged button head cap screws (PN51616), and two
loop clamps (PN51379) included in this kit. Mount the
bracket and hose assembly onto the previously installed
standoffs with a 4 mm hex wrench.
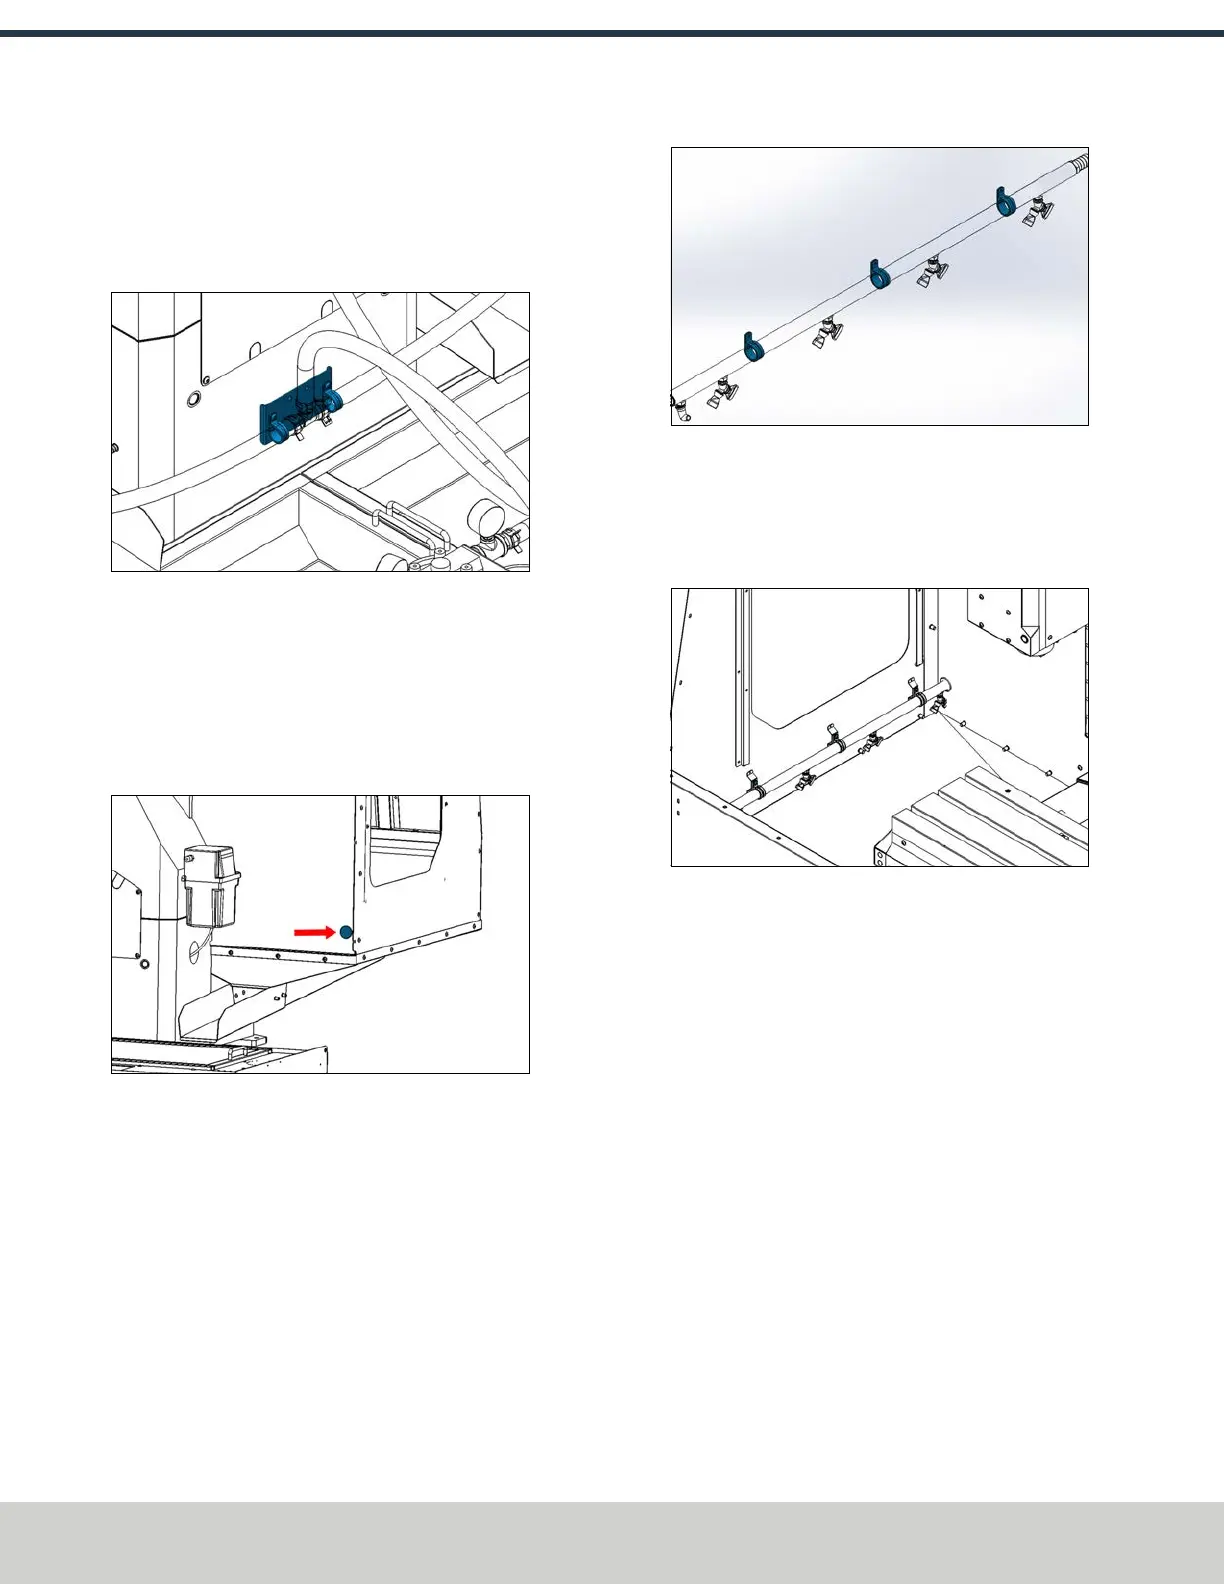
Figure 4-177: Tee fitting bracket and hose assembly
installed onto the standoffs on the back of the
machine.
Install the Washdown Bars
1. Open the windows on both sides of the enclosure.
2. Remove the two rubber plugs from both back panels of
the enclosure.
Figure 4-178: Rubber plug on the back panel of the
enclosure.
3. Identify one washdown bar, three loop clamps, one pipe
grommet, and three M6 screws included in this kit.
Install the loop clamps onto the washdown bar as shown
in the following image.
Figure 4-179: Washdown bar assembly.
4. Put one of the pipe grommets into the hole in the back
panel (where you previously removed the rubber plug).
5. Slide the barbed fitting end of the washdown bar
through the grommet in the back panel.
Figure 4-180: Washdown bar inside of the enclosure.
6. Loosely fasten each of the loop clamps to the side of the
chip pan with three M6 screws and a 4 mm hex wrench.
Turn the washdown bar so that the nozzles are pointing
down toward the chip pan. Once the bar is correctly
aligned, tighten all of the loop clamps.
7. Repeat Steps 3 through 6 for the washdown bar on the
opposite side of the enclosure.
Make Connections
1. Connect the top hose from the tee fitting to the barbed
fitting on the coolant pump with pliers and a hose
clamp.
©Tormach® 2024
Specifications subject to change without notice.
Page 88 UM10811: 1500MX Operator's Manual (Version 0424A)
For the most recent version, see tormach.com/support
4: INSTALLATION
 Loading...


