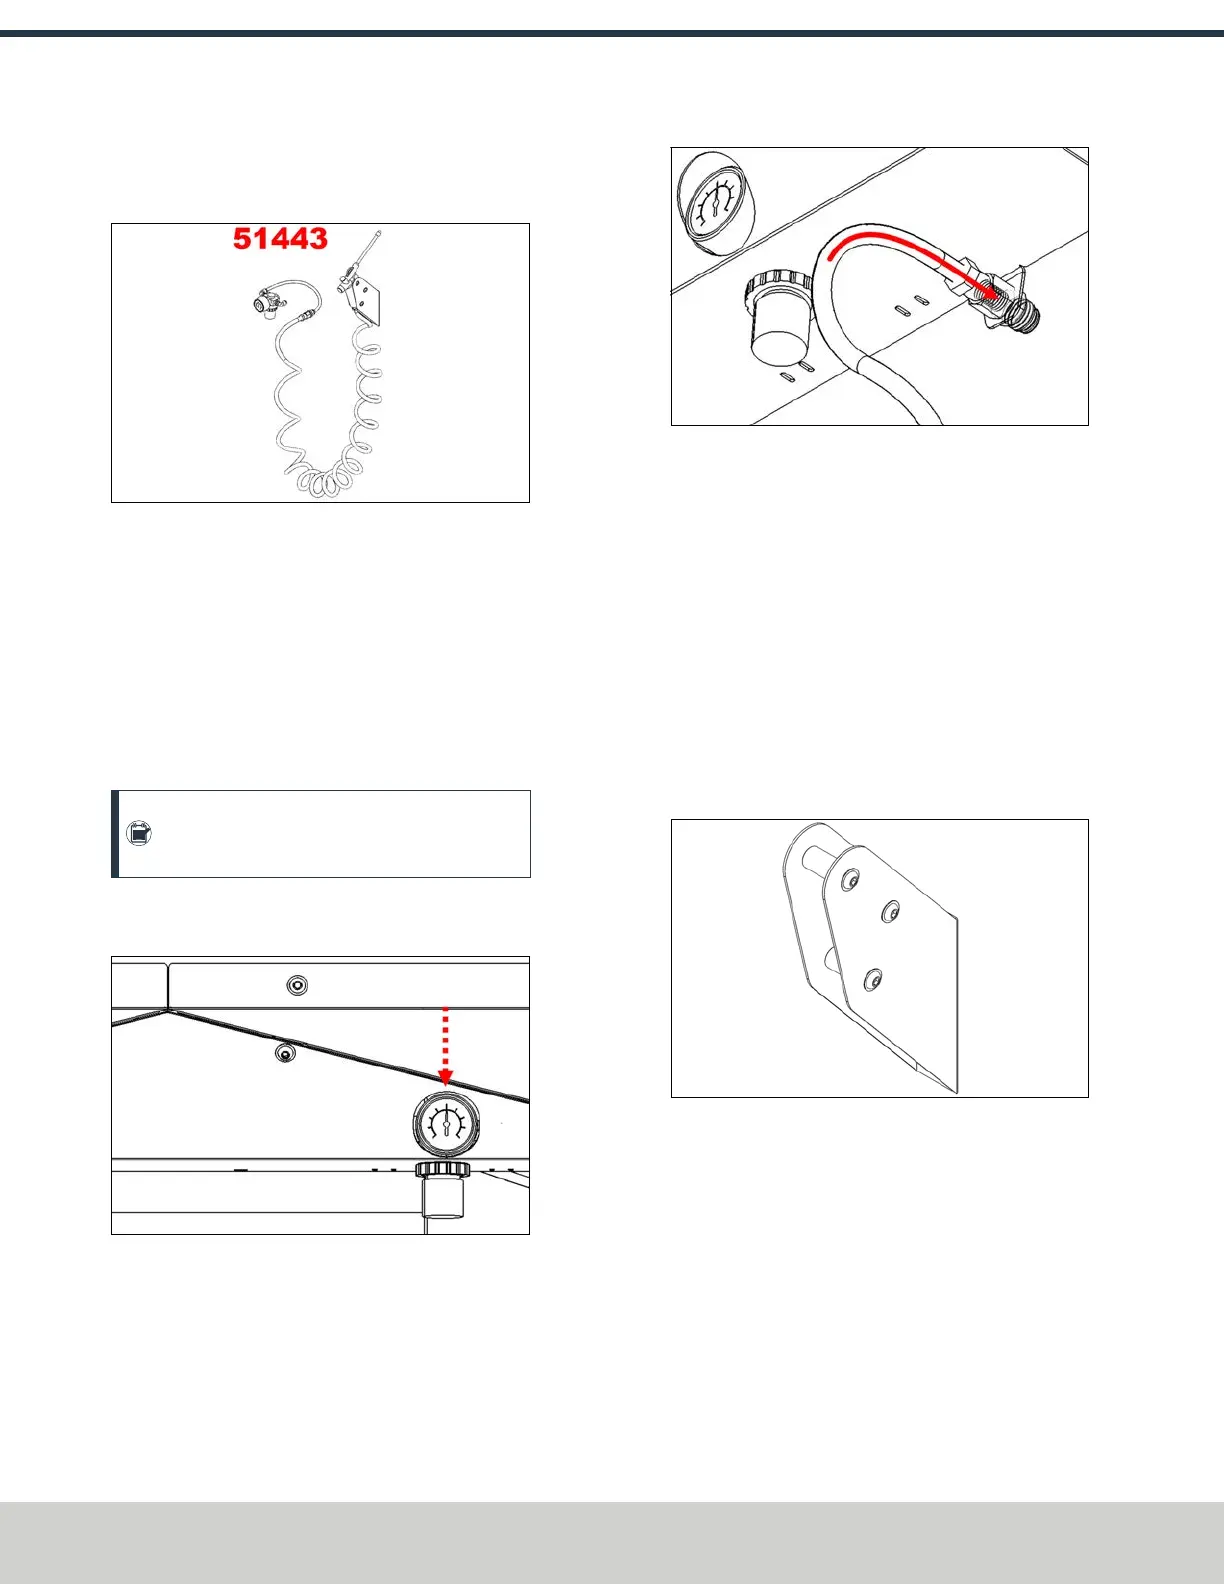
Install the Air Gun
1. Identify the Air Gun Kit (PN51443).
Figure 4-65: Air gun kit.
2. Wrap thread seal tape around the threads of the
pressure regulator's gauge, and then tighten it onto the
pressure regulator.
3. Find the two push-to-connect elbow fittings. Install the
smaller push-to-connect fitting into the inlet side of the
pressure regulator, and install the larger fitting into the
opposite side.
4. Remove the plastic nut off of the pressure regulator.
Note: There's a bracket included in the kit,
which you can discard.
5. Fasten the kit’s pressure regulator to the chip tray center
kick plate using the regulator’s plastic nut.
Figure 4-66: Installing the pressure regulator in the
chip tray center kick plate.
6. Identify the straight push-to-connect fitting. Fasten the
fitting to the chip tray center kick plate’s tab using the
bulkhead fitting’s flange nut. Tighten flange nut using
two 19 mm wrenches.
Figure 4-67: Installing the straight push-to-connect
fitting in the chip tray center kick plate.
7. Identify two airlines (one is short, one is long) included
with this kit. Connect the long airline to the inlet side of
the regulator. Connect the short airline between the
open fitting on the regulator and the straight push-to-
connect fitting that's installed on the chip tray center
kick plate.
8. Identify the coiled airline for the air gun hose. If the
airline has a Euro fitting on the end, cut it off with snips.
9. Fasten the chip tray center kick plate to the chip trays
using 4 M6 × 1.0 - 12 screws.
10. Identify the air gun holster assembly.
Figure 4-68: Air gun holster.
©Tormach® 2024
Specifications subject to change without notice.
Page 58 UM10811: 1500MX Operator's Manual (Version 0424A)
For the most recent version, see tormach.com/support
4: INSTALLATION