24. Fasten the right top panel to the right rear panel, the
right side panel, and the right front panel using 9 M6 ×
1.0 - 12 screws. Don't install a screw into the middle
hole above the right side panel — you'll need to use that
hole to install another enclosure panel later in this
procedure.
Figure 4-42: Installing the right top panel to the right
rear panel, right side panel, and right front panel.
25. Identify the left top panel (PN51272).
Figure 4-43: Left top panel.
26. Fasten the left top panel to the left rear panel, the left
side panel, and the left front panel using 11 M6 × 1.0 -
12 screws.
Figure 4-44: Installing the left top panel to the left
rear panel, the left side panel, and the left front panel.
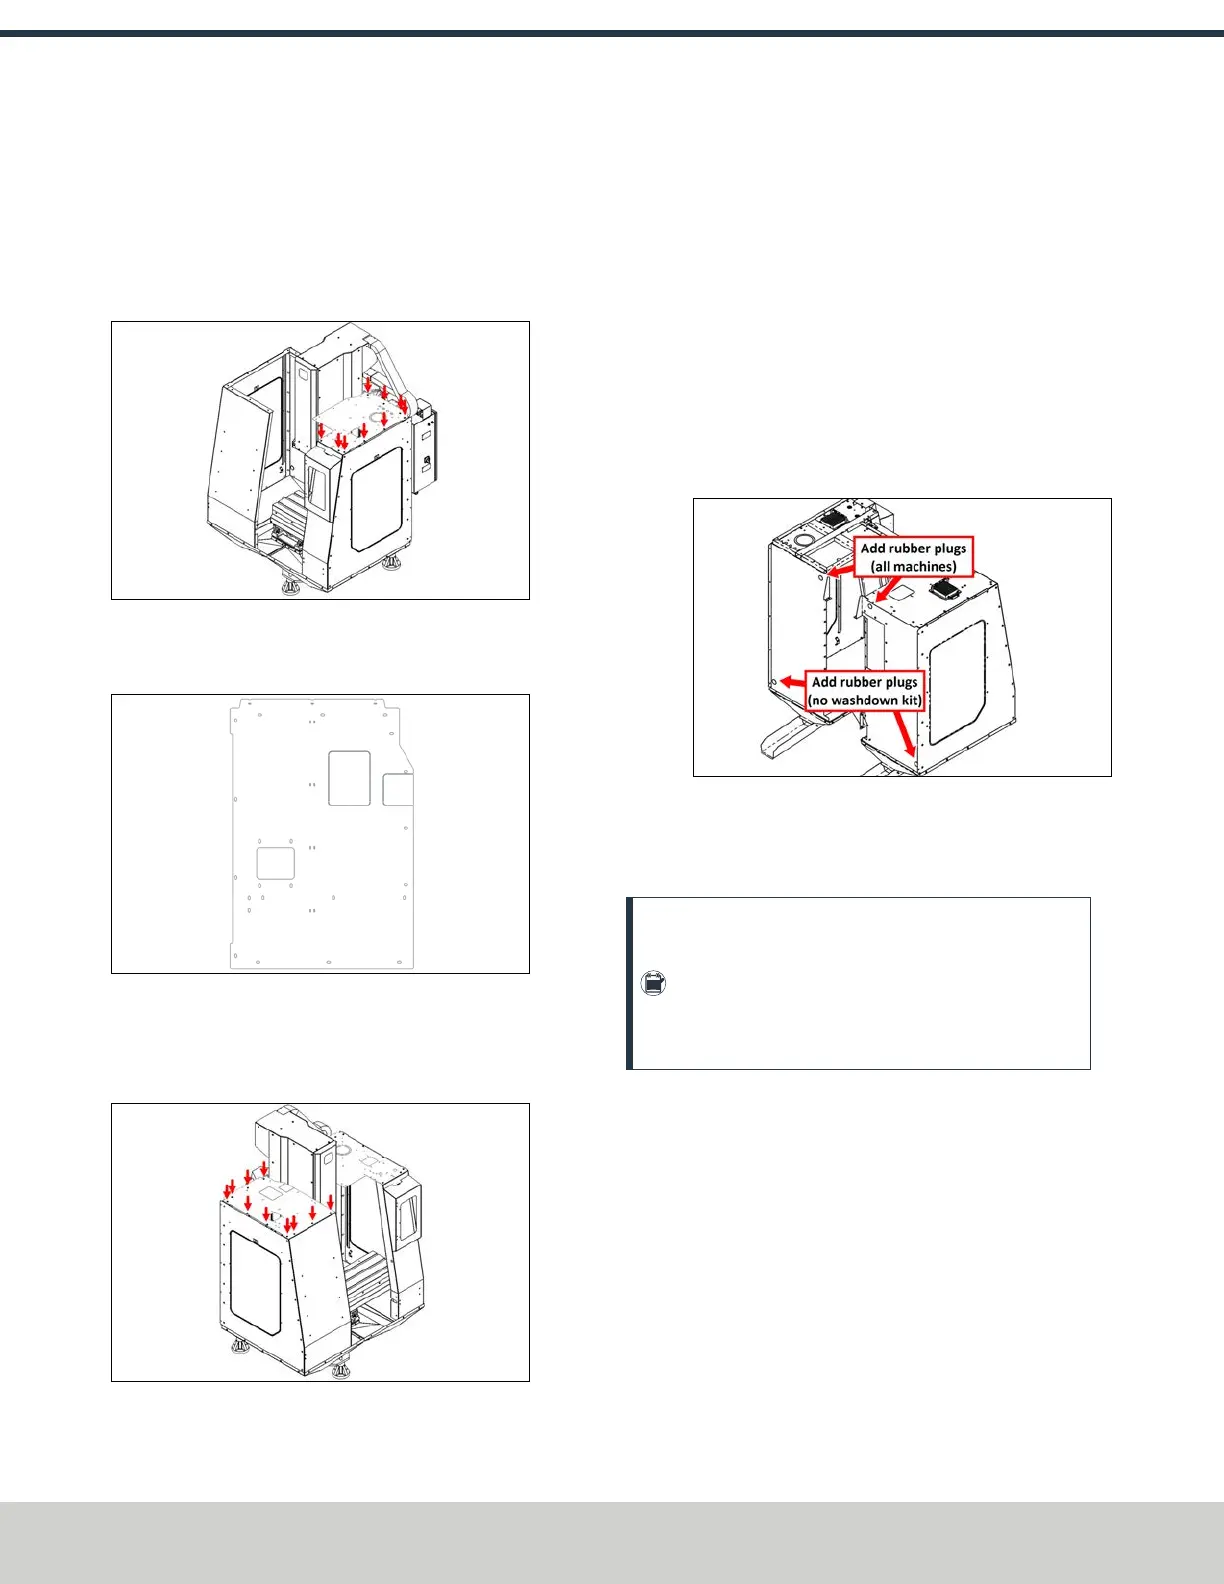
27. Identify the four 32 mm rubber plugs included in the
enclosure kit. Install two of them into the holes on the
top of the left and right rear enclosure panels.
Depending on if you're installing the Automatic Chip Tray
Washdown Kit (PN51393), do one of the following:
a.
No Washdown Kit Install the remaining two rubber
plugs into the remaining two holes on the bottom of
the left and right rear enclosure panels.
b.
Washdown Kit Included Discard the two remaining
rubber plugs. Hosing from the washdown kit will pass
through the bottom holes on the left and right rear
enclosure panels.
Figure 4-45: Rubber plug locations on the back of
the machine enclosure.
Assemble the Door
Note: If you've already installed the window panels
due to height restrictions, we recommend raising the
windows as much as possible and temporarily
securing them with the enclosure window pins. This
helps to more easily install certain components.
©Tormach® 2024
Specifications subject to change without notice.
Page 52 UM10811: 1500MX Operator's Manual (Version 0424A)
For the most recent version, see tormach.com/support
4: INSTALLATION