4: INSTALLATION
1. Identify the top linear rail (PN51816).
2. Fasten the top linear rail to the inside of the right top
panel and the left top panel using 12 M6 × 8 screws.
Figure 4-46: Top linear rail installed.
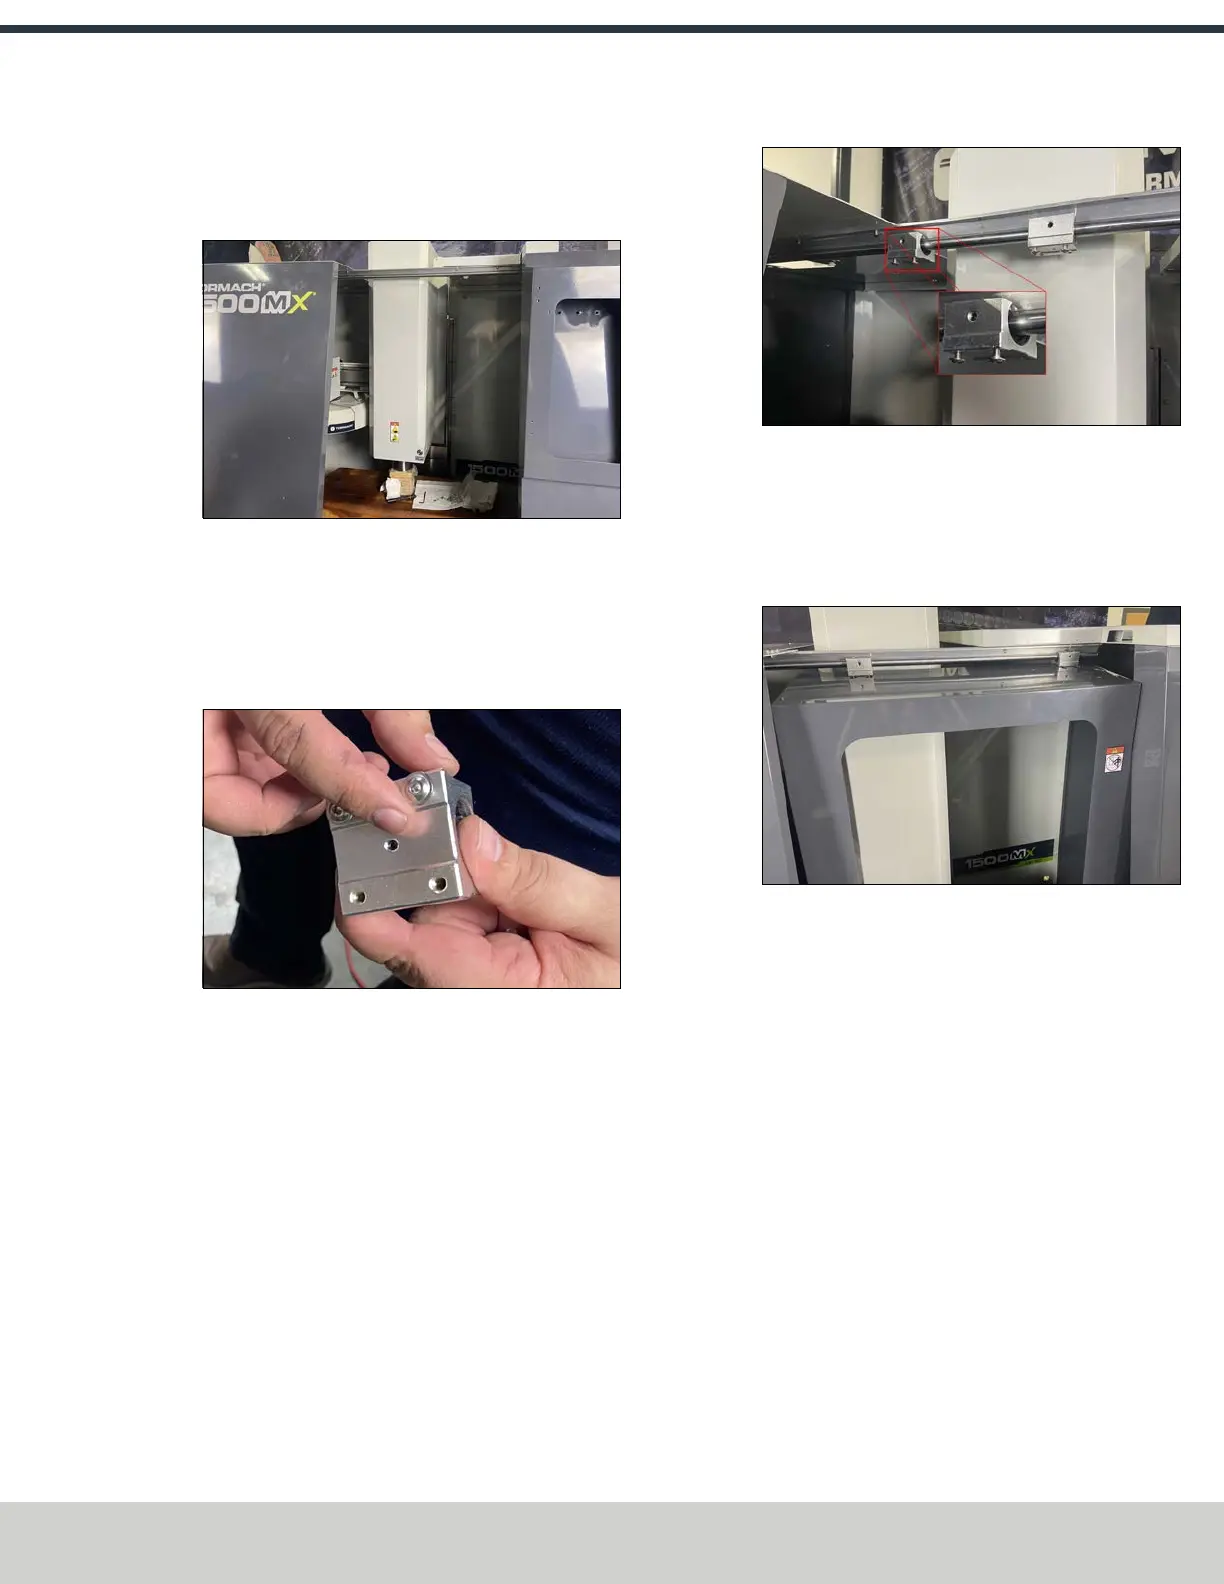
3. Identify the four linear guide blocks (PN 37610 and
PN51817). One set of guide blocks is enclosed, and the
other is open. Set aside the enclosed guide blocks.
4. Install two M5 screws into one side of each of the open
linear guide blocks.
Figure 4-47: M5 screws installed in a linear guide
block.
5. Slide both open linear guide blocks onto the top linear
rail. Make sure that the screws are facing down and
nearest to the front of the enclosure, as shown in the
following image.
Figure 4-48: Linear guide blocks installed on the top
linear rail.
6. Carefully move the door panel through the front of the
enclosure. Tilt the bottom of the door toward the right
side of the machine, and then slowly slide it onto the
screws that you already installed onto the linear blocks.
Figure 4-49: Door installed onto the linear guide
blocks.
7. Install the remaining four screws into the open holes on
the two linear blocks.
8. Identify the bottom linear rail (PN51229), the two linear
rail supports (PN37622), and the two enclosed guide
blocks that you set aside earlier (PN37610).
©Tormach® 2024
Specifications subject to change without notice.
Page 53 UM10811: 1500MX Operator's Manual (Version 0424A)
For the most recent version, see tormach.com/support