4. Carefully install the 1/8 in. capillary tube onto the barbed
fitting on the pump with a pair of pliers.
Figure 4-194: Capillary tube installed onto the barbed
fitting.
Note: Make sure that the tube is fully installed
onto the barbed fitting. If it isn't, it may result
in system performance issues.
5. Screw the push-to-connect fitting back into the pump
block.
6. Mount the pump with its magnetic base in a convenient
location. We recommend using the access panel on the
back of the machine column.
Figure 4-195: Pump mounted onto the access panel on
the machine column.
7. Route the solenoid wire into the bottom of the electrical
cabinet.
Figure 4-196: Solenoid wire routing into the bottom of
the electrical cabinet.
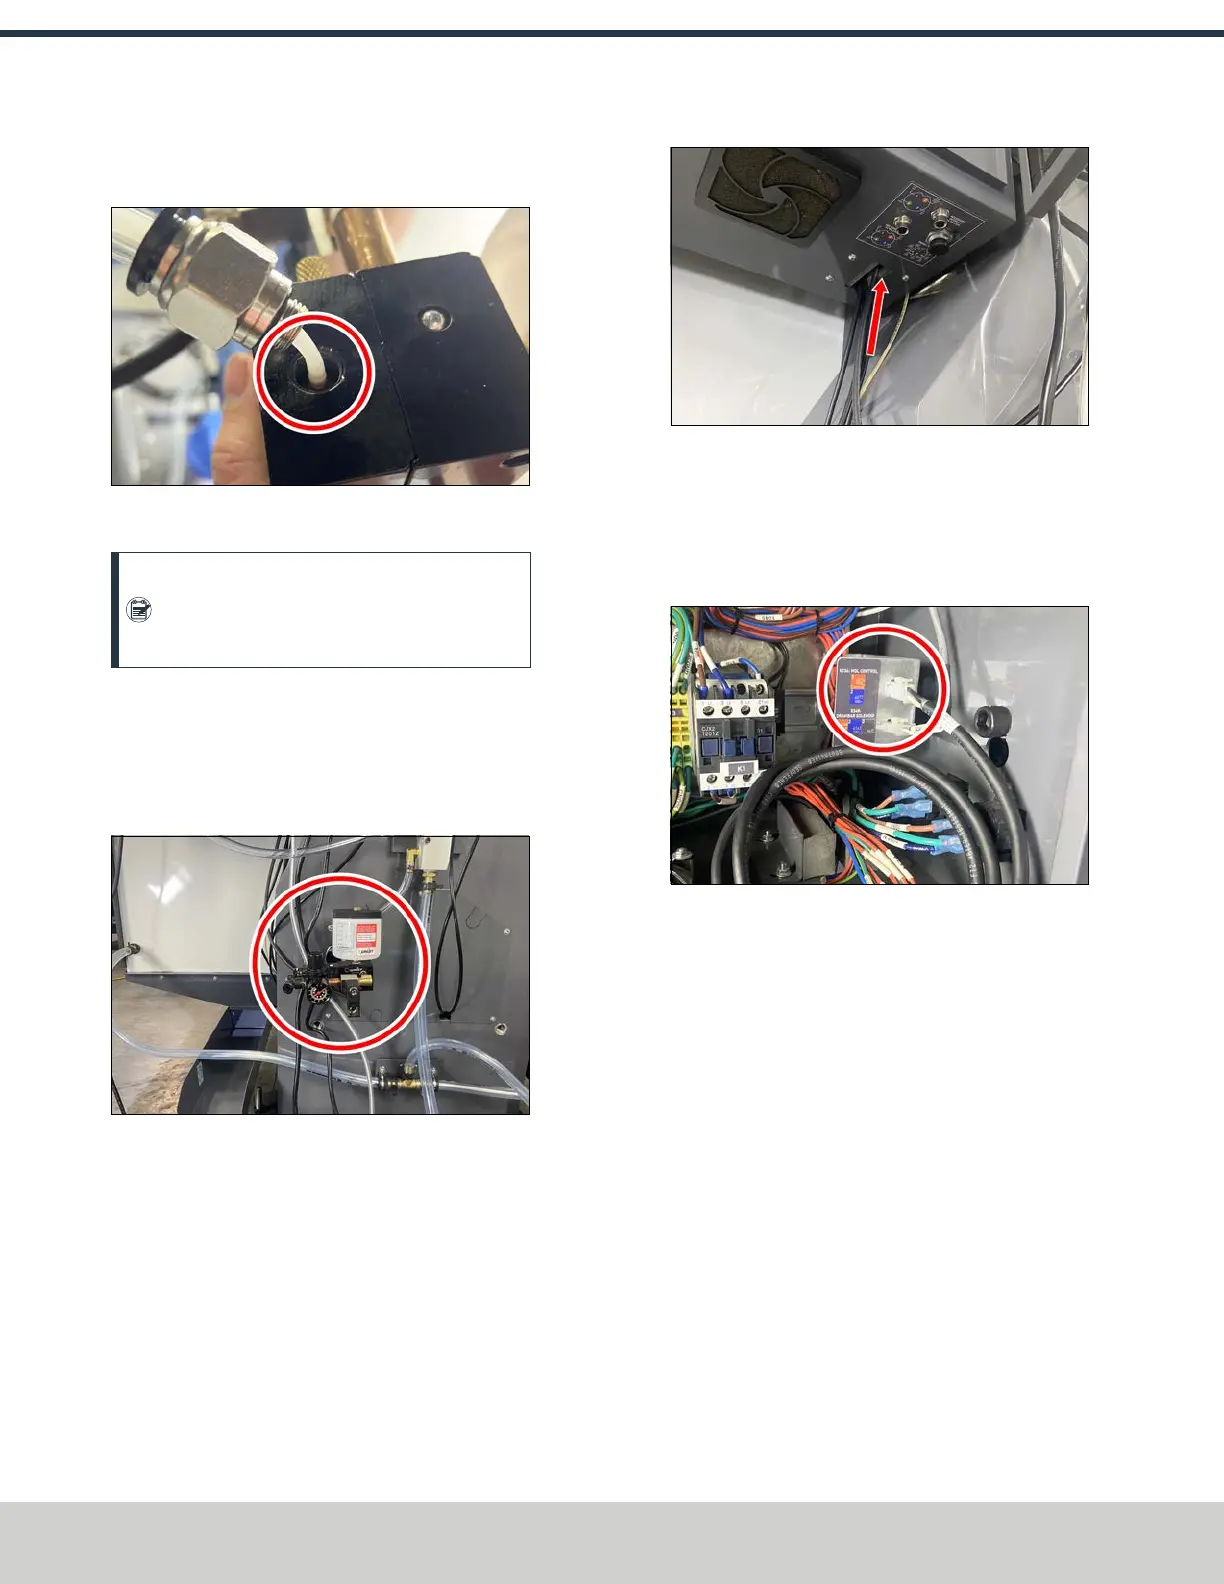
8. In the bottom left corner of the electrical cabinet, plug
the solenoid wire into the XS36:MQL Control connector.
Pull the extra wire into the electrical cabinet, coil it up,
and secure it with a cable tie.
Figure 4-197: Solenoid wire connection inside of the
electrical cabinet.
9. On the back of the machine, identify the air line that's
connected to the machine's FRL(with the fitting
installed on the end). Disconnect it from the FRL, and
connect it to the inlet valve of the MQL's solenoid.
©Tormach® 2024
Specifications subject to change without notice.
Page 92 UM10811: 1500MX Operator's Manual (Version 0424A)
For the most recent version, see tormach.com/support
4: INSTALLATION