Using 3D Guidance in the Field 5
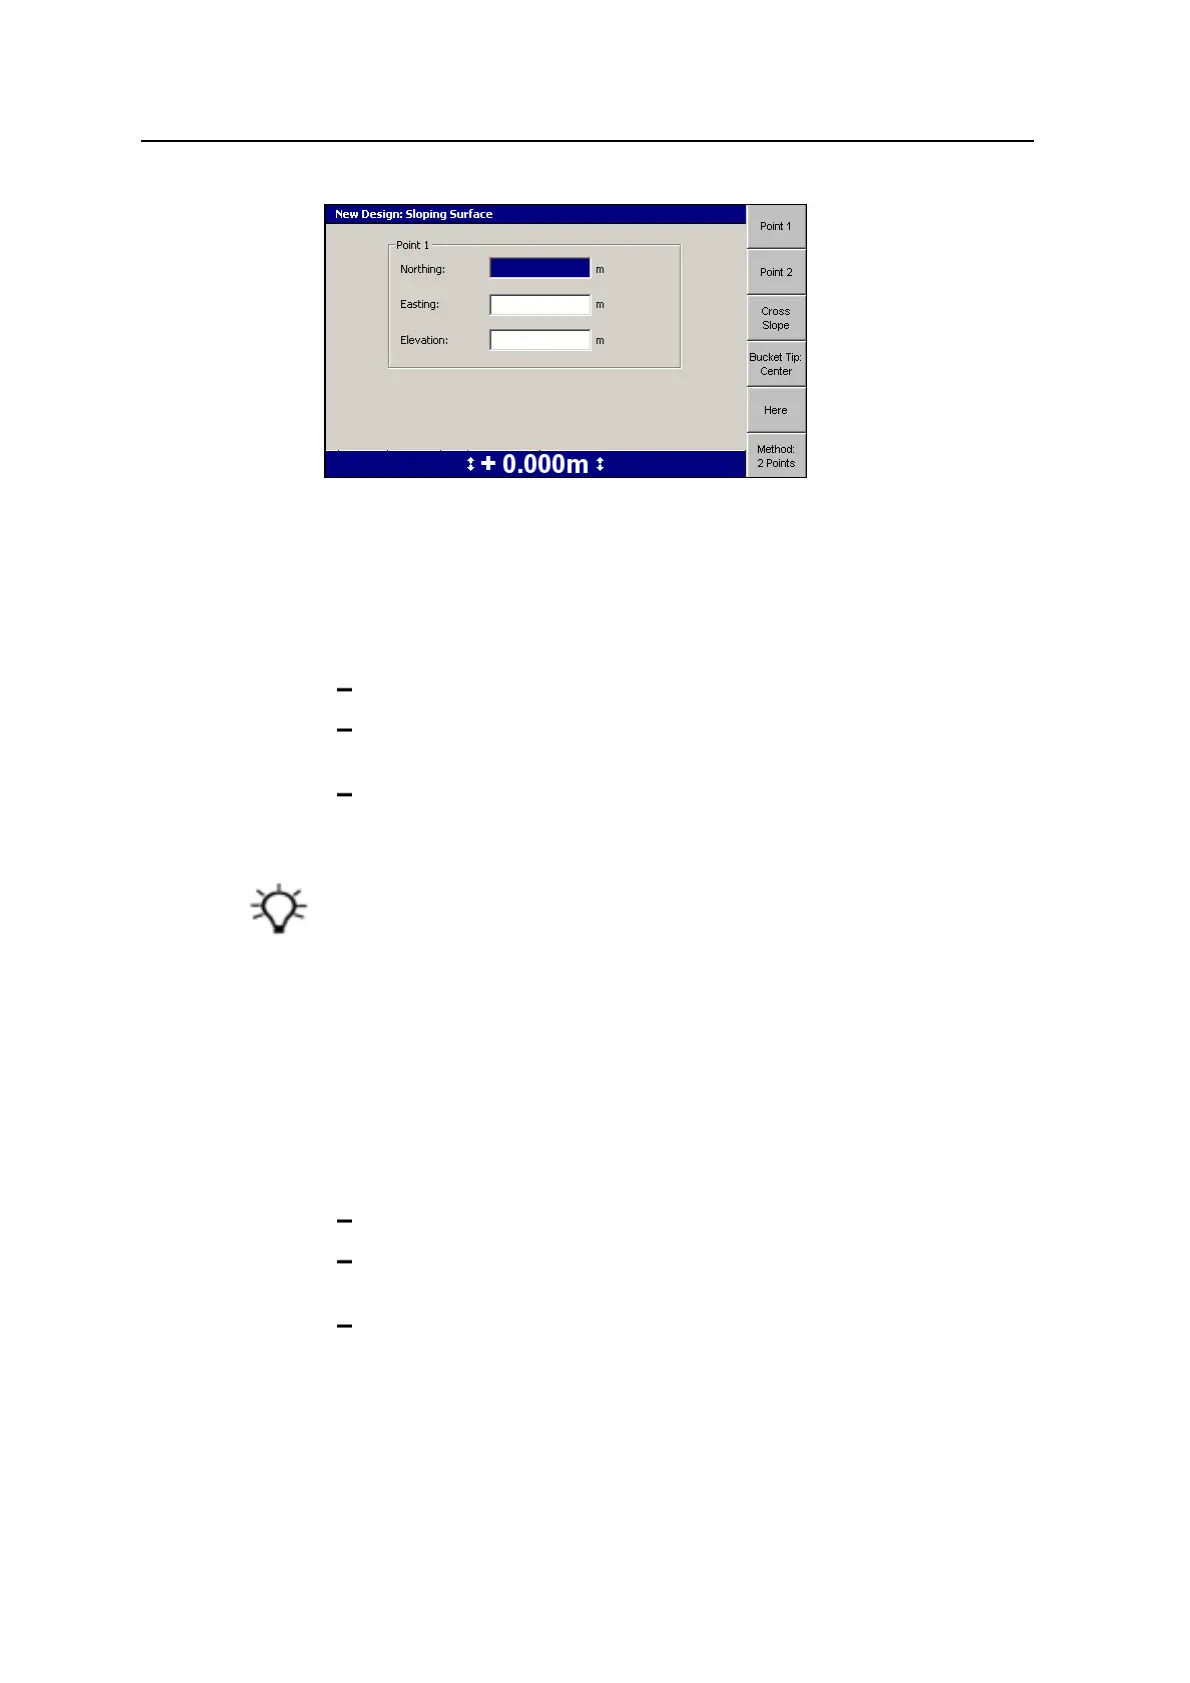
By default, the dialog shows the softkeys and fields needed to define a sloping
surface using the 2-Points method.
If you want to define the surface by using the Point-and-Direction method, go to
step 3 below:
1. Use any of the following tools to specify Point 1:
Edit the Northing, Easting, and Elevation fields directly.
To use the current Northing, Easting, and Elevation of the focus point,
press Here.
To change the focus point, press either Bucket Tip:Left, Bucket Tip:Right,
or Bucket Tip:Center.
2. Press Point 2. Use the procedure outlined in step 1 to specify Point 2.
Tip – When both points are entered, the system calculates the direction and grade
values. To view the calculated values, press Method:2Points.
The 2Points and Pt/Dir dialogs update each other with information. The Point1 and
CrossSlope values are always the same in both dialogs. Enter Point2 values and then
change to the Pt/Dir dialog to see the calculated direction and grade. Check that the
calculated direction and grade are within design limits. If you change the Direction
setting or change the Grade setting in the Pt/Dir dialog, the change clears the value of
Point2 in the 2Points dialog, as there is not enough information to calculate the new
position.
3. To use the Point-and-Direction method, press Method:2Points. The softkey
changes to Method:Pt/Dir and the Point1 position fields are shown.
4. Use one or more of the following tools to specify Point 1:
Edit the Northing, Easting, and Elevation fields directly.
To use the current Northing, Easting, and Elevation of the focus point,
press Here.
To change the focus point, press either Bucket Tip:Left, Bucket Tip:Right,
or Bucket Tip:Center.
5. Press Direction.
GCS900 Grade Control System for Excavators Operator's Manual 125