Maintenance2751−1/A1
Winterthur Gas & Diesel Ltd.
2/ 5
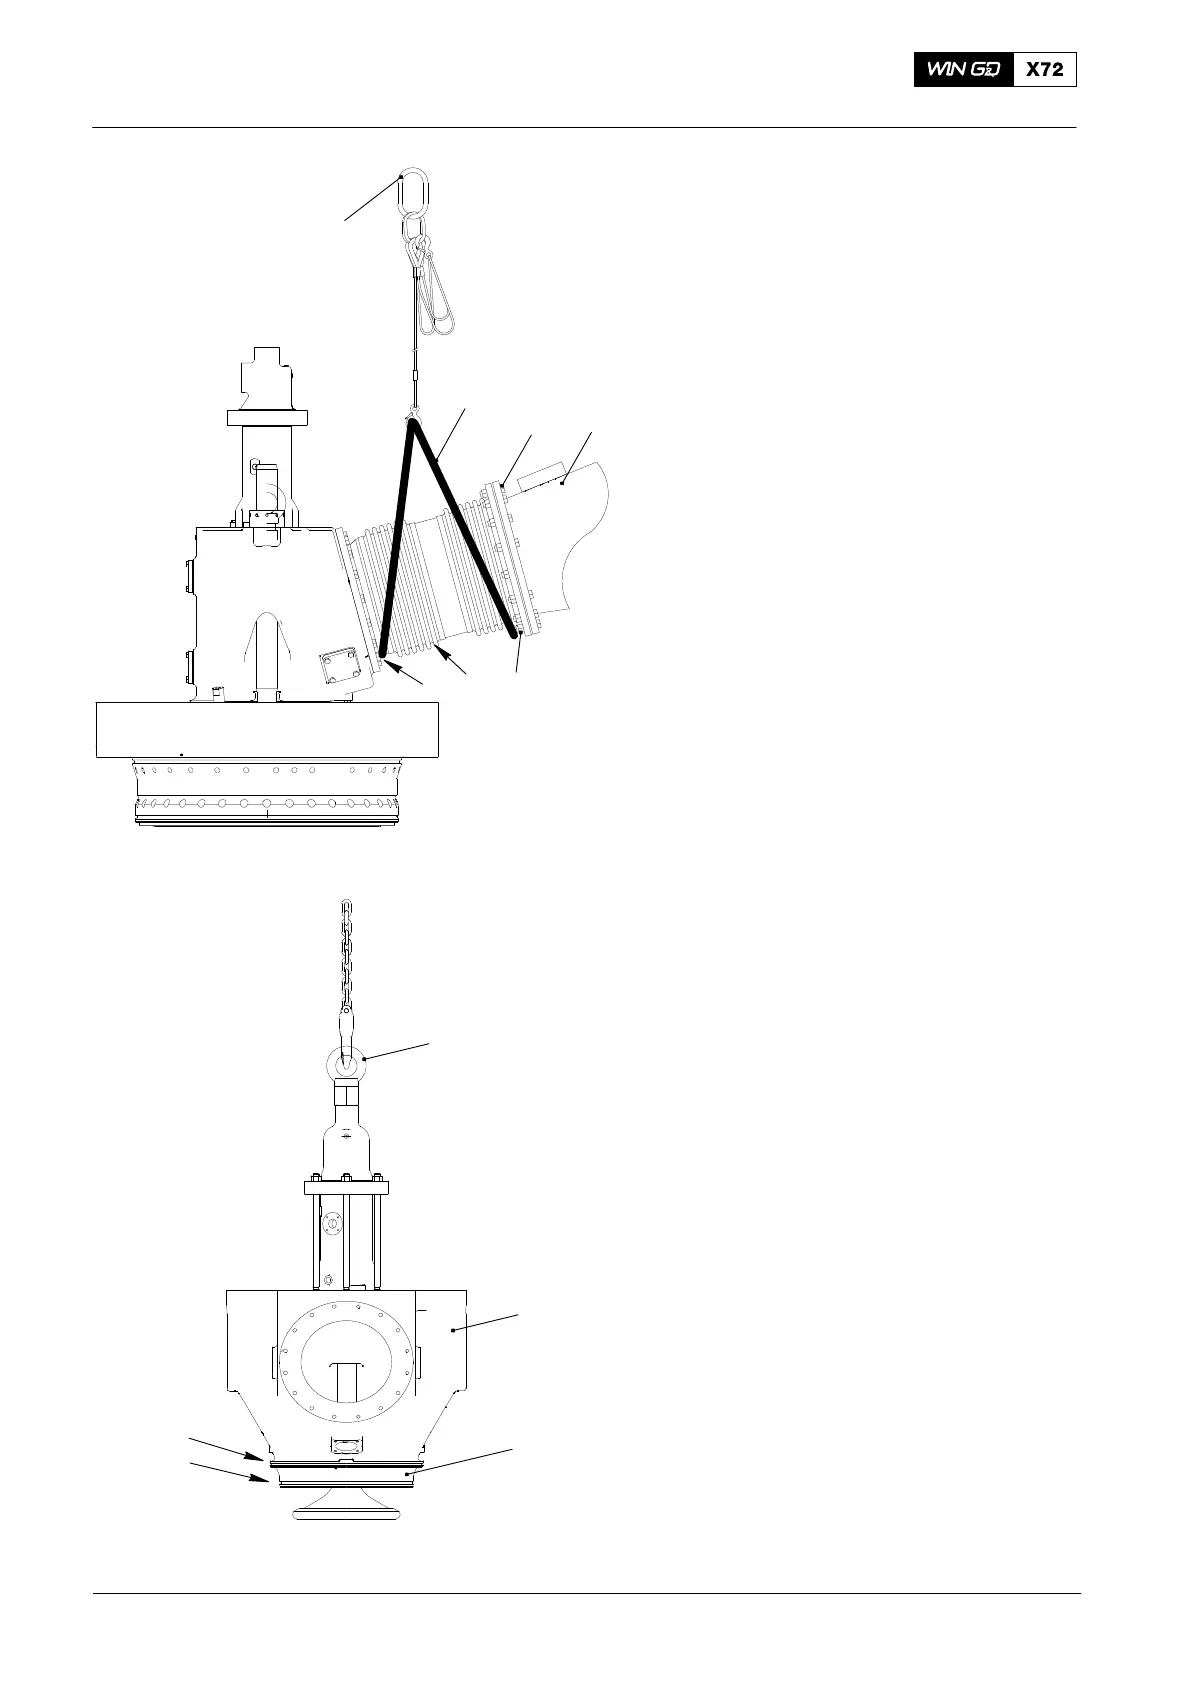
3) Put the slings (94202K, Fig. 2) in
position on the expansion piece as
shown.
4) Connect the slings to the hook on the
lifting tool (94209).
5) Use the crane to put a light tension on
the lifting tool and the slings.
6) Remove the 16 screws (5).
7) Remove the 16 nuts (3) and the bolts
(1).
8) Move the expansion piece (4) to one
side.
9) Lower the expansion piece on to an
applicable surface.
10) Remove the tool (94209) from the
slings.
11) Attach the eye bolt (1, Fig. 3) to the
exhaust valve.
12) Attach the lifting tool (94209) to the eye
bolt (1).
13) Use the crane to lift the exhaust valve
(2) from the cylinder cover.
14) Carefully lower the exhaust valve (2) on
to a wooden underlay.
15) Disconnect the lifting tool (94209).
16) Remove and discard the two gaskets
(4, 5). from the valve cage.
2015
Exhaust Valve − Removal and Installation
94209
94202K
016.885/08
WCH02353
Fig. 2
Fig. 3
1
2
5
34
2
3
1
5
4
 Loading...


