CAMSHAFTS
5-18
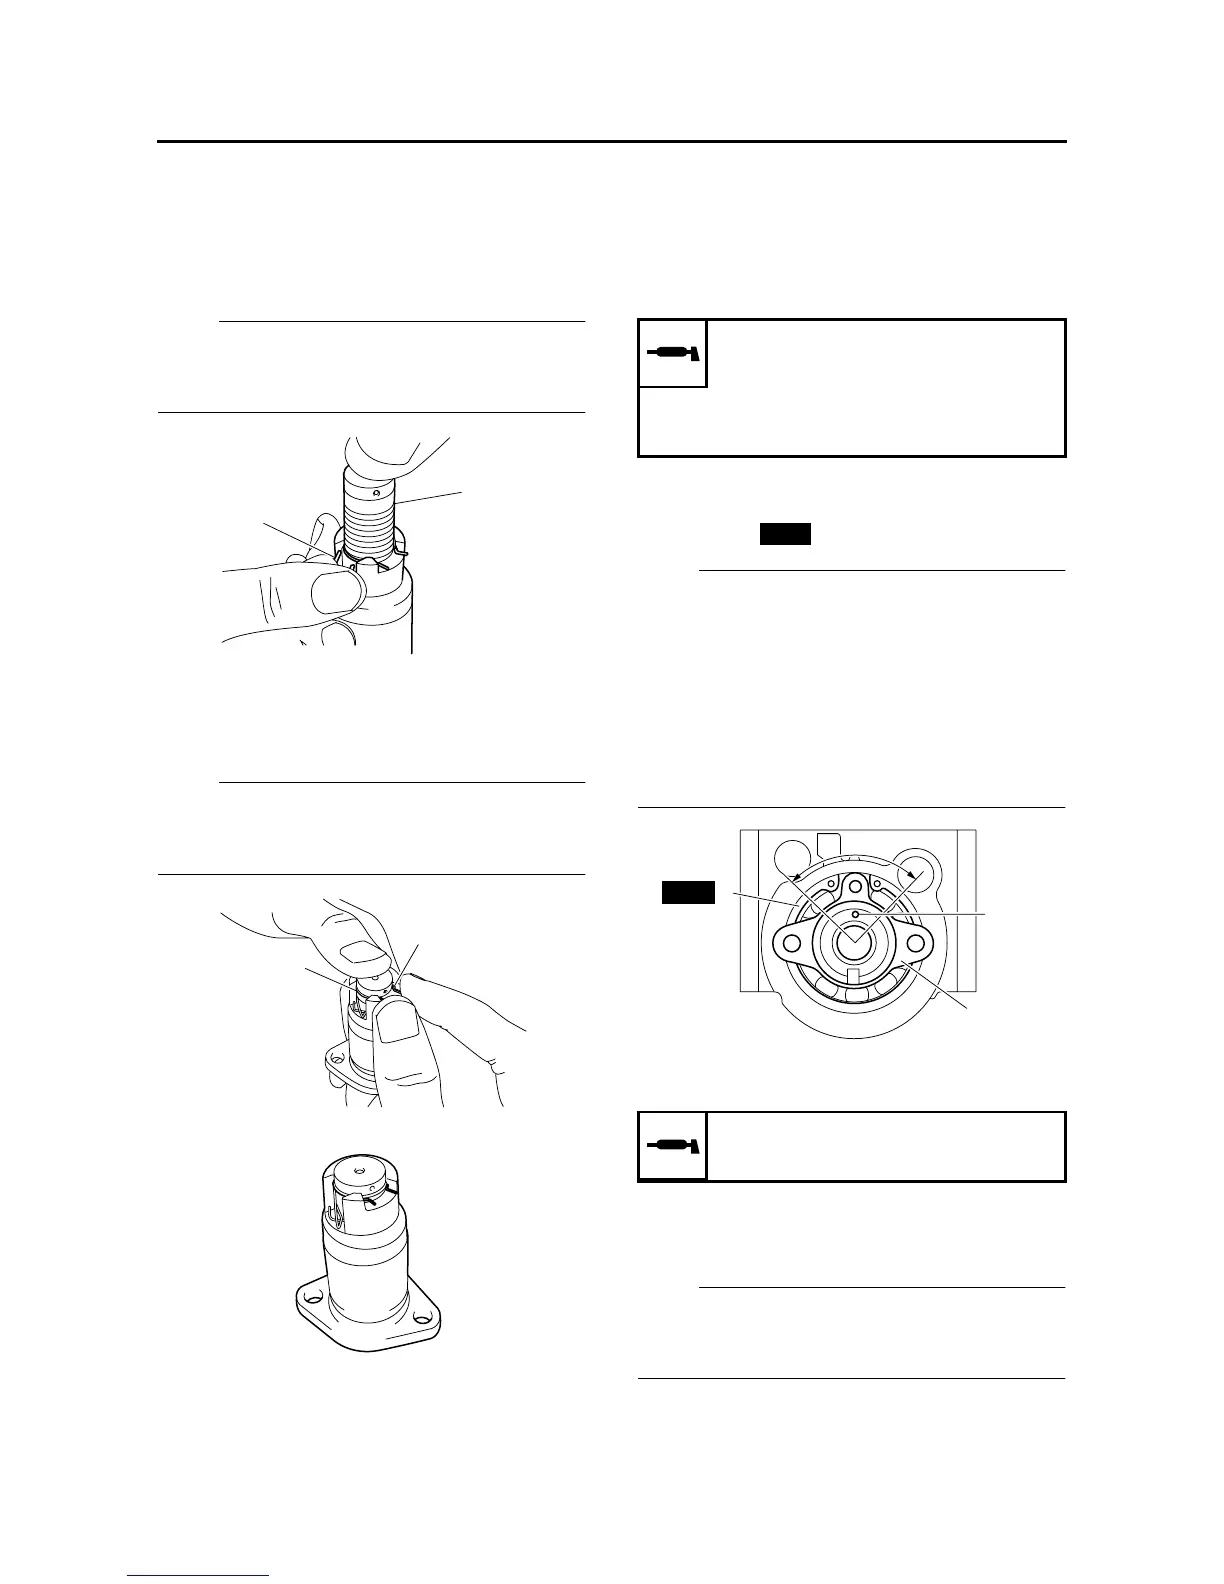
b. Install the timing chain tensioner inner spring,
timing chain tensioner spring seat, and timing
chain tensioner rod.
c. Squeeze timing chain tensioner clip 2 “1”,
and then push the timing chain tensioner rod
“3” into the timing chain tensioner housing.
NOTE:
Do not release timing chain tensioner clip 2 while
pushing the rod into the housing, otherwise the
rod may be ejected.
d. Align the groove “b” in the timing chain ten-
sioner rod with timing chain tensioner clip 1
“2”, and then squeeze the clip to fit it into the
groove.
NOTE:
Make sure that the timing chain tensioner rod is
secured by the clip, otherwise the rod may be
ejected.
▲▲▲▲▲▲▲▲▲ ▲ ▲▲▲▲▲▲▲▲▲ ▲ ▲▲▲▲ ▲ ▲▲▲▲ ▲▲▲
EAS24040
INSTALLING THE CAMSHAFTS AND
ROCKER ARMS
The following procedure applies to all of the
rocker arms and camshafts.
1. Lubricate:
• Camshaft
2. Install:
• Camshaft “1”
• Circlip “2”
NOTE:
• Position the camshaft as shown in the illustra-
tion so that the camshaft lobes will not catch on
the camshaft carrier during installation.
• Position the opening between the ends of the
circlip in the 90° range “a” shown in the illustra-
tion.
• The front cylinder camshaft is identified by the
punch mark “b”. The rear cylinder camshaft
does not have a punch mark.
3. Lubricate:
• Rocker arm shafts
4. Install:
• Rocker arms
• Rocker arm shafts
NOTE:
Make sure that the notches “a” in the rocker arm
shafts are aligned vertically as shown in the illus-
tration.
1
3
2
b
Recommended lubricant
Camshaft
Molybdenum disulfide oil
Camshaft bearing
Engine oil
Recommended lubricant
Engine oil
New
a
2
1
b
New