THERMOSTAT
6-6
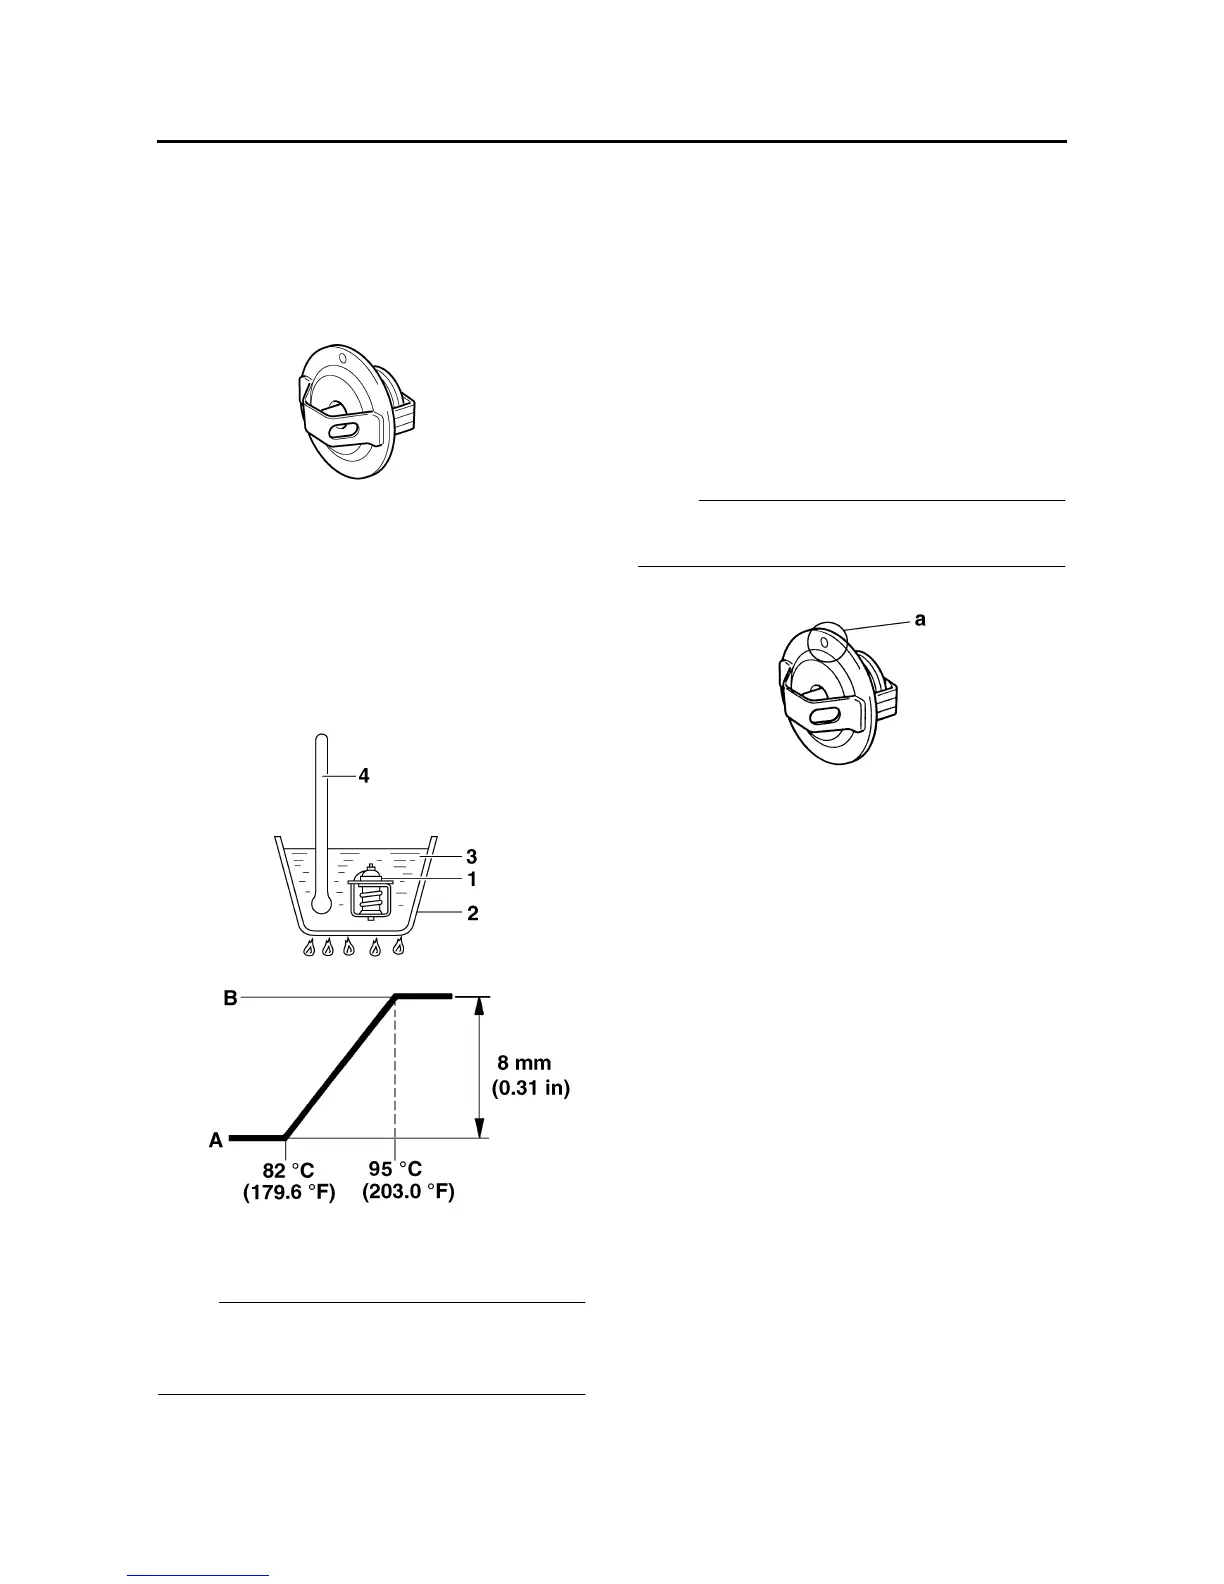
EAS26450
CHECKING THE THERMOSTAT
1. Check:
• Thermostat
Does not open at 82–95 °C (179.6–203.0 °F)
→ Replace.
▼▼▼▼▼▼▼▼▼ ▼ ▼▼▼▼▼▼▼▼▼ ▼ ▼▼▼▼ ▼ ▼▼▼▼ ▼▼▼
a. Suspend the thermostat “1” in a container “2”
filled with water.
b. Slowly heat the water “3”.
c. Place a thermometer “4” in the water.
d. While stirring the water, observe the thermo-
stat and thermometer’s indicated tempera-
ture.
NOTE:
If the accuracy of the thermostat is in doubt, re-
place it. A faulty thermostat could cause serious
overheating or overcooling.
▲▲▲▲▲▲▲▲▲ ▲ ▲▲▲▲▲▲▲▲▲ ▲ ▲▲▲▲ ▲ ▲▲▲▲ ▲▲▲
2. Check:
• Thermostat housing cover
• Thermostat housing
• Thermostat pipes
• Thermostat hoses
• Radiator inlet hose
• Radiator filler pipe
Cracks/damage/wear → Replace.
EAS26480
INSTALLING THE THERMOSTAT
ASSEMBLY
1. Install:
• Thermostat
NOTE:
Install the thermostat with its breather hole “a”
facing up.
2. Fill:
• Cooling system
(with the specified amount of the recom-
mended coolant)
Refer to “CHANGING THE COOLANT” on
page 3-16.
3. Check:
• Cooling system
Leaks → Repair or replace any faulty part.
4. Measure:
• Radiator cap opening pressure
Below the specified pressure → Replace the
radiator cap.
Refer to “CHECKING THE RADIATOR” on
page 6-3.
A. Fully closed
B. Fully open