CYLINDER HEADS
5-24
EAS24150
REMOVING THE CYLINDER HEADS
1. Remove:
• Cylinder head bolts
• Cylinder head nuts
NOTE:
• Loosen the nuts and bolts in the proper se-
quence as shown.
• Loosen each nut and bolt 1/2 of a turn at a
time. After all of the bolts and nuts are fully
loosened, remove them.
EAS24170
CHECKING THE CYLINDER HEADS
The following procedure applies to all of the cyl-
inder heads.
1. Eliminate:
• Combustion chamber carbon deposits
(with a rounded scraper)
NOTE:
Do not use a sharp instrument to avoid damag-
ing or scratching:
• Spark plug bore threads
• Valve seats
2. Check:
• Cylinder heads
Damage/scratches → Replace.
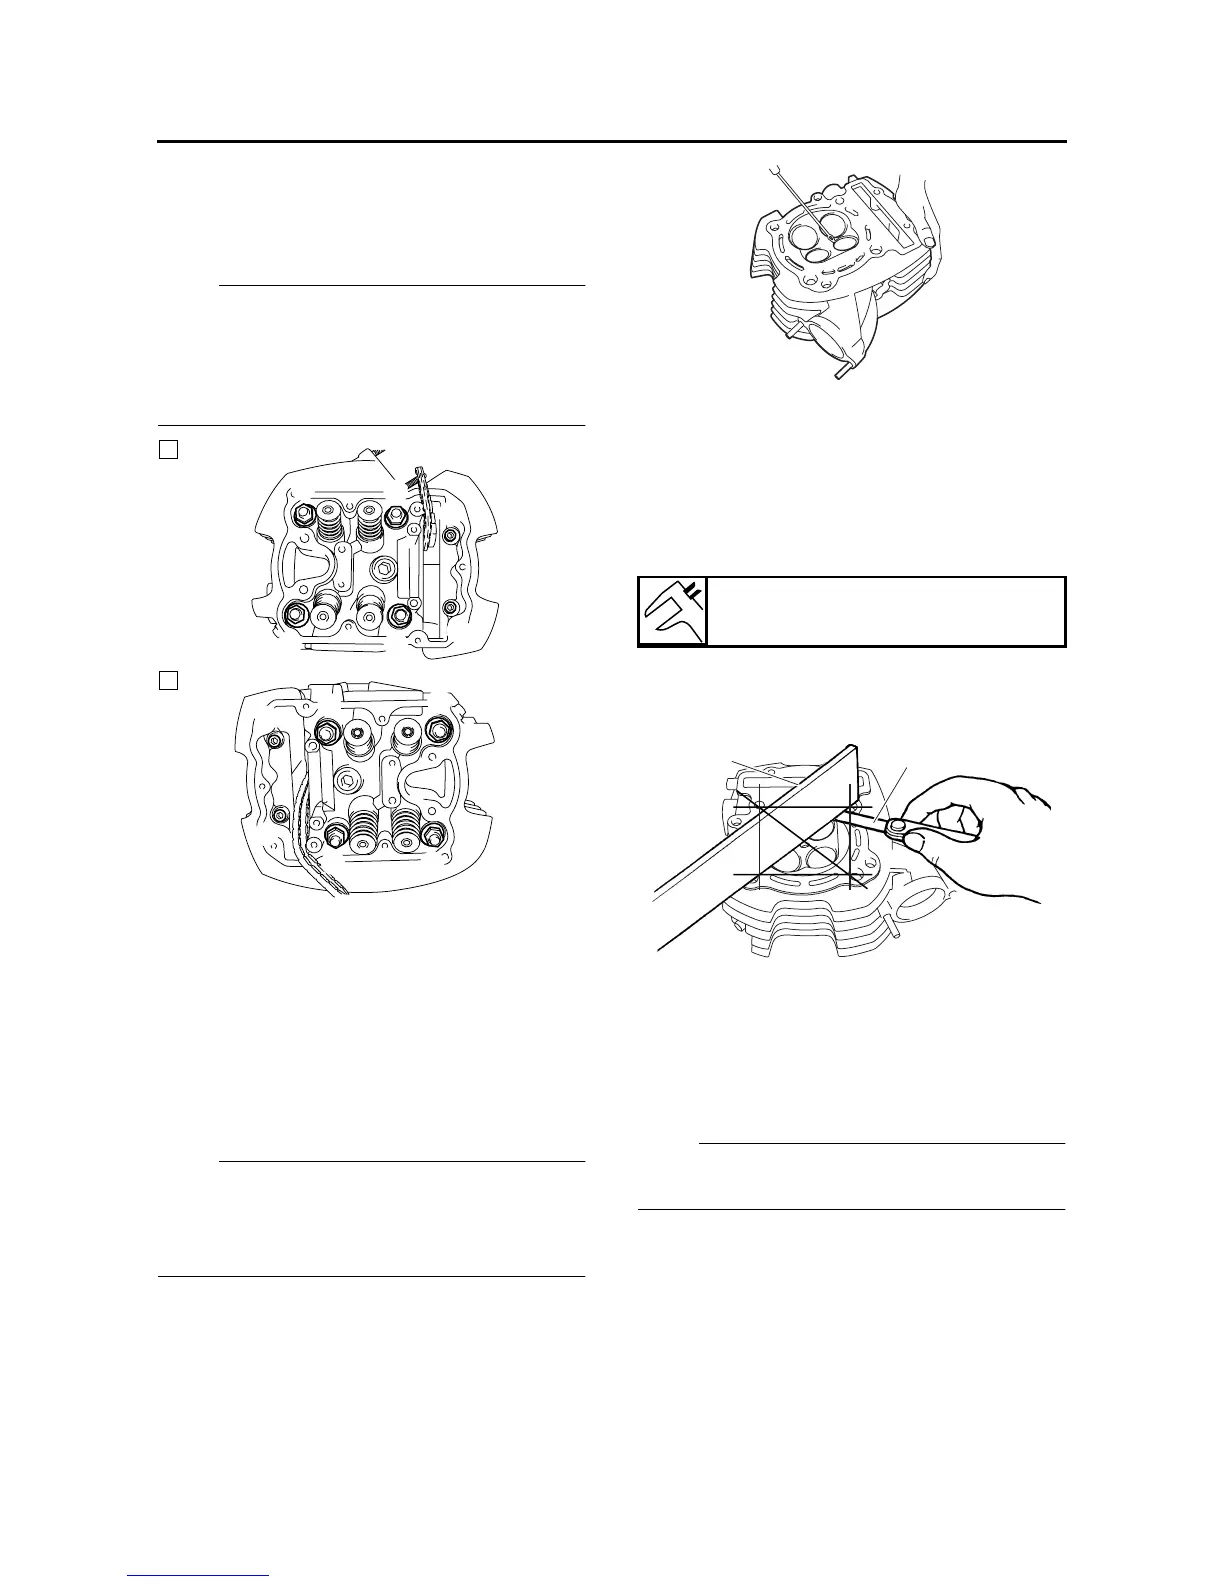
3. Measure:
• Cylinder head warpage
Out of specification → Resurface the cylinder
head.
▼▼▼▼▼▼▼▼▼ ▼ ▼▼▼▼ ▼ ▼▼▼▼ ▼ ▼▼▼▼ ▼ ▼▼▼▼ ▼▼▼
a. Place a straightedge “1” and a thickness
gauge “2” across the cylinder head.
b. Measure the warpage.
c. If the limit is exceeded, resurface the cylinder
head as follows.
d. Place a 400–600 grit wet sandpaper on a sur-
face plate and resurface the cylinder head
using a figure-eight sanding pattern.
NOTE:
To ensure an even surface, rotate the cylinder
head several times.
▲▲▲▲▲▲▲▲▲ ▲ ▲▲▲▲ ▲ ▲▲▲▲ ▲ ▲▲▲▲ ▲ ▲▲▲▲ ▲▲▲
EAS24230
INSTALLING THE CYLINDER HEADS
1. Tighten:
• Cylinder head nuts
• Cylinder head bolts
A. Front cylinder head
B. Rear cylinder head
4
5
3
1
2
6
A
1
2
6
4
5
3
B
Warpage limit
0.03 mm (0.0012 in)
1
2