CRANKCASE
5-69
EAS25560
DISASSEMBLING THE CRANKCASE
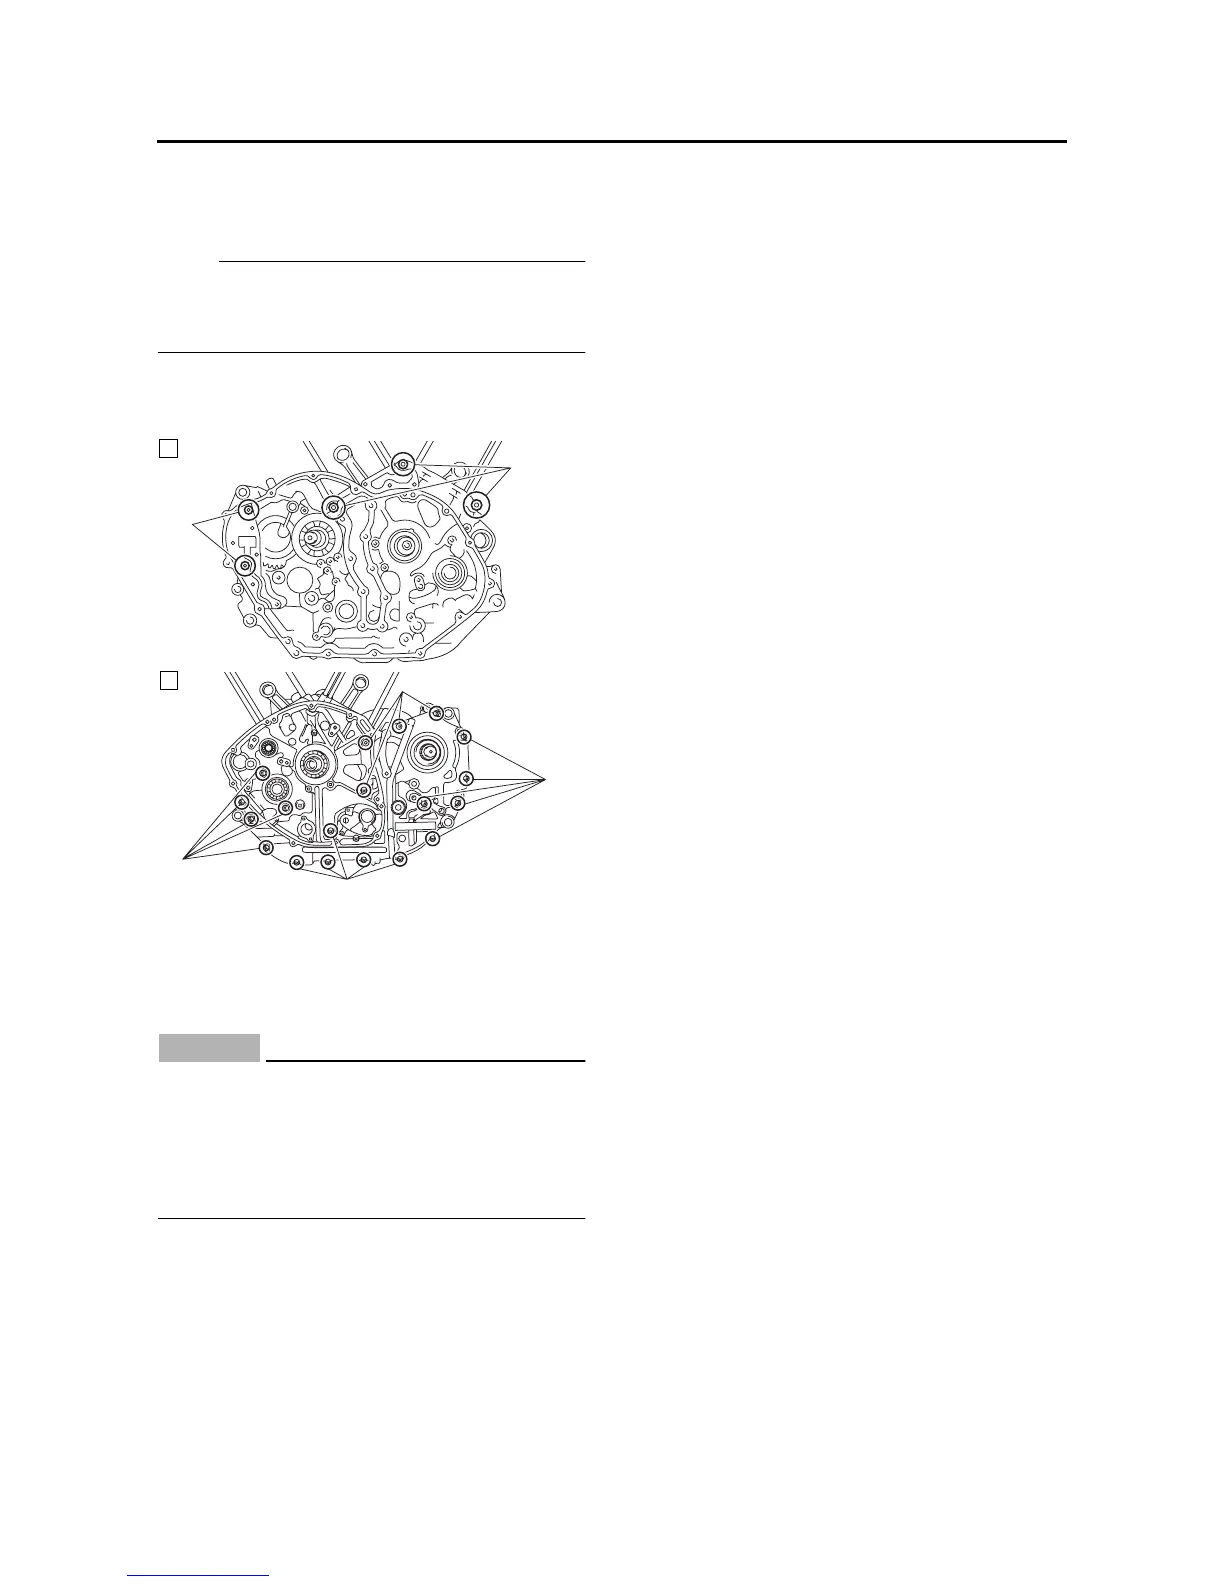
1. Remove:
• Crankcase bolts
NOTE:
Loosen each bolt 1/4 of a turn at a time, in stag-
es and in a crisscross pattern. After all of the
bolts are fully loosened, remove them.
• M10 × 110 mm bolts “1”
• M6 × 120 mm bolts “2”
• M6 × 80 mm bolts “3”
2. Remove:
• Left crankcase
CAUTION:
ECA13900
Tap on one side of the crankcase with a soft-
face hammer. Tap only on reinforced por-
tions of the crankcase, not on the crankcase
mating surfaces. Work slowly and carefully
and make sure the crankcase halves sepa-
rate evenly.
EAS25580
CHECKING THE CRANKCASE
1. Thoroughly wash the crankcase halves in a
mild solvent.
2. Thoroughly clean all the gasket surfaces and
crankcase mating surfaces.
3. Check:
• Crankcase
Cracks/damage → Replace.
• Oil delivery passages
Obstruction → Blow out with compressed air.
EAS3D81029
CHECKING THE BEARINGS AND OIL SEAL
1. Check:
• Bearings
Clean and lubricate the bearings, then rotate
the inner race with your finger.
Rough movement → Replace.
• Oil seals
Damage/wear → Replace.
EAS25600
CHECKING THE OIL DELIVERY PIPES AND
COOLANT DELIVERY PIPE
The following procedure applies to all of the oil
delivery pipes and joint pipe.
1. Check:
• Oil delivery pipe
• Joint pipe
Damage → Replace.
Obstruction → Wash and blow out with com-
pressed air.
2. Check:
• Coolant delivery pipe
Cracks/damage/wear → Replace.
EAS25620
CHECKING THE TIMING CHAINS
1. Check:
• Timing chains
Damage/stiffness → Replace the timing
chain and camshaft sprocket as a set.
EAS3D81030
CHECKING THE OIL/WATER PUMP DRIVEN
SPROCKET
1. Check:
• Oil/water pump driven sprocket
Cracks/damage/wear → Replace the oil/wa-
ter pump driven sprocket and the oil/water
pump drive chain as a set.
EAS3D81036
CHECKING THE OIL NOZZLES
The following procedure applies to all of the oil
nozzles.
1. Check:
• Oil nozzle
Damage/wear → Replace the oil nozzle.
• Oil passage
Obstruction → Blow out with compressed air.
A. Right crankcase
B. Left crankcase
A
1
2
3
3
3
3
B