3-78
Confidential
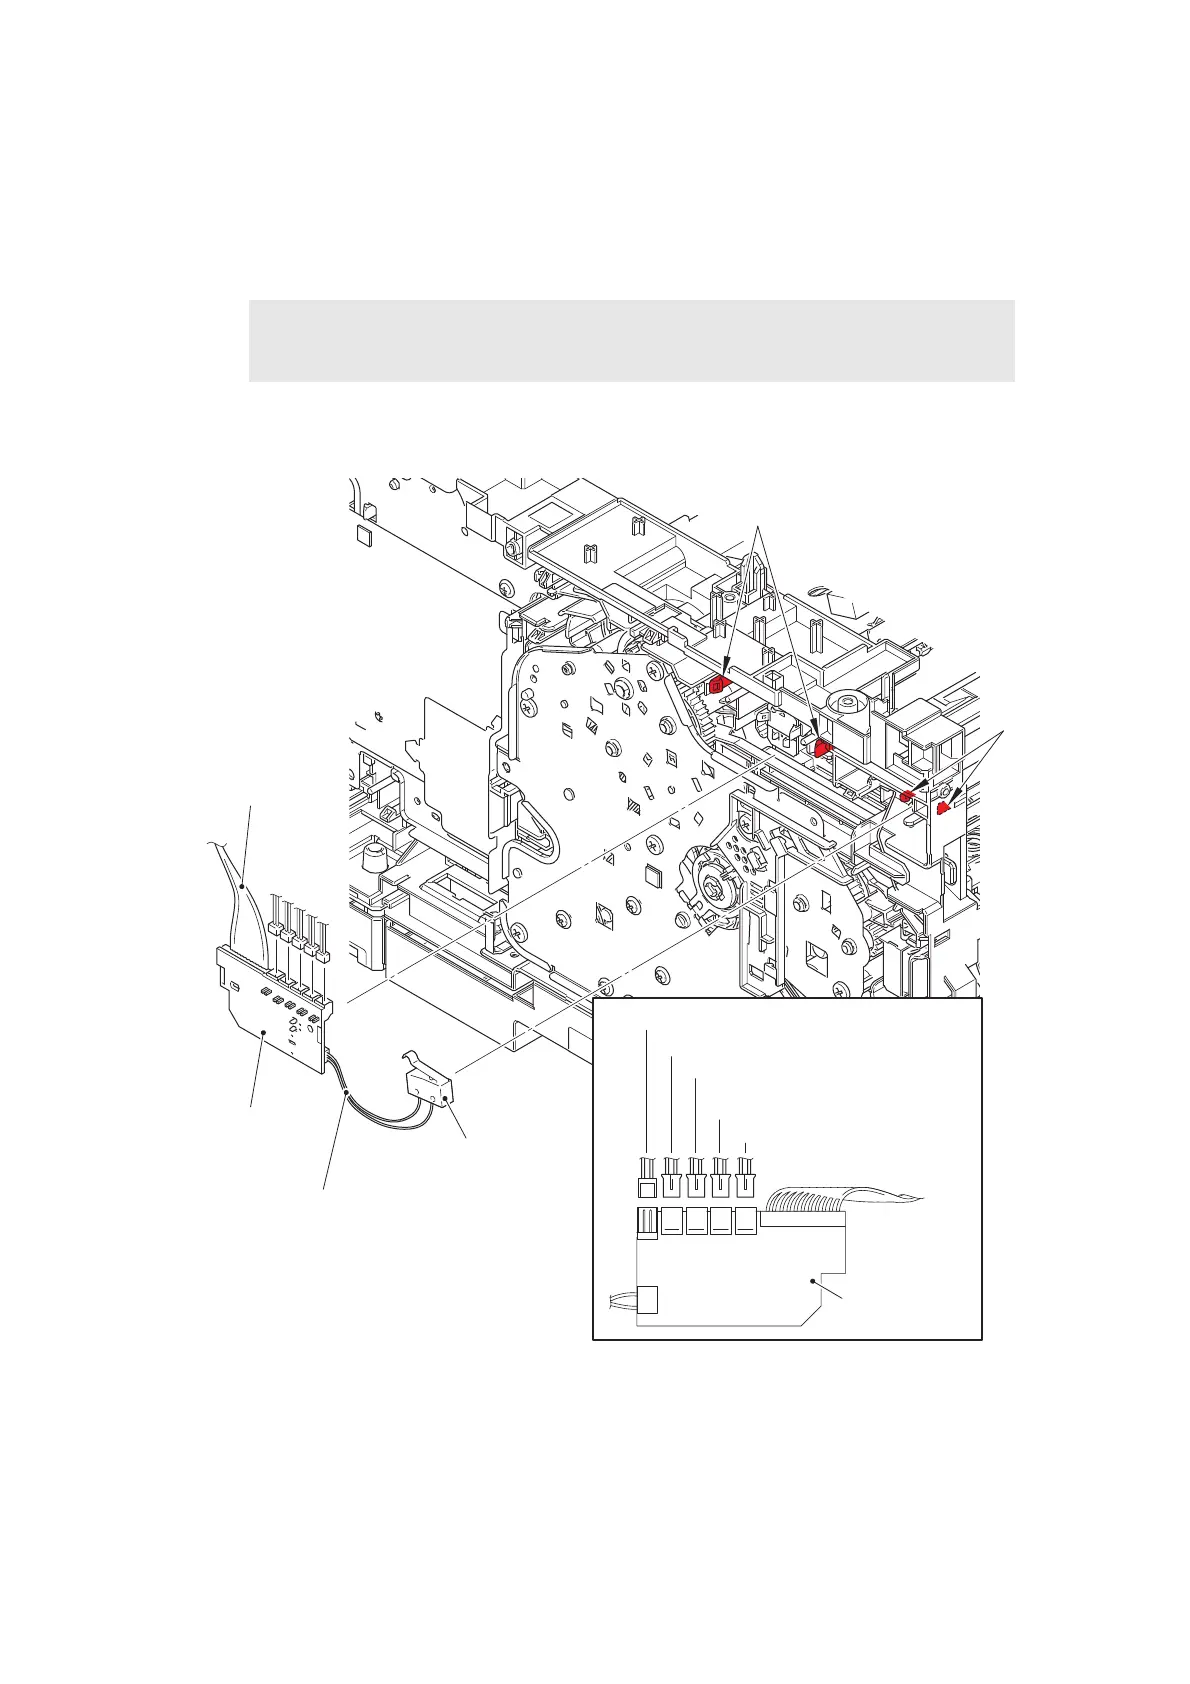
9.19 Relay front PCB ASSY
(1) Release the relay front harness from the securing fixtures.
(2) Release the two hooks, and remove the front cover sensor. Release the front cover
sensor harness from the securing fixtures.
(3) Release the two hooks, and remove the relay front PCB ASSY. Disconnect all harnesses
from the relay front PCB ASSY.
Fig. 3-67
Harness routing: Refer to “3. Left side of the machine (Common to all models)”.
Note:
• When removing the front cover sensor, push it from the rear to remove it.
Relay front PCB ASSY
Hooks
Relay front
PCB ASSY
Hooks
Front cover sensor
Front cover sensor harness
Relay front harness
Toner amount detection sensor
PCB harness (light reception)
Registration clutch harness
T1 pickup clutch harness
MP solenoid harness
Develop clutch harness
 Loading...