3-54
Confidential
9.10.4 Control panel
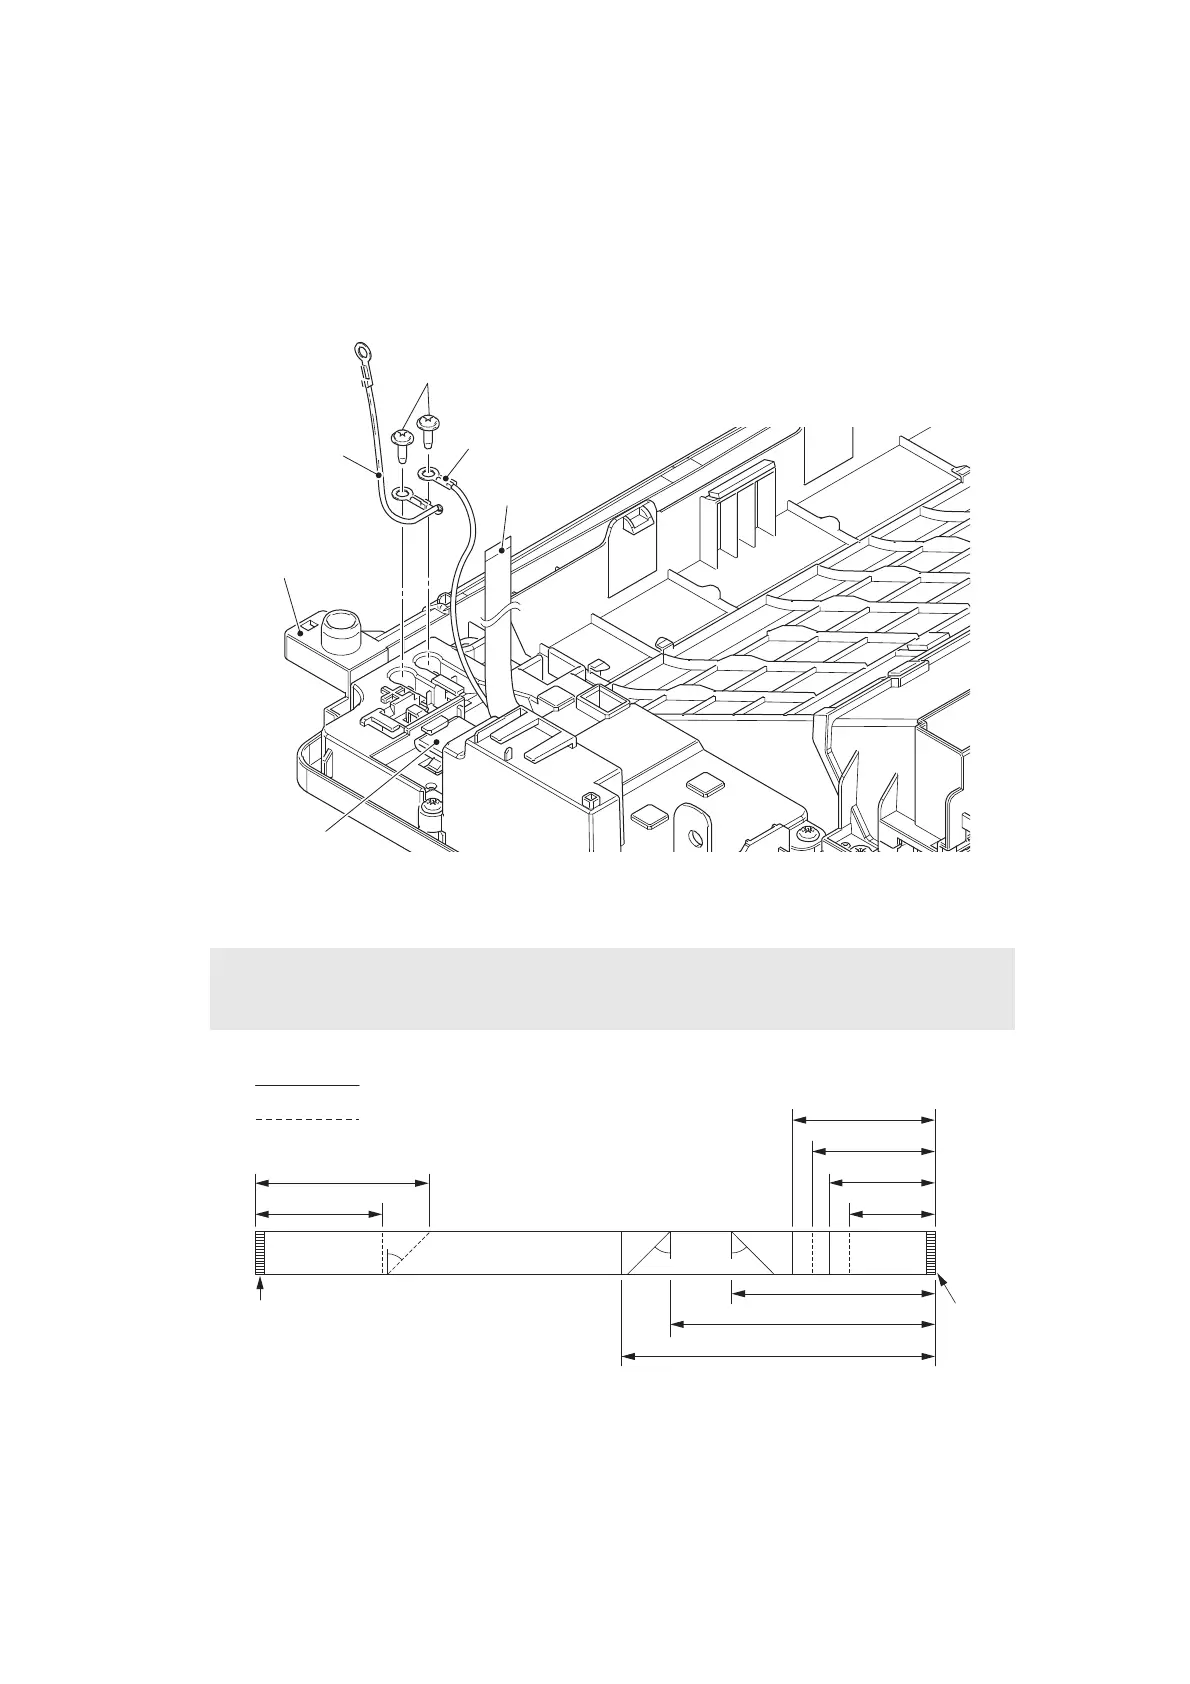
(1) Remove the taptite cup B M3x10 screw, and remove the FG harness A from the top
cover printed ASSY. Release the FG harness A from the securing fixtures.
(2) Remove the taptite cup B M3x10 screw, and disconnect the FG harness B.
(3) Release the LCD flat cable from the securing fixtures, and disconnect it from the flat
core.
Fig. 3-39
Harness routing: Refer to
“4. Bottom side of the top cover ASSY (Touch panel models)”
.
Fig. 3-40
Assembling Note:
• Fold the LCD flat cable at the positions shown in the figure below.
FG harness A
Taptite cup B M3x10
FG harness B
Top cover printed ASSY
LCD flat cable
Flat core
Mountain fold
Valley fold
72±2
35±2
LCD
PCB
side
45°
45°
52±2
43±2
50±2
58±2
83±2
108±2
128±2
Panel
PCB
side
45°
Conductor
Conductor
 Loading...