3-170
Confidential
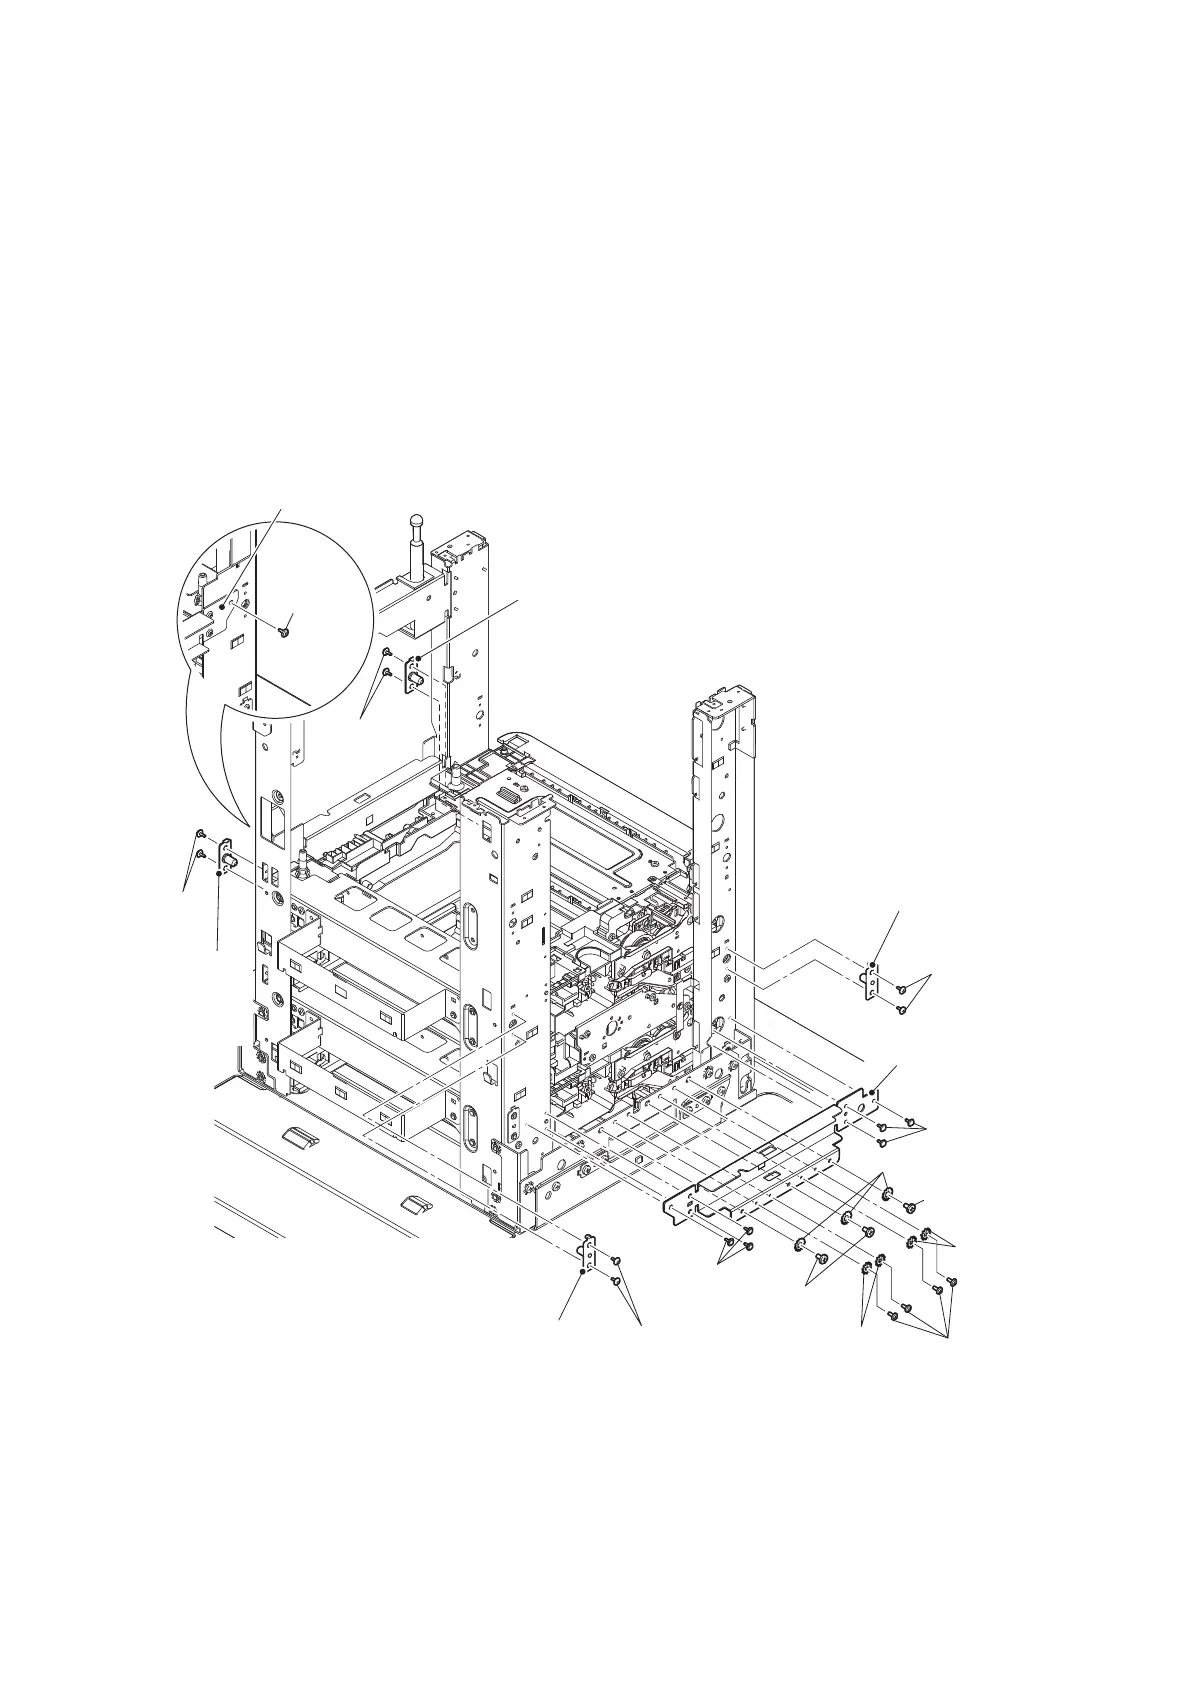
12.12 T4TT unit
(1) Remove the two taptite cup S M3x8 SR screws to remove the positioning plate calking
ASSY. (Four places)
(2) Remove the three screw bind M5x8 screws, the three flywheel lock washers, the four
screw cup M3x8 (black) screws, and the four flywheel lock washers from the Reinforcing
plate L (2/2). Remove the six taptite cup S M3x8 SR screws to remove the reinforcing
plate L (2/2).
(3) Remove the taptite cup S M3x8 SR screw from the reinforcing plate R (1/2).
Fig. 3-167
Positioning plate
calking ASSY
Positioning plate calking ASSY
Taptite cup
S M3x8 SR
Taptite
cup S
M3x8 SR
Positioning
plate calking
ASSY
Taptite cup S
M3x8 SR
Taptite cup
S M3x8 SR
Taptite cup S
M3x8 SR
Reinforcing
plate L (2/2)
Screw bind
M5x8
Taptite cup S
M3x8 SR
Positioning plate
calking ASSY
Screw bind M5x8
Screw cup
M3x8 (black)
Flywheel lock washers
Flywheel lock
washers
Flywheel
lock washers
Taptite cup S
M3x8 SR
Reinforcing plate R (1/2)
 Loading...