3-166
Confidential
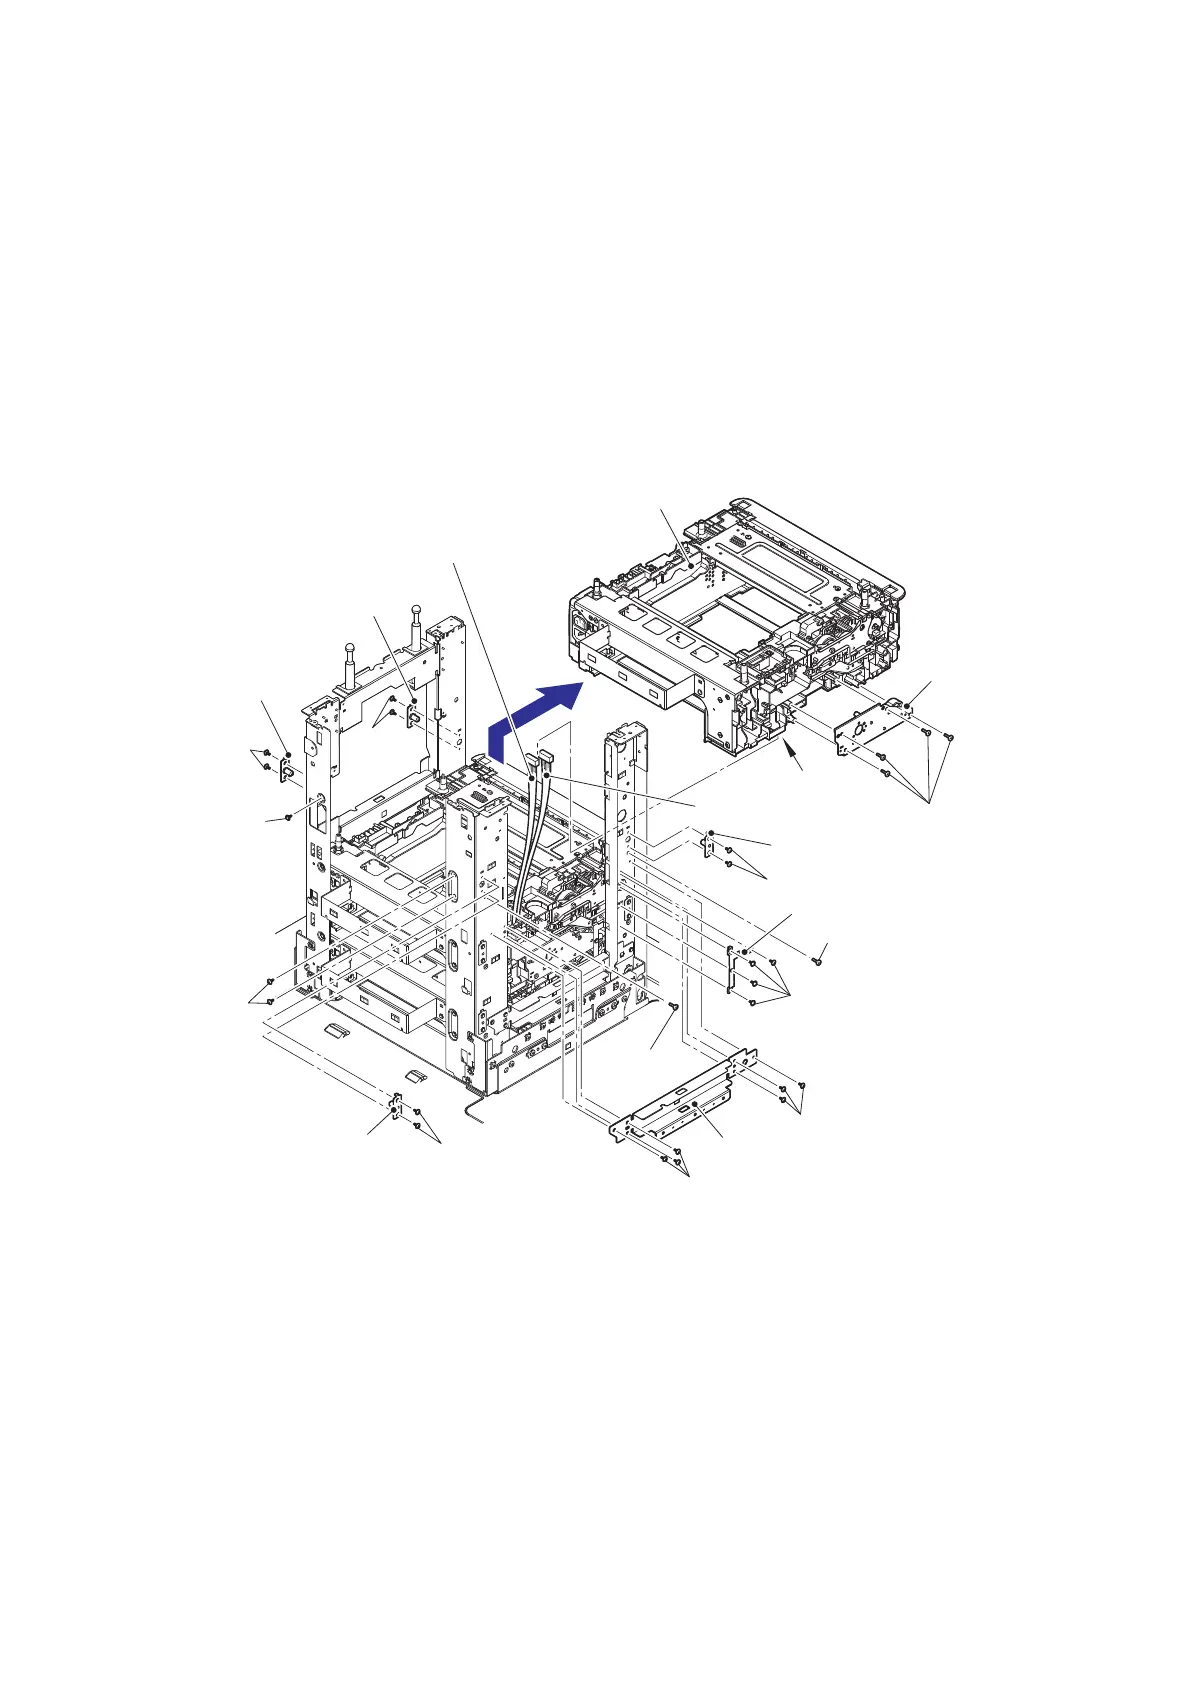
12.10 T3TT unit
(1) Remove the two taptite cup S M3x8 SR screws to remove the positioning plate calking
ASSY. (Four places)
(2) Remove the six taptite cup S M3x8 SR screws to remove the reinforcing plate L (1/2).
(3) Remove the four taptite cup S M3x8 SR screws to remove the FG plate L.
(4) Remove the four taptite bind B M4x12 screws to remove the calking gear plate ASSY.
(5) Remove the three taptite cup S M3x8 SR screws and the two taptite bind B M4x10
screws. Lift the T3TT unit slightly, and pull the T4TT relay harness and T5TT relay
harness from the T3TT unit hole to remove the T3TT unit in the direction of the arrow.
Fig. 3-162
Harness routing: Refer to “13. Left side of the TT”.
Taptite bind B M4x12
Positioning plate calking ASSY
Taptite cup S M3x8 SR
Taptite bind B M4x10
FG plate L
Taptite cup S M3x8 SR
Taptite cup S M3x8 SR
Taptite cup S M3x8 SR
Taptite cup S
M3x8 SR
Positioning plate calking ASSY
Reinforcing plate L (1/2)
Taptite cup S
M3x8 SR
Calking gear
plate ASSY
Taptite bind B
M4x10
Hole
T4TT relay harness
T3TT unit
T5TT relay harness
Taptite cup S
M3x8 SR
Positioning plate
calking ASSY
Positioning plate
calking ASSY
Taptite cup S
M3x8 SR
Taptite cup
S M3x8 SR
 Loading...