3-109
Confidential
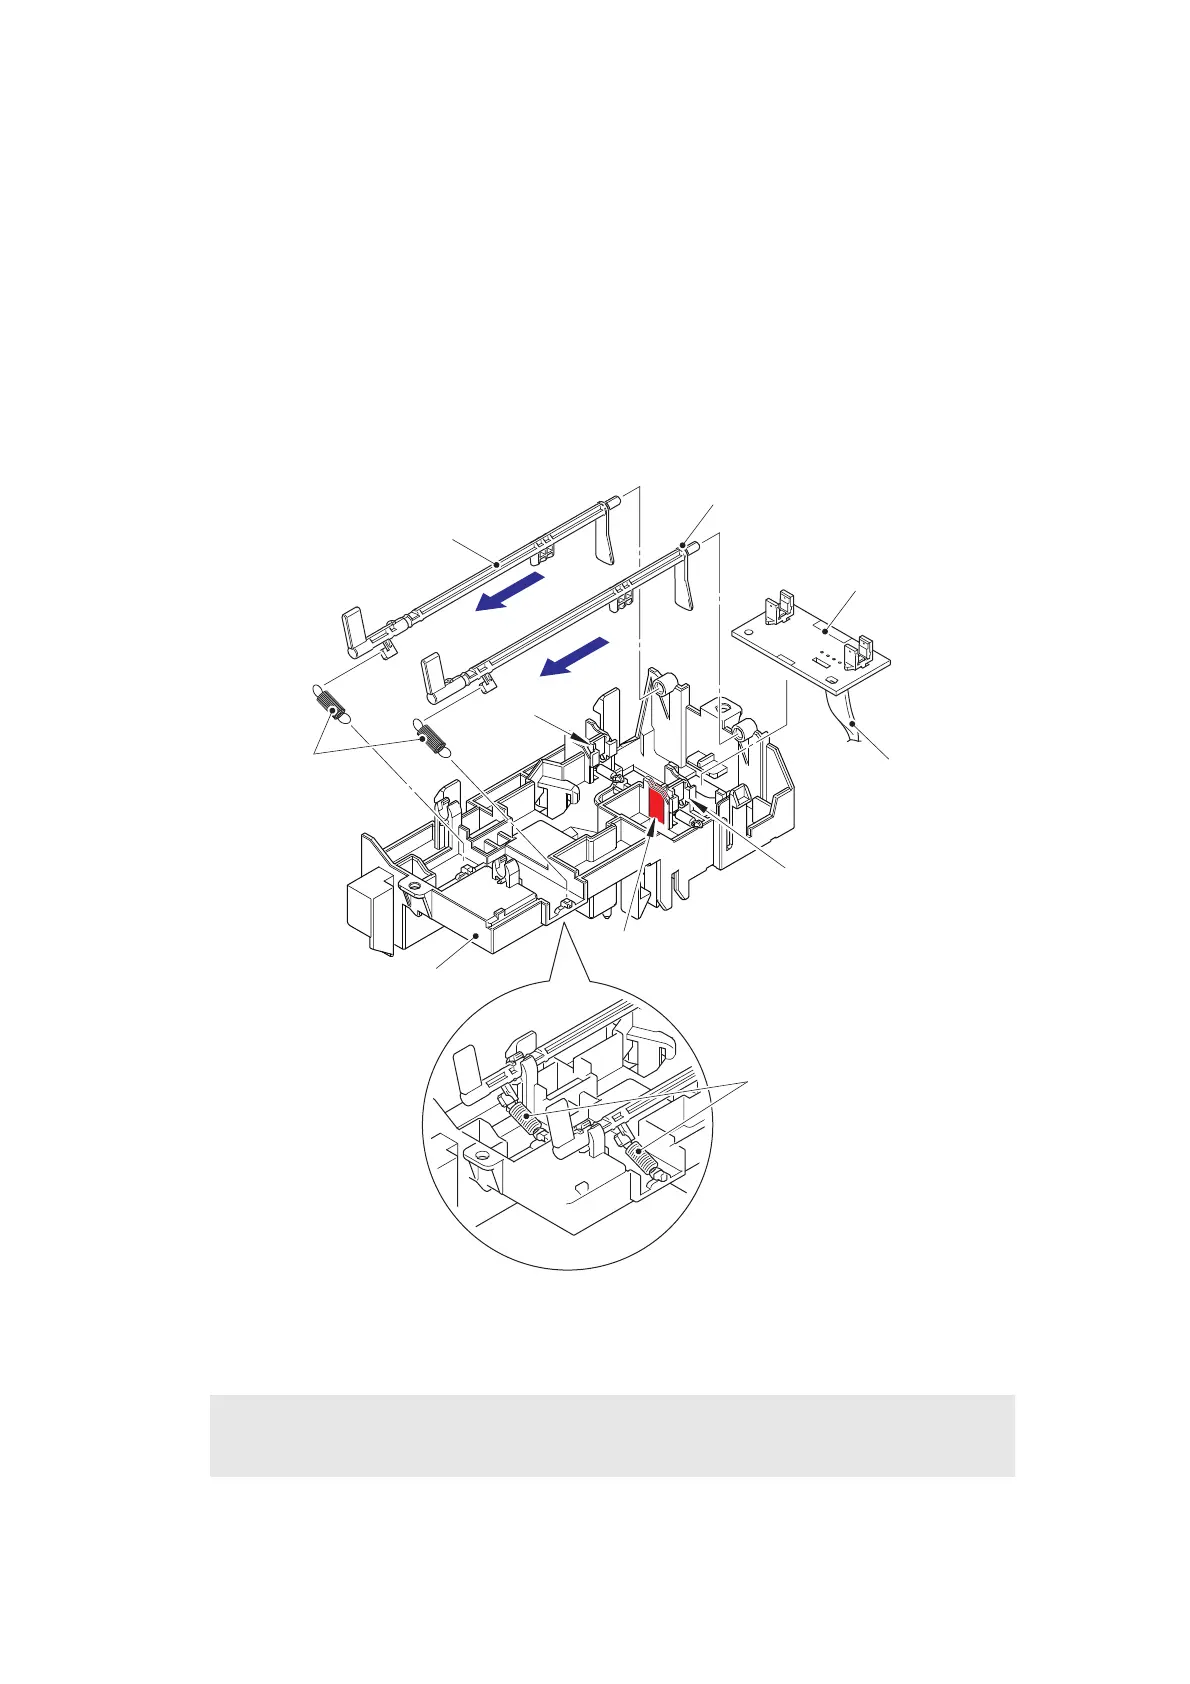
(6) Remove the registration actuator spring from the registration front actuator and the
registration actuator holder ASSY.
(7) Turn the registration front actuator to remove it from the guide, and then slide it in the
direction of the arrow to remove it from the registration actuator holder ASSY.
(8) Remove the registration actuator spring from the registration rear actuator and the
registration actuator holder ASSY.
(9) Turn the registration rear actuator to remove it from the guide, and then slide it in the
direction of the arrow to remove it from the registration actuator holder ASSY.
(10) Release the registration front/rear sensor harness from the securing fixtures. Release
the hook, and remove the registration front/rear sensor PCB ASSY from the registration
actuator holder ASSY.
Fig. 3-99
Harness routing: Refer to
“8. Bottom side of the machine (High-voltage power supply PCB ASSY)”
.
Assembling Note:
• Attach the registration actuator spring on the position described in the figure above.
Registration rear actuator
Registration actuator spring
Registration front actuator
Hook
Guide
Guide
Registration front/rear
sensor harness
Registration front/rear
sensor PCB ASSY
Registration actuator holder ASSY
Registration actuator spring
 Loading...