3-180
Confidential
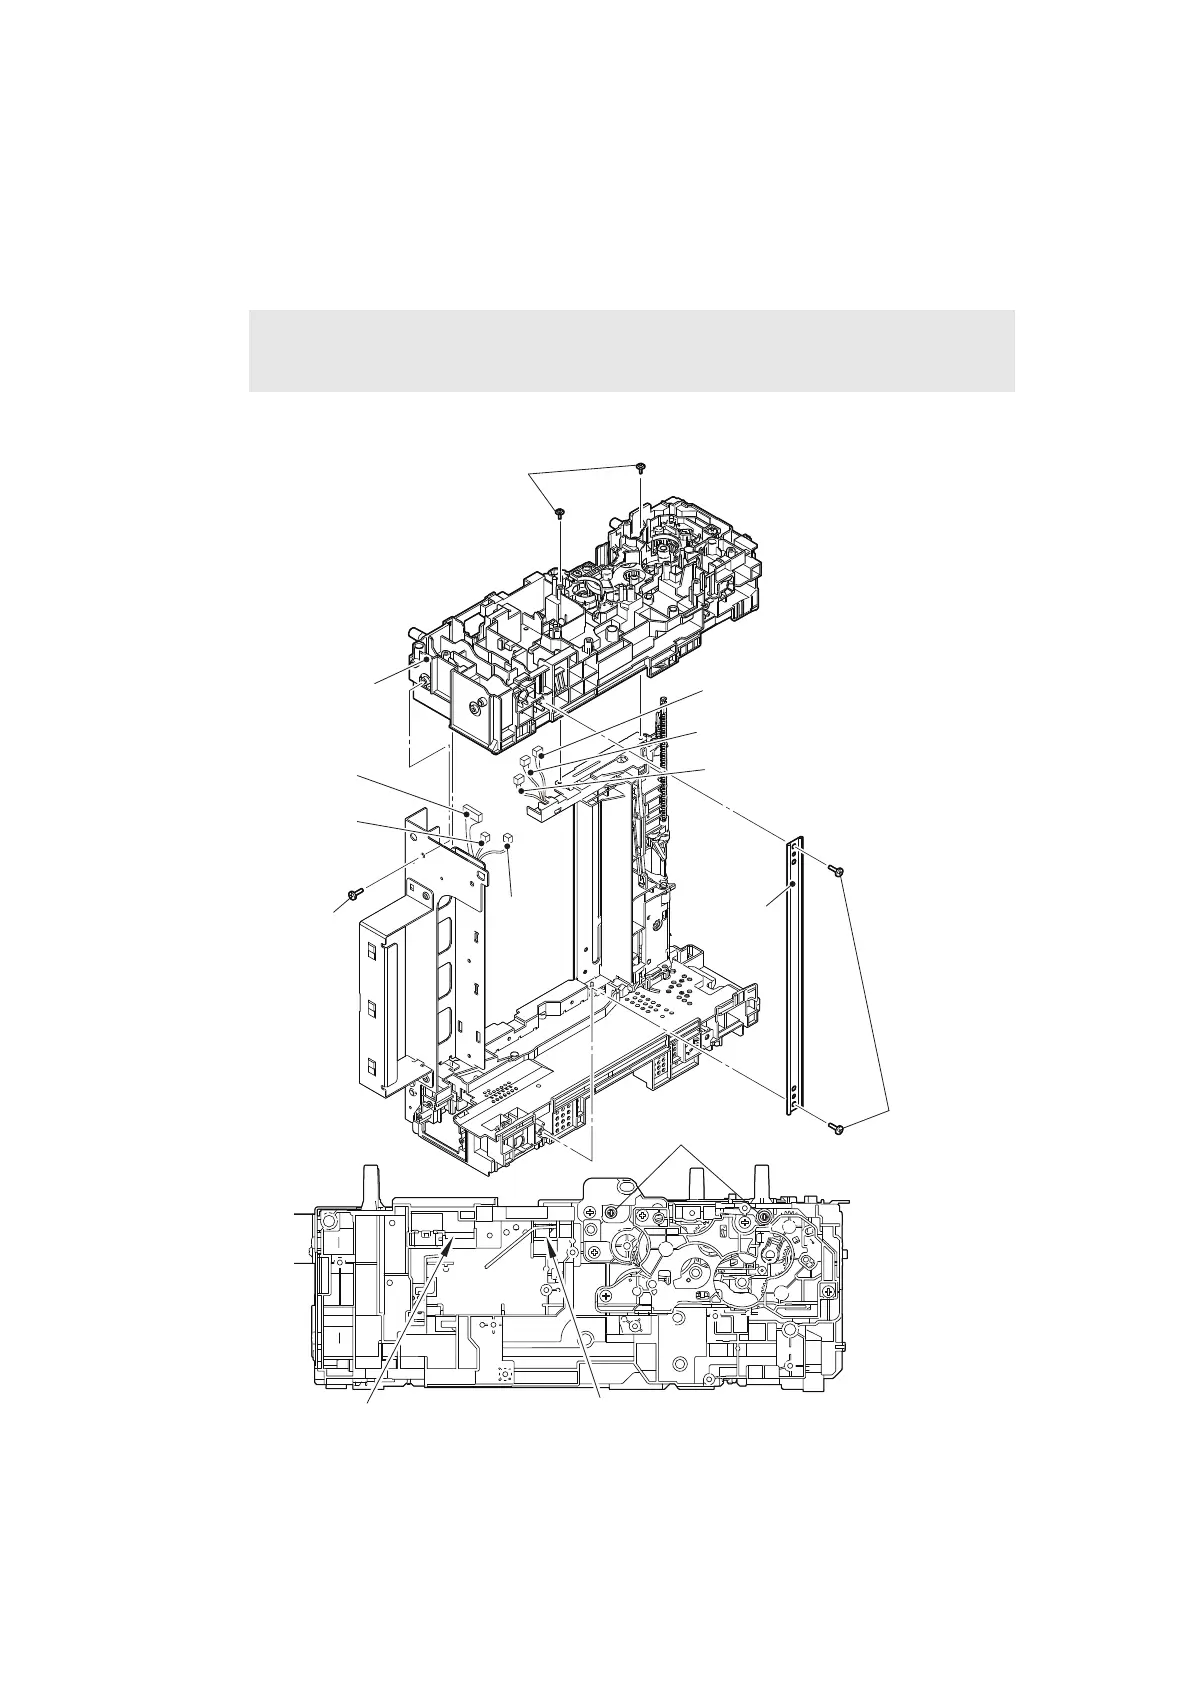
(2) Remove the two taptite bind B M4x12 screws to remove the rear under bar.
(3) Remove the two taptite cup S M3x8 SR screws and the taptite bind B M4x12 screw.
Remove the Frame L, and pull out the low-voltage power supply harness*, the fan motor
relay harness*, the TT balance sensor R relay harness*, the TT jam sensor harness, the
TT paper feed sensor harness and the TT paper empty sensor harness through the two
holes.
Fig. 3-178
Harness routing: Refer to “15. TT relay PCB ASSY (Each TT unit)”, “16. T3TT unit”.
Note:
• Three harnesses for T2TT, T4TT, and T5TT.
Taptite bind
B M4x12
Taptite cup S M3x8 SR
Frame L
Taptite bind B M4x12
Taptite cup S M3x8 SR
Under bar
Hole
* T3TT only
Hole
TT balance sensor R relay harness*
TT jam sensor harness
TT paper feed sensor harness
Low-voltage power
supply harness*
Fan motor relay harness*
TT paper
empty
sensor
harness
 Loading...