xStack® DES-3528/DES-3552 Series Layer 2 Stackable Fast Ethernet Managed Switch Web UI Reference Guide
Server Settings window.
HTTP(S) Port (1-65535)
Enter a HTTP port number. Port 80 is the default.
HTTP – Specify that the TCP port will run the WAC HTTP protocol. The default value is
80. HTTP port cannot run at TCP port 443.
HTTPS – Specify that the TCP port will run the WAC HTTPS protocol. The default value
is 443. HTTPS cannot run at TCP port 80.
Click the Apply button to accept the changes made for each individual section.
NOTE: A successful authentication should direct the client to the stated Web page. If the client does not
reach this Web page, yet does not receive a Fail! Message, the client will already be authenticated
and therefore should refresh the current browser window or attempt to open a different Web page.
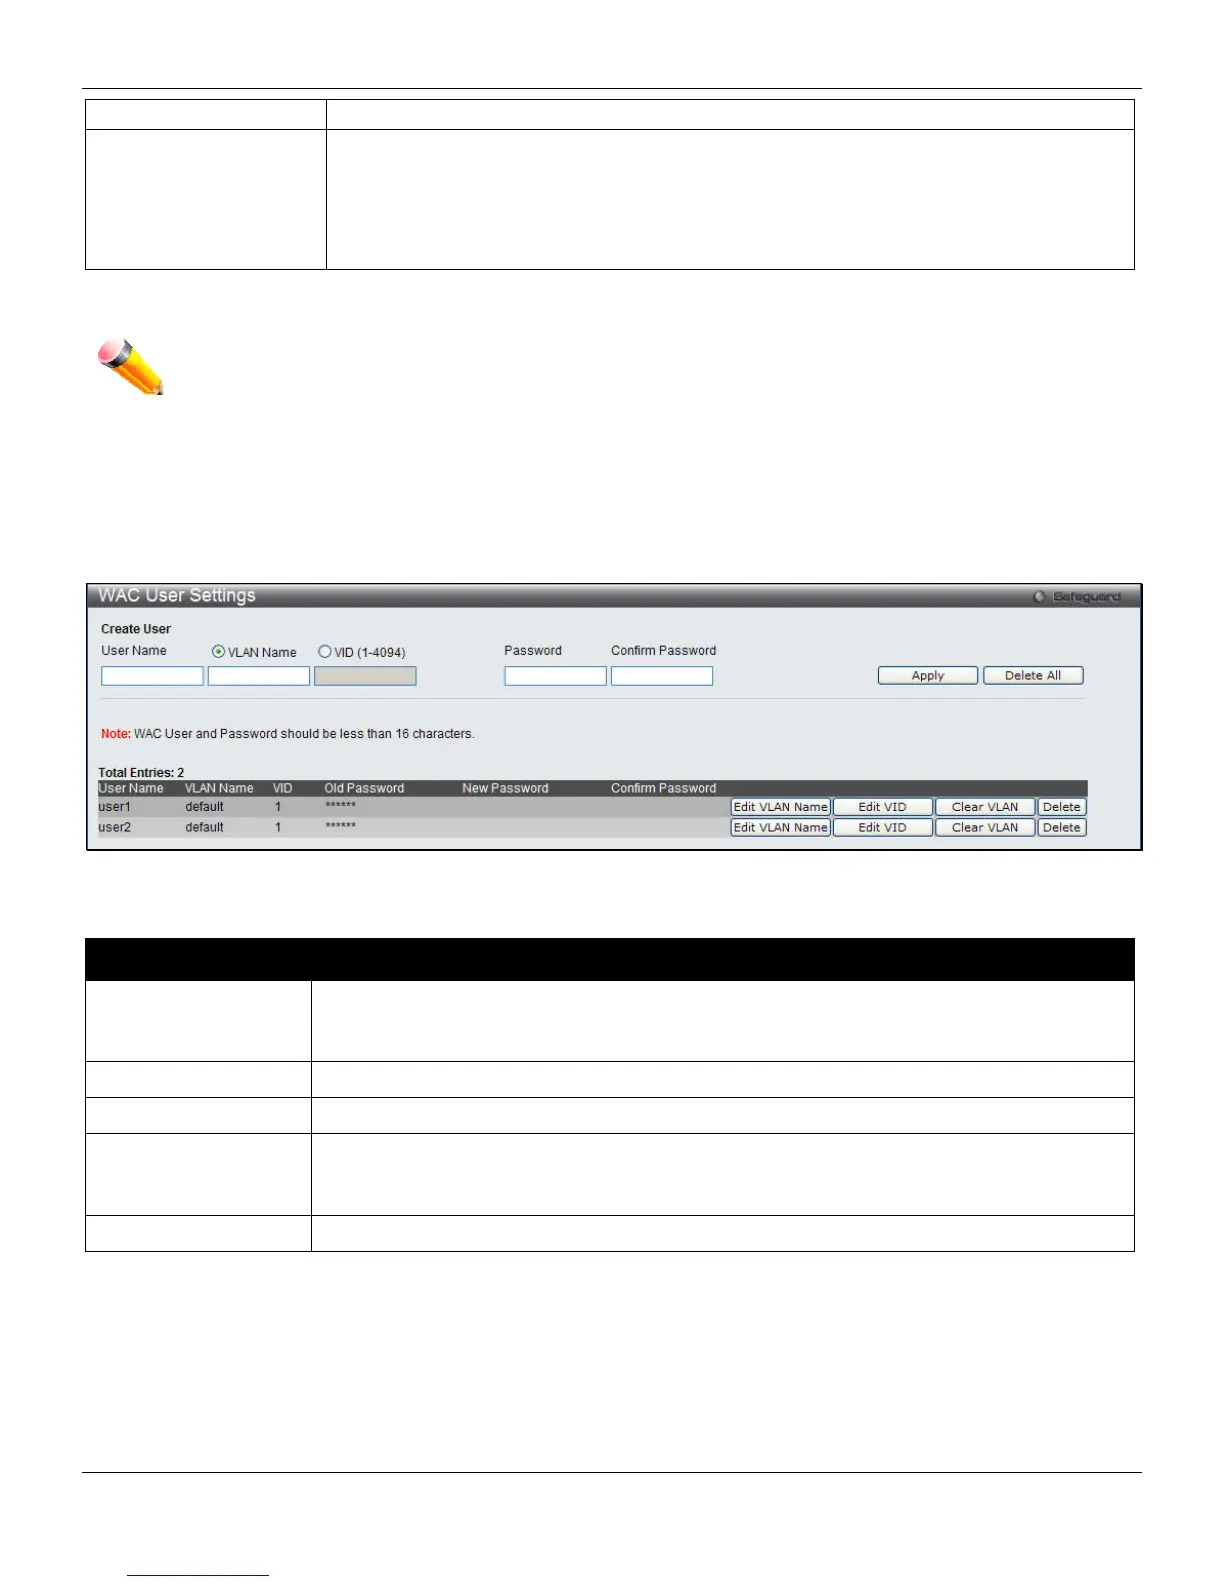
WAC User Settings
Users can view and set local database user accounts for Web authentication.
To view this window, click Security > Web-based Access Control (WAC) > WAC User Settings, as shown below:
Figure 8-38 WAC User Settings window
The fields that can be configured are described below:
Parameter Description
User Name
Enter the user name of up to 15 alphanumeric characters of the guest wishing to access
the Web through this process. This field is for administrators who have selected Local as
their Web-based authenticator.
VLAN Name
Click the button and enter a VLAN Name in this field.
VID (1-4094)
Click the button and enter a VID in this field.
Password
Enter the password the administrator has chosen for the selected user. This field is case-
sensitive and must be a complete alphanumeric string. This field is for administrators who
have selected Local as their Web-based authenticator.
Confirm Password
Retype the password entered in the previous field.
Click the Apply button to accept the changes made.
Click the Delete All button to remove all the entries listed.
Click the Edit VLAN Name button to re-configure the specific entry’s VLAN Name.
Click the Edit VID button to re-configure the specific entry’s VLAN ID.
Click the Clear VLAN button to remove the VLAN information from the specific entry.
Click the Delete button to remove the specific entry.
234