6-8 Removal and Replacement
Main Enclosure
Removal Procedure
1. Unplug the printer.
2. Remove the ribbon cartridge and cleaning roller.
3. Remove the
Swingarm Cover (p. 6-7).
4. Close the swingarm, but do not latch it.
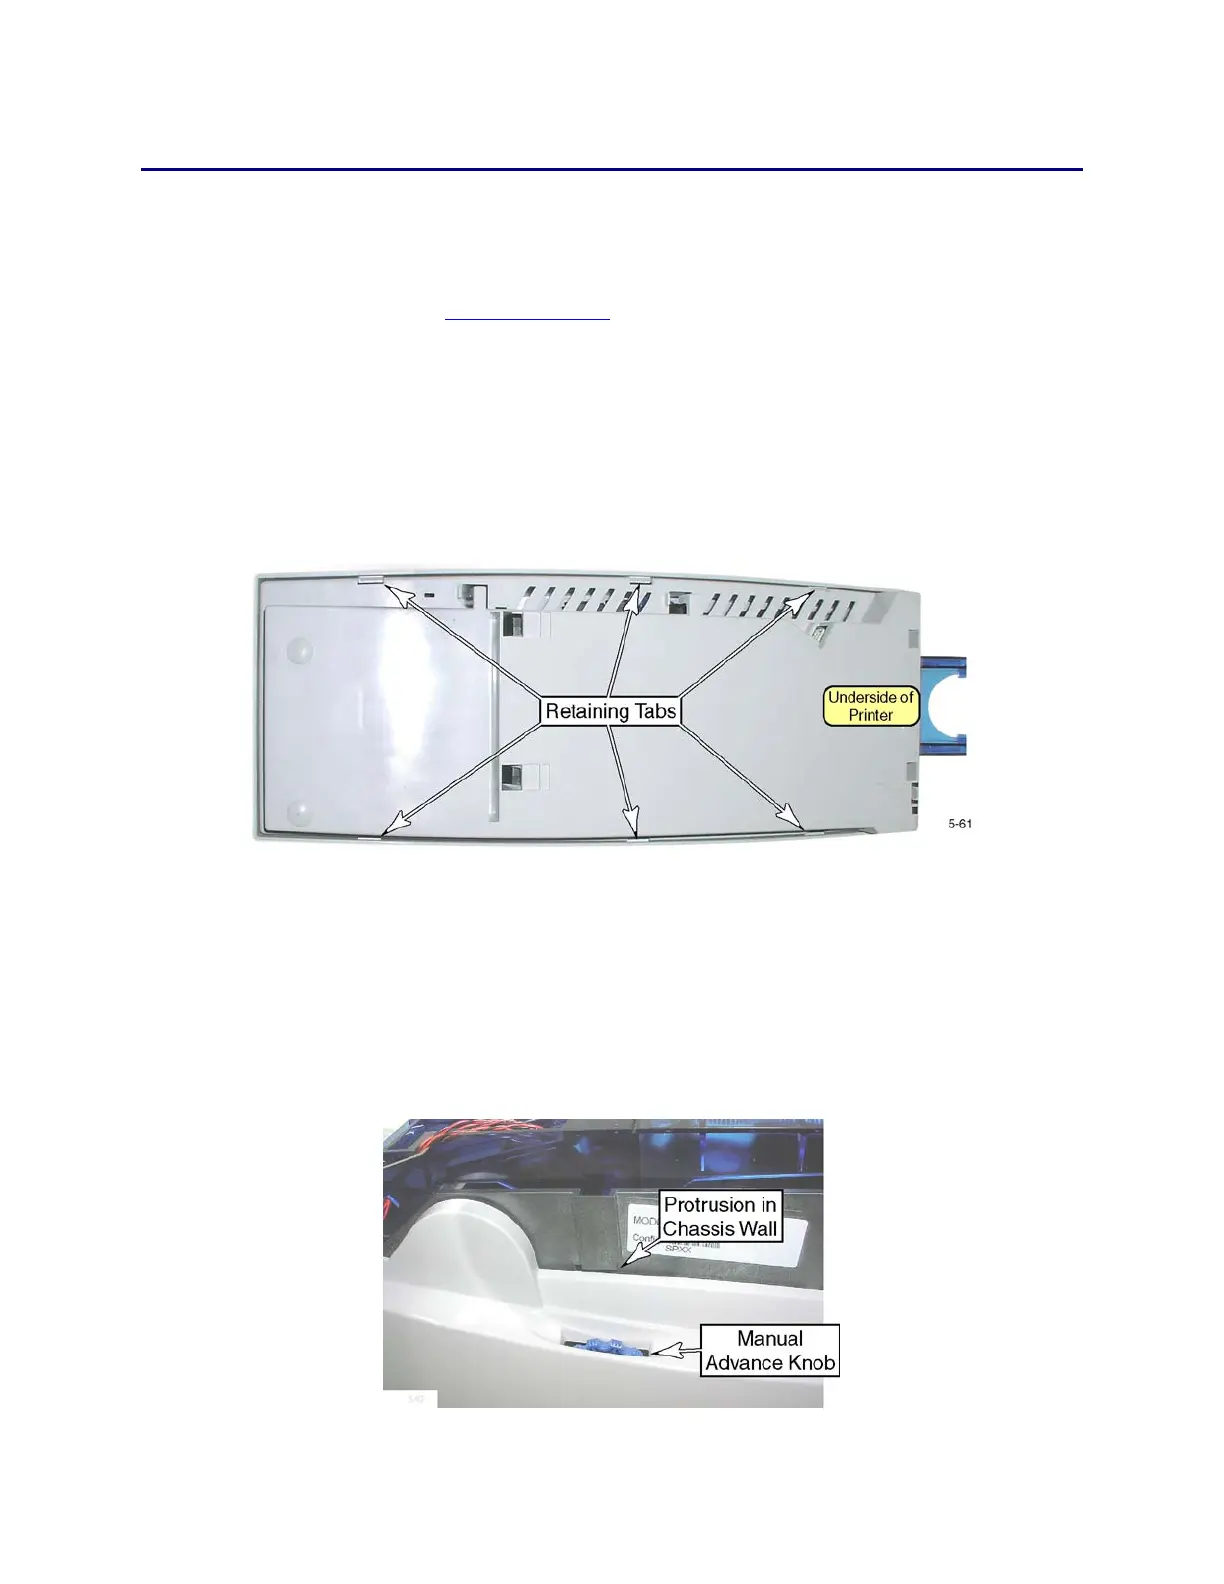
5. There are three retaining tabs on each side of the enclosure. Using your
fingertips, pry the enclosure away from the locking tabs and begin to lift the
enclosure. Work back and forth as necessary until all six locking tabs are free.
Note that there are alignment tabs inside the enclosure. Do not pull out
too far or these will break.
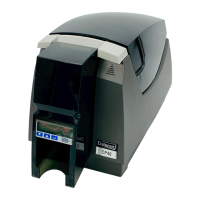
6. With the swing arm closed but not latched, lift the enclosure off the base.
• If the swingarm is open, the rear of the enclosure will not clear the
swingarm. Once this is clear, you can open the swingarm.
• There is a small projection near the manual advance knob. The enclosure
may hang up on this.
• When the enclosure is clear of the base, turn it slightly to clear the
swingarm latch handle.