6-14 Removal and Replacement
Printhead Fan
There are two different sizes of fans in the printers. The thicker fan is removed
from the top of the swingarm, and the thinner fan slides out from the bottom of
the swingarm.
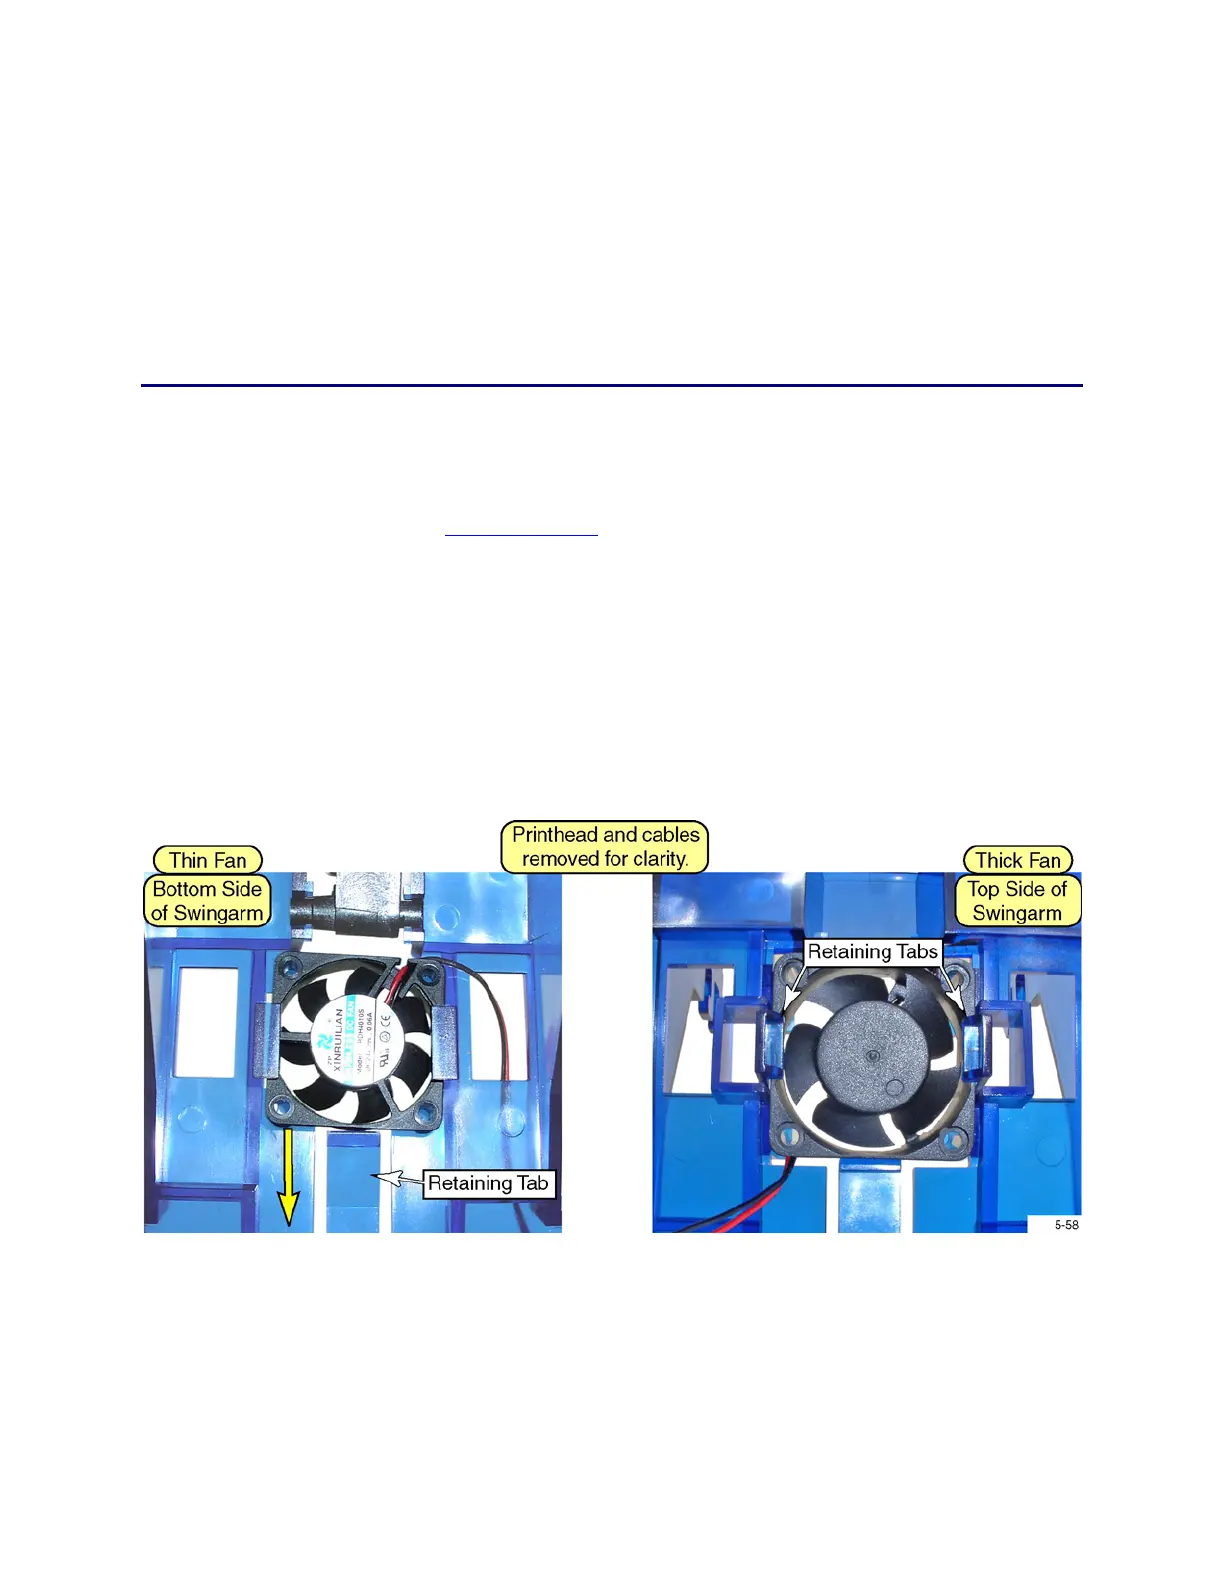
To identify the fan size, look for the retaining tabs on the top side of the
swingarm as shown in the right-hand picture below. If the tabs are present, the
fan is the thicker fan.
Removal Procedure
1. Unplug the printer.
2. Remove the ribbon cartridge and cleaning roller.
3. Remove the
Main Enclosure including the swingarm cover (p. 6-8).
4. Unplug the fan from the main control board.
5. To remove the thick fan, press in on the two retaining tabs and lift the fan out
from the top of the swingarm (right-hand image below).
Do not attempt to remove the thick fan using the thin fan procedure. The
retaining tab will break.
6. To remove the thin fan, press in on the single retaining tab and slide the fan
down to remove it (left-hand image below).
Note that with either fan, the label on the fan is facing toward the inside of
the printer.