6-16 Removal and Replacement
Sensors
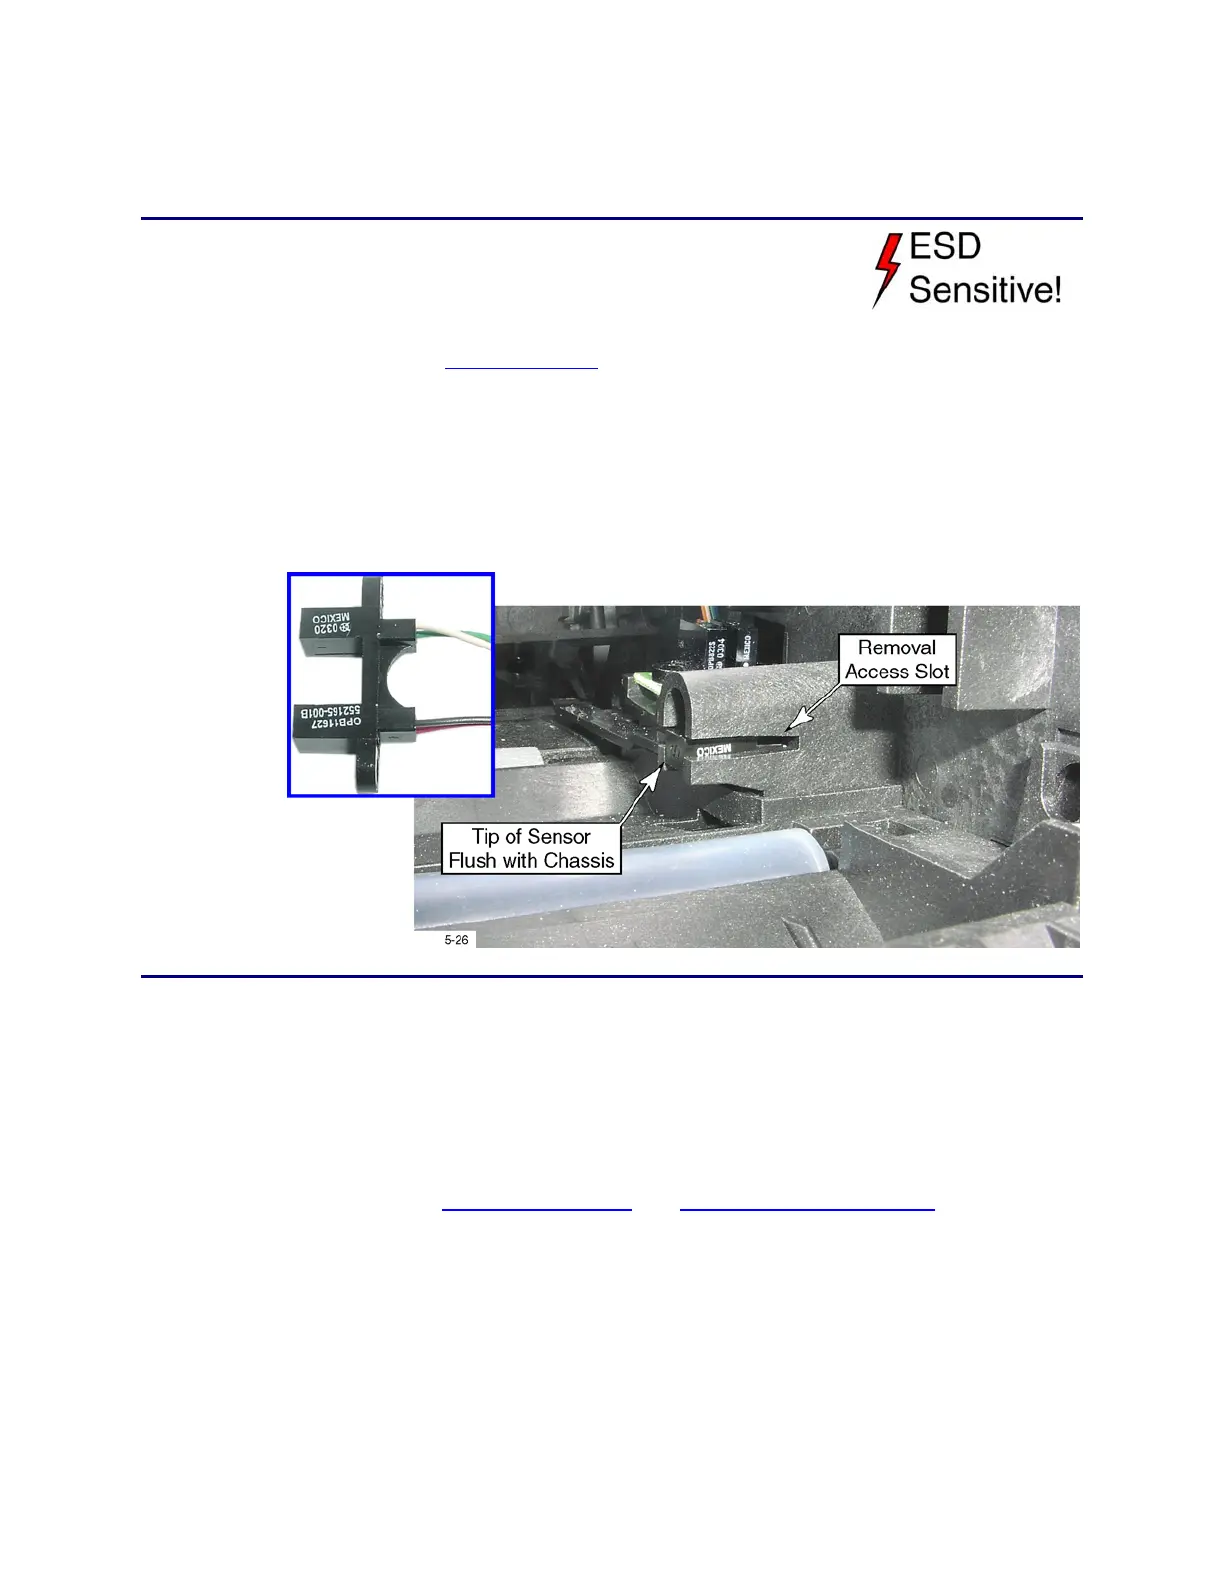
Card Input Sensor (Without Clear Card)
Removal Procedure
1. Unplug the printer.
2. Remove the ribbon cartridge and cleaning roller.
3. Remove the
Main Enclosure (p. 6-8).
4. Gently press the side of a screwdriver against the tip of the sensor (removal
access slot shown below) and push it out of the chassis.
5. Only when the sensor cannot be pushed out any further is it okay to pull the
sensor out with the wires.
6. Unplug the connector from the main control board.
Replacement Notes
• When pushing the sensor back into position, use a blunt tool and push only
on the top tab, bottom tab, or the center of the body. Do not push against the
wire entry points or crush the wires.
• Make sure the sensor is fully seated. The tip of the sensor should be flush
with the edge of the chassis.
• Refer to the Front Wire Routing and Functional Block Diagram for
replacement details.
• Use Diagnostics to pick cards to verify that the sensor is functional.