CP60 and CP60 Plus Service Manual 6-21
Cam Sensor
Removal Procedure
1. Unplug the printer.
2. Remove the ribbon cartridge and cleaning roller.
3. Remove the
Main Enclosure (p. 6-8).
4. Remove the
Transport Assembly from the base (p. 6-29).
5. Close and lock the swingarm, and turn the printer upside down.
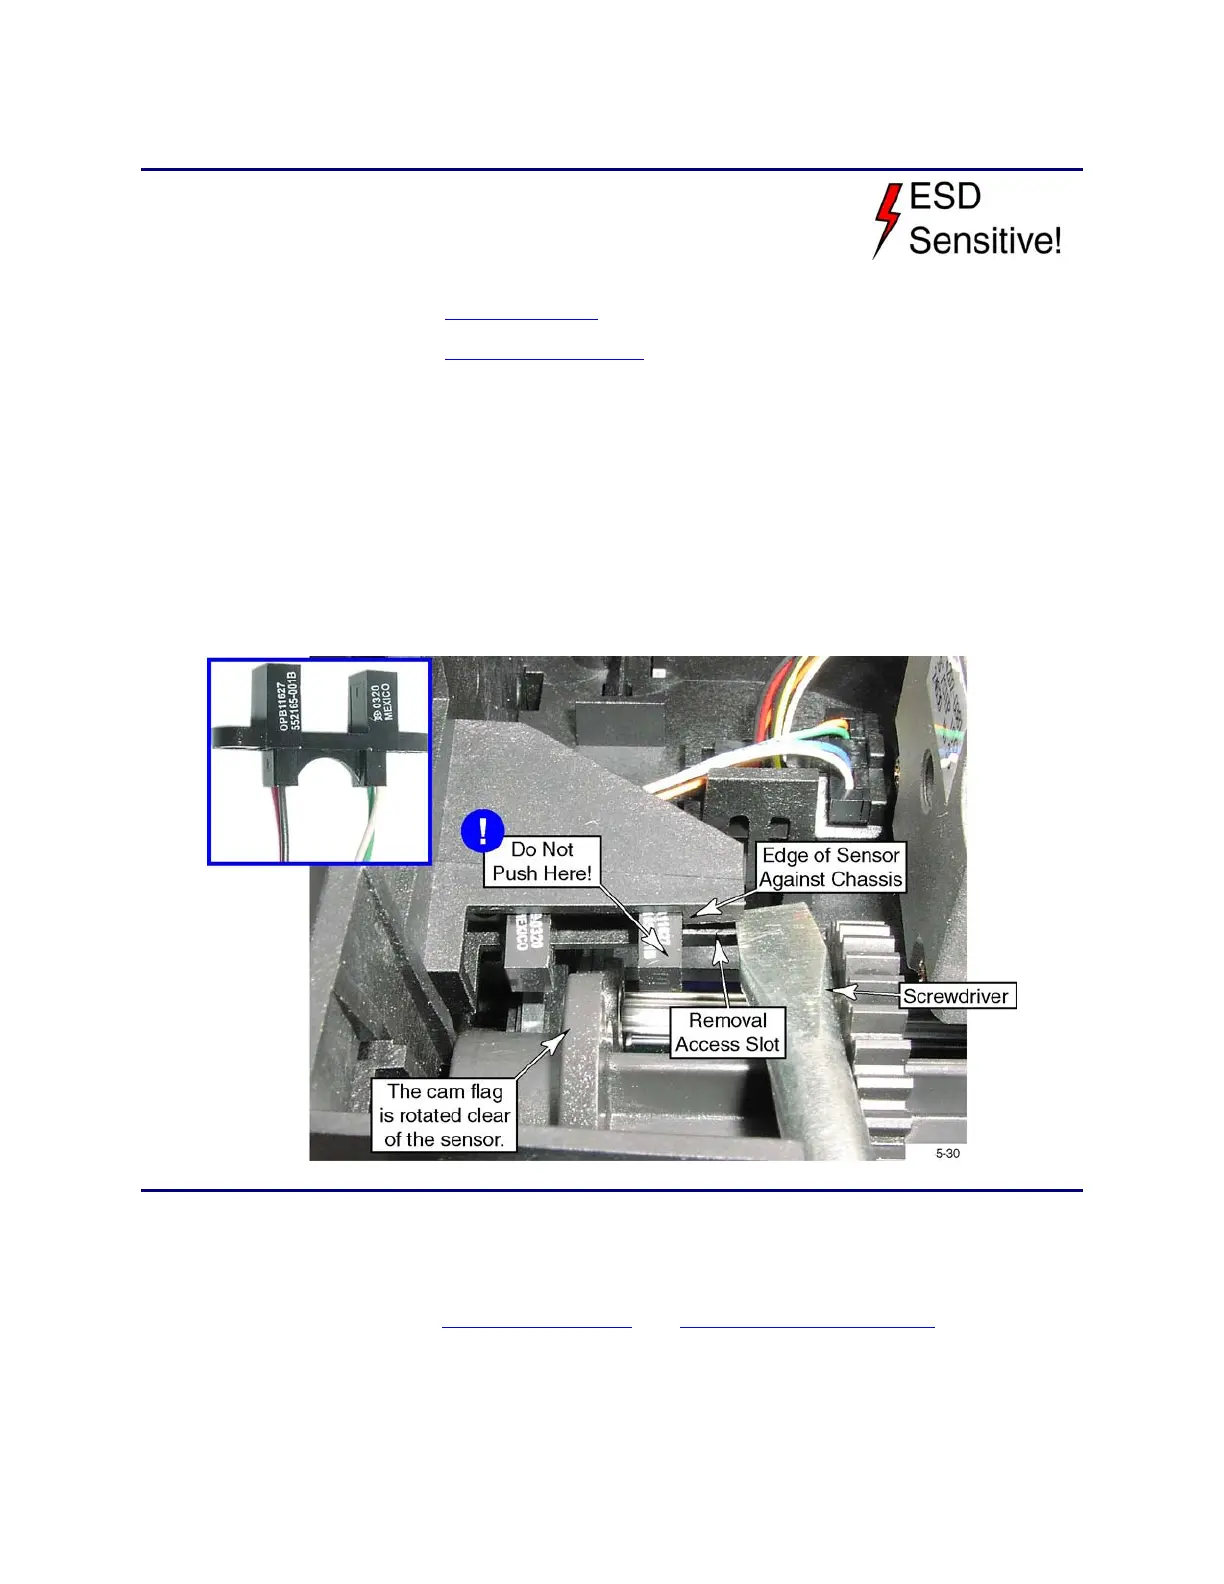
6. Rotate the printhead cam until the cam flag is clear of the sensor.
7. Remove the sensor:
A. Place a screwdriver into the removal access slot, and push the sensor out.
B. Only when the sensor is partially removed (loose) is it acceptable to push
against the sensor arm or pull with the wires.
C. Disconnect the sensor cable connector from the main control board.
Replacement Notes
• Make sure the sensor is fully seated. The edge of the sensor arm should be
against the edge of the chassis.
• Refer to the Front Wire Routing and Functional Block Diagram for
replacement details.
• Run the Printhead Cam Test in Diagnostics to verify the sensor is functional.