6-82 Removal and Replacement
Solenoid Assembly/Solenoid Link
Removal Procedure
1. Unplug the printer.
2. Remove the ribbon cartridge and cleaning roller.
3. Remove the
Main Enclosure (p. 6-8).
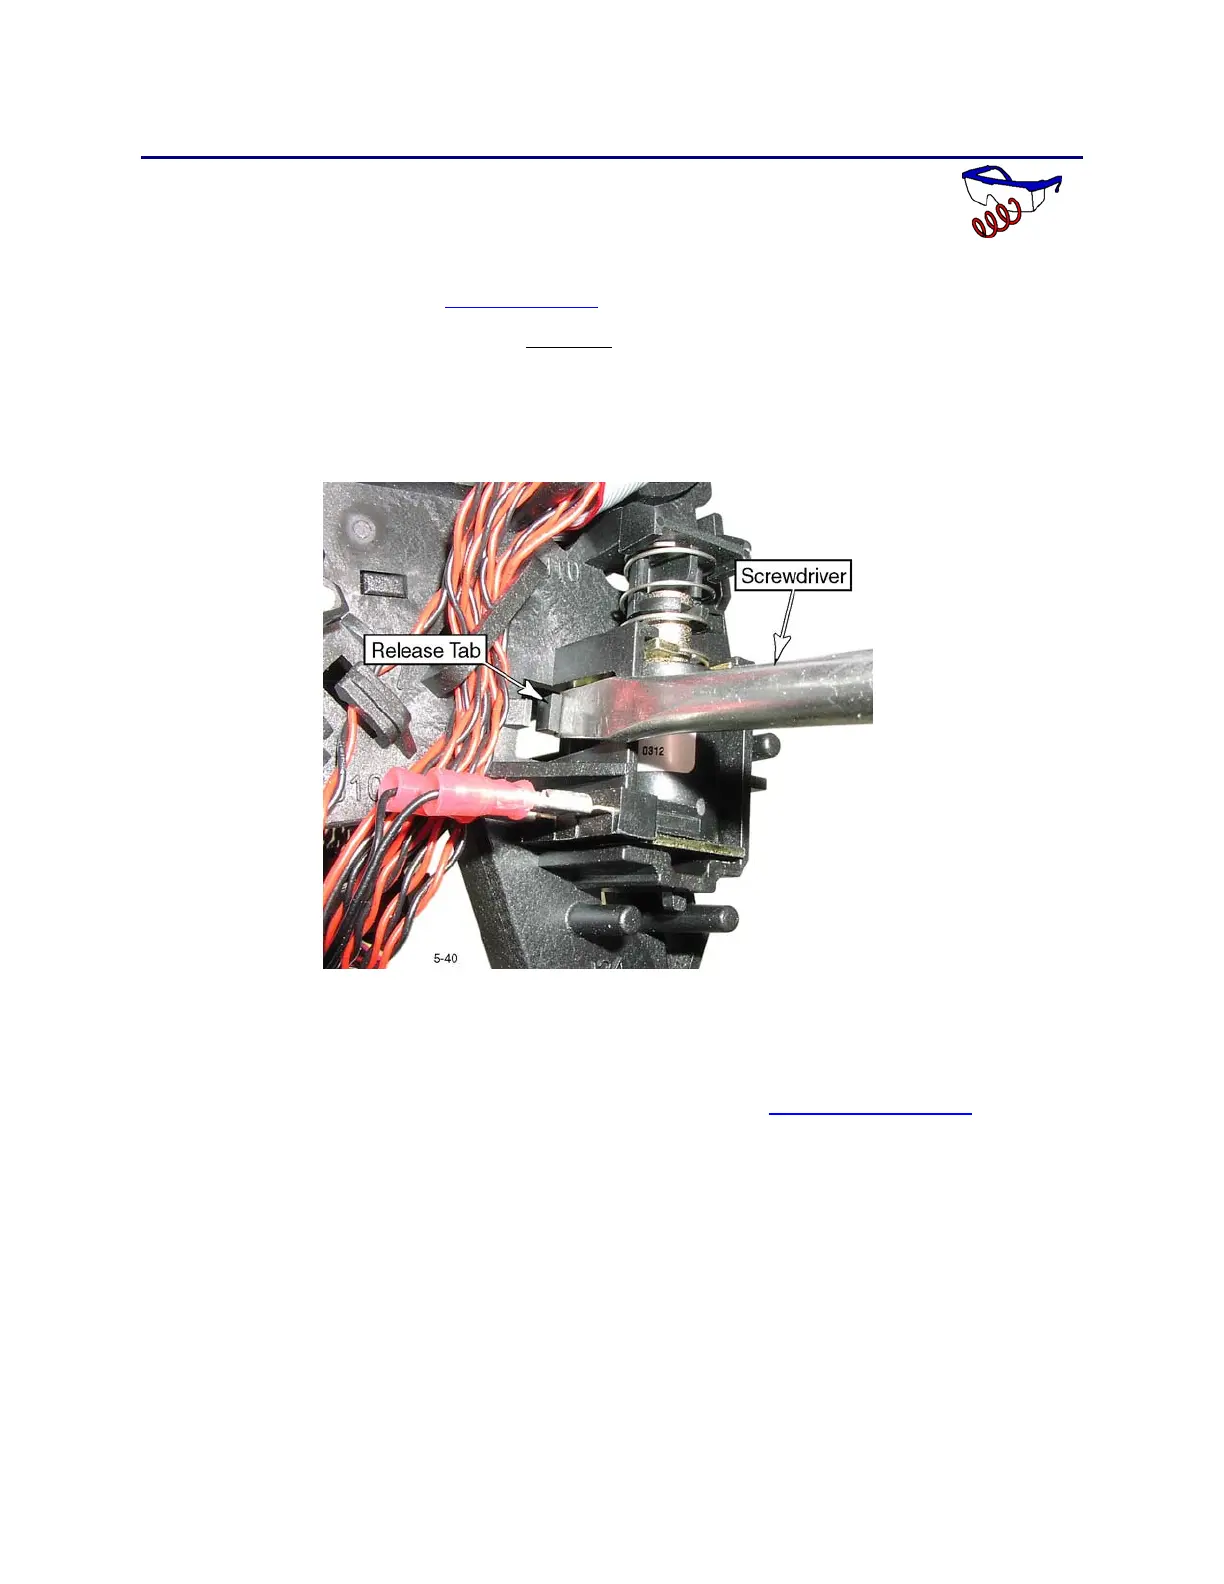
4. Using a screwdriver carefully
pry out the solenoid release tab, and pull the
solenoid out just slightly from the mounting pocket.
• Do not pry on the release tab any more than is necessary—it will break.
• Do not pull the solenoid out too far as this will damage the return spring.
5. Unplug the connectors from the solenoid.
• Tip: Use a screwdriver to pry the connectors loose, and then remove them
the rest of the way by hand.
• If the wires need replacement, remove the Transport Assembly (p. 6-29)
from the base.
• There is no polarity for the wires; they may be connected to either
terminal.